

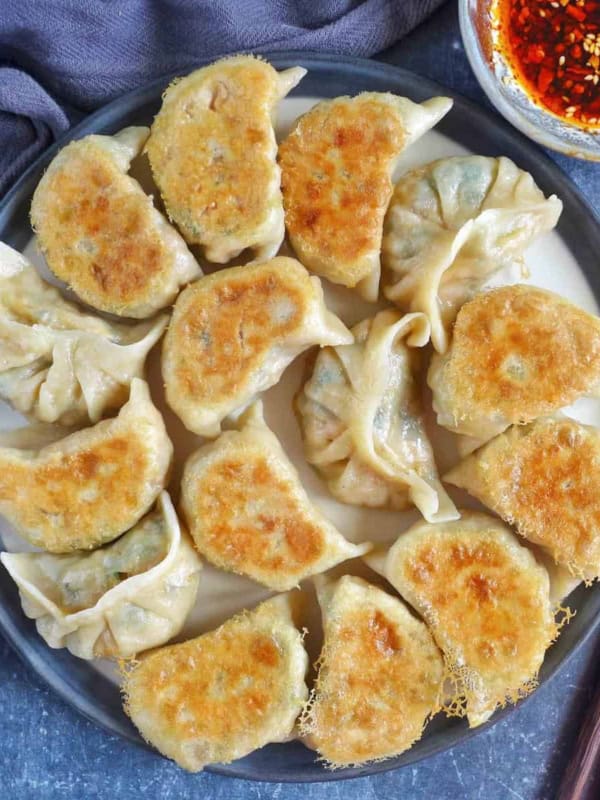
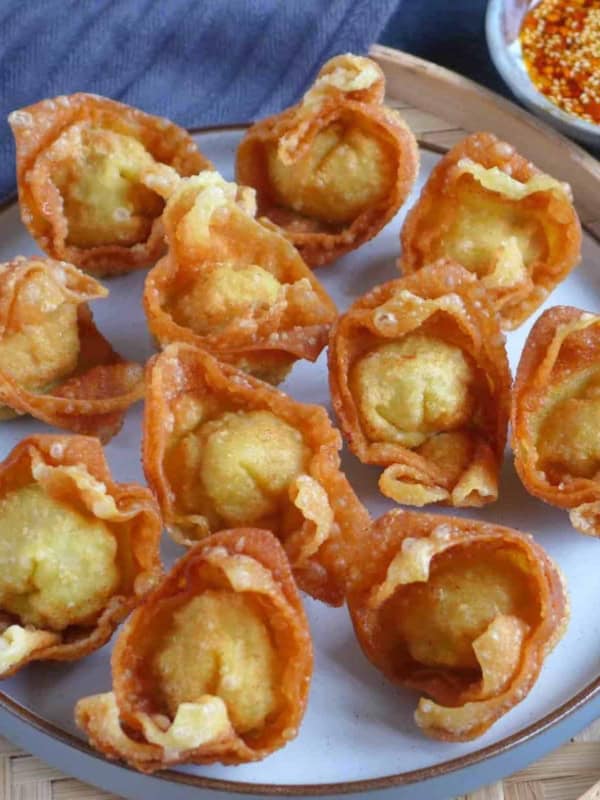
Crispy pan-fried pork and chive dumplings with juicy filling—packed with flavor, fun to make, and irresistibly delicious in every bite!

Pin this now to find it later!
Pin ItTable of Contents
About the dish
Today, I’m adding another recipe to my dumpling collection—my absolute favorite topic to share! This recipe features half-moon-shaped parcels made with fresh wrappers, filled with pork and chives, then pan-fried to perfection: crispy on the bottom and soft yet slightly chewy on top.
Like the Boiled Pork and Cabbage Dumplings I shared earlier, these pan-fried pork and chive dumplings (猪肉韭菜煎饺) are a staple in our Red House. Whenever I pass by a Chinese or Asian supermarket, I always grab a bag of Chinese chives. When my children spot the chives, they know their favorite dumpling dinner is on the way.
If you’re a seasoned dumpling maker, feel free to jump straight to the recipe card at the end. But if you’re new to this culinary art, I recommend reading through the entire post and watching the tutorial before rolling up your sleeves to get started.
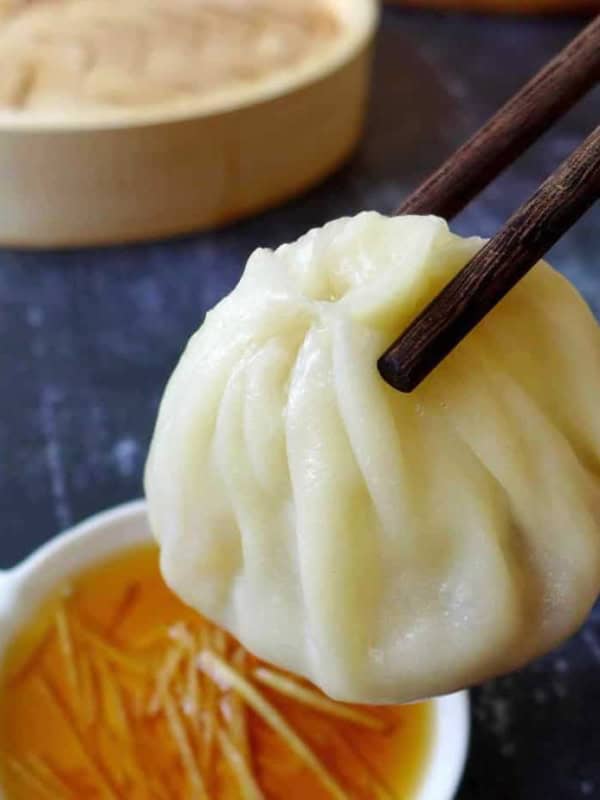
🌟NOTE: This recipe is perfect for boiling or steaming too. Check out my post on Three Ways to Cook Dumplings to learn each technique.

Workflow tips
- Start by making the dough. While it rests, prepare the filling.
- If alone, roll 10 wrappers at a time, fill and seal them, then roll more to avoid drying.
- With a partner, divide tasks: one rolls wrappers while the other fills and seals for faster assembly.
- Pan-fry the dumplings immediately after assembling, or freeze the uncooked ones if you plan to eat them later.
Homemade wrappers
** Skip this section if you plan to use store-bought wrappers. However, I encourage you to try the homemade version when you have time—they’re absolutely worth the effort!
Flour to water ratio

You only need two ingredients—all-purpose flour and water—to make Chinese dumpling dough. The ratio is approximately 2 to 1 by weight, although adjustments may be necessary depending on the water absorption capacity of the flour.
For example, to make 30 dumpling wrappers, you will need 250 g of flour mixed with 125–130 g of water. If you don’t have a kitchen scale and need to measure by volume, use 2 cups of flour (measure carefully using spooned-and-leveled technique for accuracy) and 1 cup plus 1 or 2 teaspoons of water.
🌟NOTE: I have a separate blog post dedicated to Homemade Dumpling Wrappers which covers all aspects of this topic thoroughly. Read it if wish to learn more.
Make the dough

Dumpling dough is easy to make: mix flour and water, then knead into a medium-firm, smooth dough. This can be done by hand or with a stand mixer. Both methods work equally well—choose what suits you best.
- By hand: Combine the ingredients into a rough dough, let it rest for 10 minutes to hydrate, then knead until smooth and elastic.
- By machine: Use a stand mixer with a dough hook on low speed for about 8 minutes until the dough is smooth and well-formed.
Rest the dough
Next step is to rest the dough (very important!). This process allows the gluten network to relax, increasing elasticity and making it easier to stretch the dough into the desired wrapper shape.
Let the dough rest for at least 30 minutes. If the dough feels firm, extend the resting time to 60 minutes, as it tends to soften over time. Remember to cover the dough or its container to prevent it from drying out.
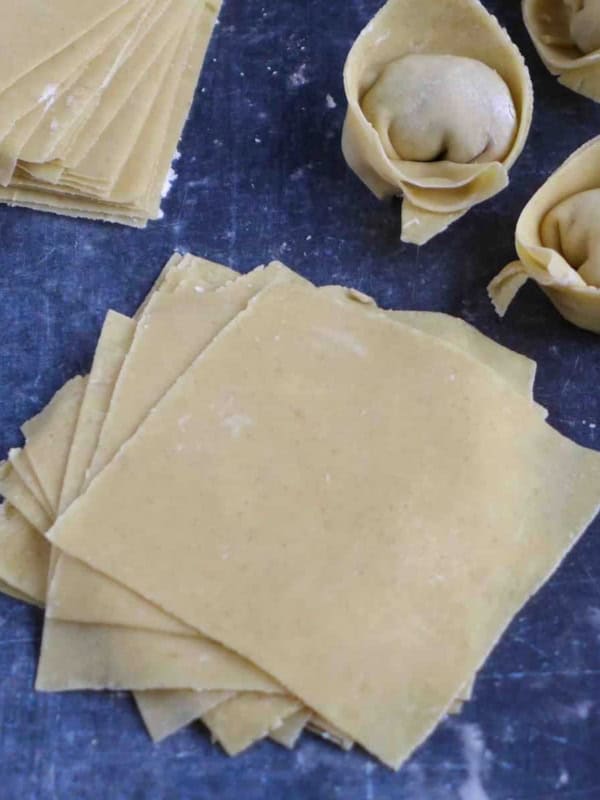
Roll the wrappers

Chinese dumpling wrappers are rolled out individually. Follow these steps:
- Divide the dough into sections.
- Roll one portion into a rope.
- Cut the rope into equal-sized pieces.
- Press each piece into a small disc.
- Flatten each disc into a thin wrapper with a rolling pin.
🌟 NOTE: Remember to lightly dust both the surface and the dough with flour to prevent sticking. Use a small, easy-to-handle rolling pin (avoid large pastry rolling pins with handles). Watch the tutorial video for a clearer demonstration of the technique.
Pork and chive filling

This recipe features two of the most popular ingredients used in Chinese dumpling fillings: ground pork and Chinese chives. You can find this combination in both northern households, where the boiled version is dominant, and Cantonese dim sum houses, where dumplings are either pan-fried or steamed.
Thanks to the strong, distinct taste of Chinese chives, this filling doesn’t require much additional seasoning. A little salt, sesame oil, and spice powder (such as five-spice powder, ground Sichuan pepper, or white pepper) are all you need.

How do you achieve a tender, juicy filling? Here are two tips:
- Choose ground pork with a high fat content.
- Add water (or stock, if available) to the meat. Do this by swirling the meat in one direction while gradually pouring in the liquid. Continue stirring until the meat becomes very sticky.
After seasoning and moistening the meat, stir in finely chopped Chinese chives and combine them thoroughly.
Assemble the dumplings
Now that you have both the wrappers and filling ready, it’s time to assemble them into little parcels. Some may find this part intimidating, but don’t worry! As long as you can seal some filling inside a wrapper and ensure there are no leaks, you’re on the right track.

Although there are many different ways to shape dumplings (have you already read my post on Ten Ways to Fold Dumplings?), I usually stick to the simplest method: Fold the wrapper in half, then pinch to seal the top. Next, make a few folds from each corner while sealing the dumpling completely. The tutorial video (in the Recipe Card at the end of the post) demonstrates how it’s done.
Here are some extra tips to help you succeed:
- Try not to overstuff the wrapper. Gradually increase the filling amount as you gain more confidence.
- Dust the surface with a little flour before placing the assembled dumplings on it. This prevents sticking.
- Don’t leave the dumplings sitting out for too long before cooking. If you plan to cook them later, freeze them (not in the fridge!)
Pan-frying process
Do you know that pan-frying dumplings actually involves two cooking actions: the bottom of the dumplings are first fried in a little oil to a crispy texture, then they are steamed until fully cooked. Here is the procedure in detail:

Heat a little oil in a skillet, then put in the dumplings. You can place them quite close to each other as they won’t expand like bao buns.
🌟 NOTE: To avoid making these dumplings overly greasy, use just a little oil to fry them. For example, you only need one tablespoon of oil for a 12 inch/30 cm skillet.

Let them fry over high heat until the bottom of the dumplings becomes golden-Carefully lift one up to check its color.

Pour cold water into the skillet, enough to cover ⅓ of the height of the dumplings. Cover with a lid immediately. Leave to steam over high heat.

Once all the water has evaporated and you hear a sizzling sound, remove the lid. Leave the skillet on the heat for about 20 seconds longer to eliminate any remaining moisture beneath the dumplings, allowing them to develop a crispy crust. Be careful not to burn them, though.

Serve & storage
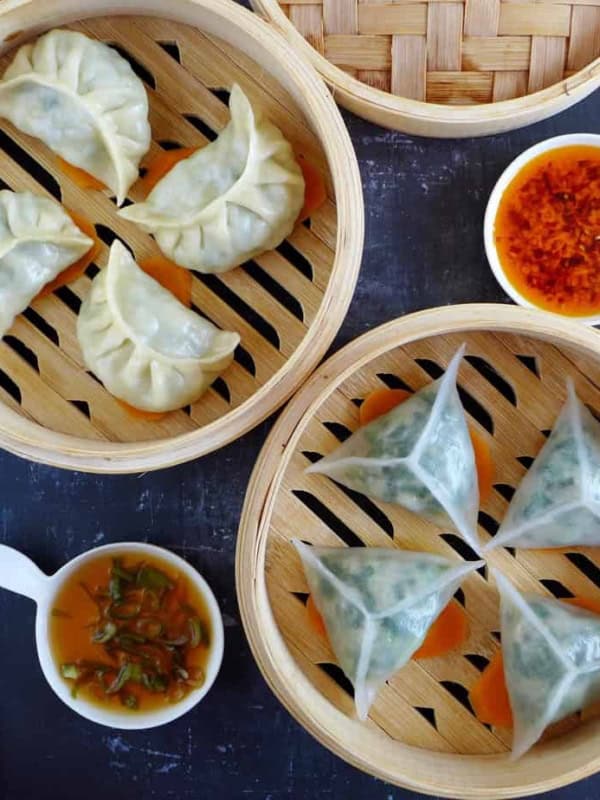
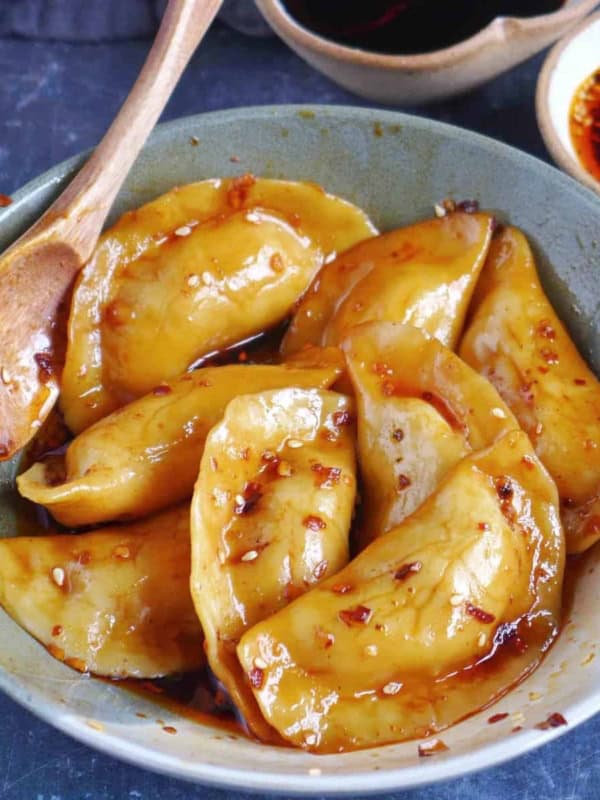
Enjoy your pork and chive dumplings while they’re warm. If you’d like to add a hot and sour kick, dip them in a mixture of Chinese chili oil and black rice vinegar. You can find more inspiration in my post on Six Dumpling Sauces.
I recommend cooking only as many dumplings as you plan to eat and storing the rest of the uncooked ones in the freezer right away. They freeze well, and you can pan-fry, boil, or steam them straight from frozen without defrosting.

- Place the uncooked dumplings on a tray dusted with flour. Put into the freezer until they become solid.
- Transfer the frozen dumplings to an air-tight bag or container. Consume within 3 months.
FAQs
Over the years of sharing dumpling recipes, I’ve received a fair amount of questions. Here are some common ones:
A: If your dough is too dry, add a small amount of water, a teaspoon at a time, until it comes together. If it’s too sticky, sprinkle in a little extra flour gradually, kneading as you go, until the texture feels right.
A: Yes, you may use ground beef, chicken or turkey as substitutes. Or try other dumpling recipes, such as Beef Dumpling Soup, Chinese Chive and Egg Pockets, Chicken Potstickers.
A: No, you don’t need to moist the edges. In fact, water could make fresh wrappers more difficult to seal.
Other dumpling recipes
Looking for more Chinese dumpling inspiration? Check out these popular ones:
📋 Recipe card
Love this recipe? Please leave a 🌟🌟🌟🌟🌟 rating and a comment. Thank you!

Pan-Fried Pork Chive Dumplings

Video
Ingredients
For the wrappers
- 250 g all-purpose flour, about 2 cups (see note 1)
- 130 g water, ½ cup+2 teaspoon (see note 2)
For the filling
- 230 g ground pork, ½ lb
- 1⅛ teaspoon salt
- 1 teaspoon sesame oil
- ¼ teaspoon five spice powder, or ground Sichuan pepper, white pepper
- 6 tablespoon water, or unsalted stock
- 140 g Chinese chives, 5 oz, finely chopped
You also need
- Neutral cooking oil, for pan-frying
- Chinese chili oil, for dipping, optional
- Black rice vinegar, for dipping, optional
Instructions
Make the dough
- In a mixing bowl, add water to flour gradually. Mix until no more loose flour can be seen. Combine and knead into a dough. Leave to rest (covered) for 10 minutes then knead again until smooth. Cover and rest the dough again for 30-60 minutes until it becomes soft.
- If using a stand mixture with a dough hook: Add flour and water into the mixing bowl. Knead on low speed for 8 minutes or so until smooth. Cover and rest for 30-60 minutes.
Prepare the filling
- Put ground pork in a bowl. Add salt, sesame oil, and white pepper. Stir the meat in one direction while gradually pouring in the water or stock.
- Once all the liquid is well absorbed and the meat becomes sticky, add Chinese chives. Mix well to evenly distribute the chives. Set aside, or refrigerate if not using immediately.
Roll the wrappers
- Divide the dough into three parts. Roll one portion into a rope then cut it into 10 equal pieces (cover the other two portions to avoid drying out).
- Press one dough piece into a small disc with the palm of your hand. Then flatten it into a thin disc with a rolling pin (Please refer to the tutorial video below). Dust with a little flour if the dough sticks. Repeat to finish the rest of the dough.
Assemble the dumplings
- Place a spoonful of filling on a wrapper. Fold the wrapper and seal it using the technique you're most comfortable with. Please refer to the tutorial video below or the methods demonstrated in "Ten Ways to Fold Dumplings".
- *If you're using frozen wrappers, defrost them in the fridge. Wet the edge of the wrapper with a little water, then fold and seal the filling in securely.
Pan-fry the dumplings
- In a skillet, heat a little oil, about 1 tablespoon for a 12-inch skillet. Place in the dumplings (fry them in two batches if your cookware isn’t big enough).
- Leave them to fry over high heat until the bottoms of the dumplings turn golden (lift one to check). Pour cold water into the skillet, enough to cover ⅓ of the height of the dumplings. Cover with a lid.
- Keep the heat high and wait for the water to evaporate completely. Uncover the skillet and let the dumplings crisp up further for about 20 seconds.
- Transfer the dumplings to a serving plate. Enjoy them on their own, or with a dipping sauce made of chili oil and black rice vinegar.
Notes
Your Recipe Notes
Nutrition
Nutrition information is automatically calculated, so should only be used as an approximation.


Thank you for showing me how to do your delicious dumplings. Now I don’t have to buy them any more. Our family enjoy your cousin , all the meals are very tasty. Nice break from Czech heavy meals.
Kind regards Jitka
Thank you so much for your kind words Jitka! Hope you’ll enjoy more homemade Chinese dishes.
These dumplings are so flavorful! They taste just like the ones at my favorite dumpling restaurant. I would recommend this recipe to anyone.
Lovely to hear these dumplings reminded you of your favorite dumpling restaurant. Thanks for recommending my recipe.
Amazing thoughtful website, amazing tasty food best food ive ever tasted then just some chinese takeaway this is food.
I’m really glad you enjoyed the food and appreciate your support.
be checking your other posts as well. The way you explained the topic was very clear. I like the balance between theory and practice.
Thanks for the kind words!