
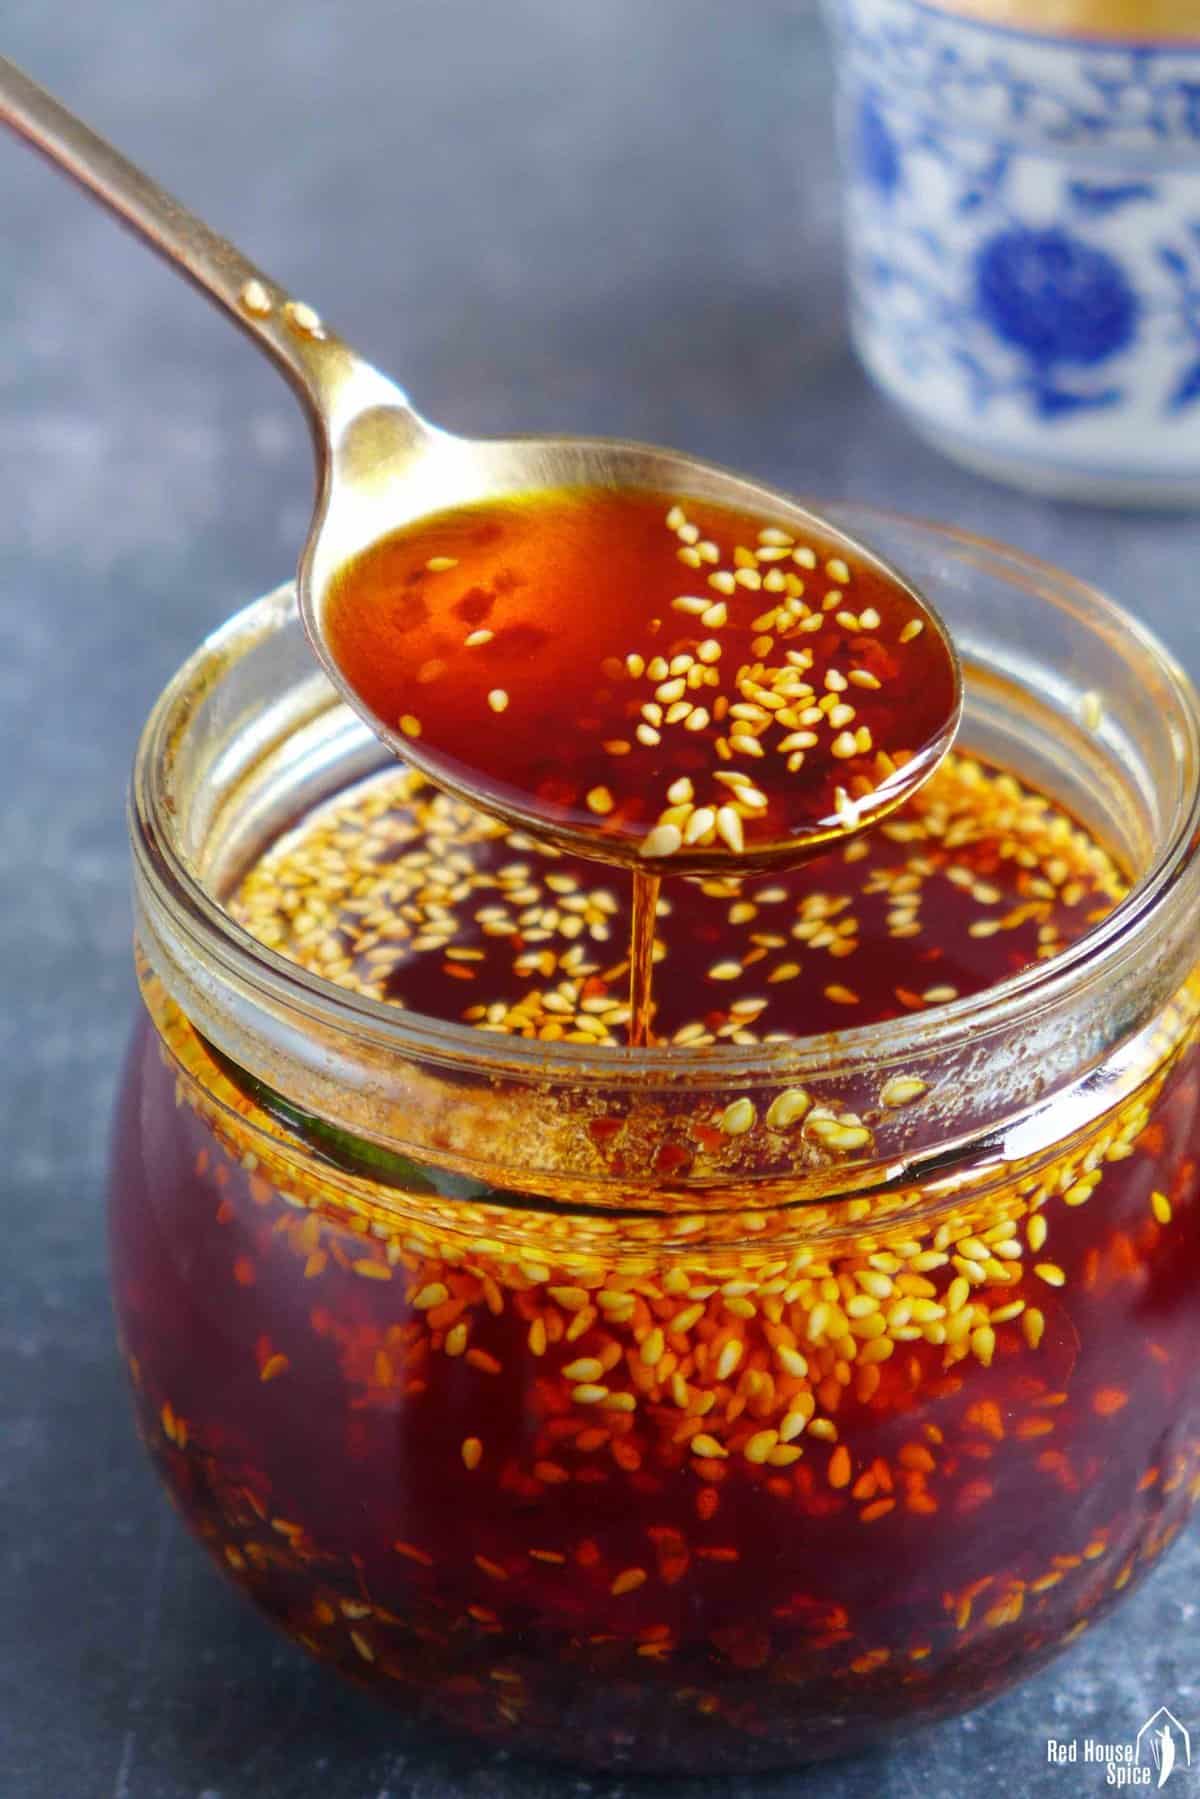
Magically delicious and extremely versatile, chili oil can be easily and quickly made from scratch. Learn tips and tricks to achieve the best taste.
Pin this now to find it later!
Pin ItUpdate Notice: This is a revised version of my original post published in 2017. It includes process photos and more tips.
Table of Contents
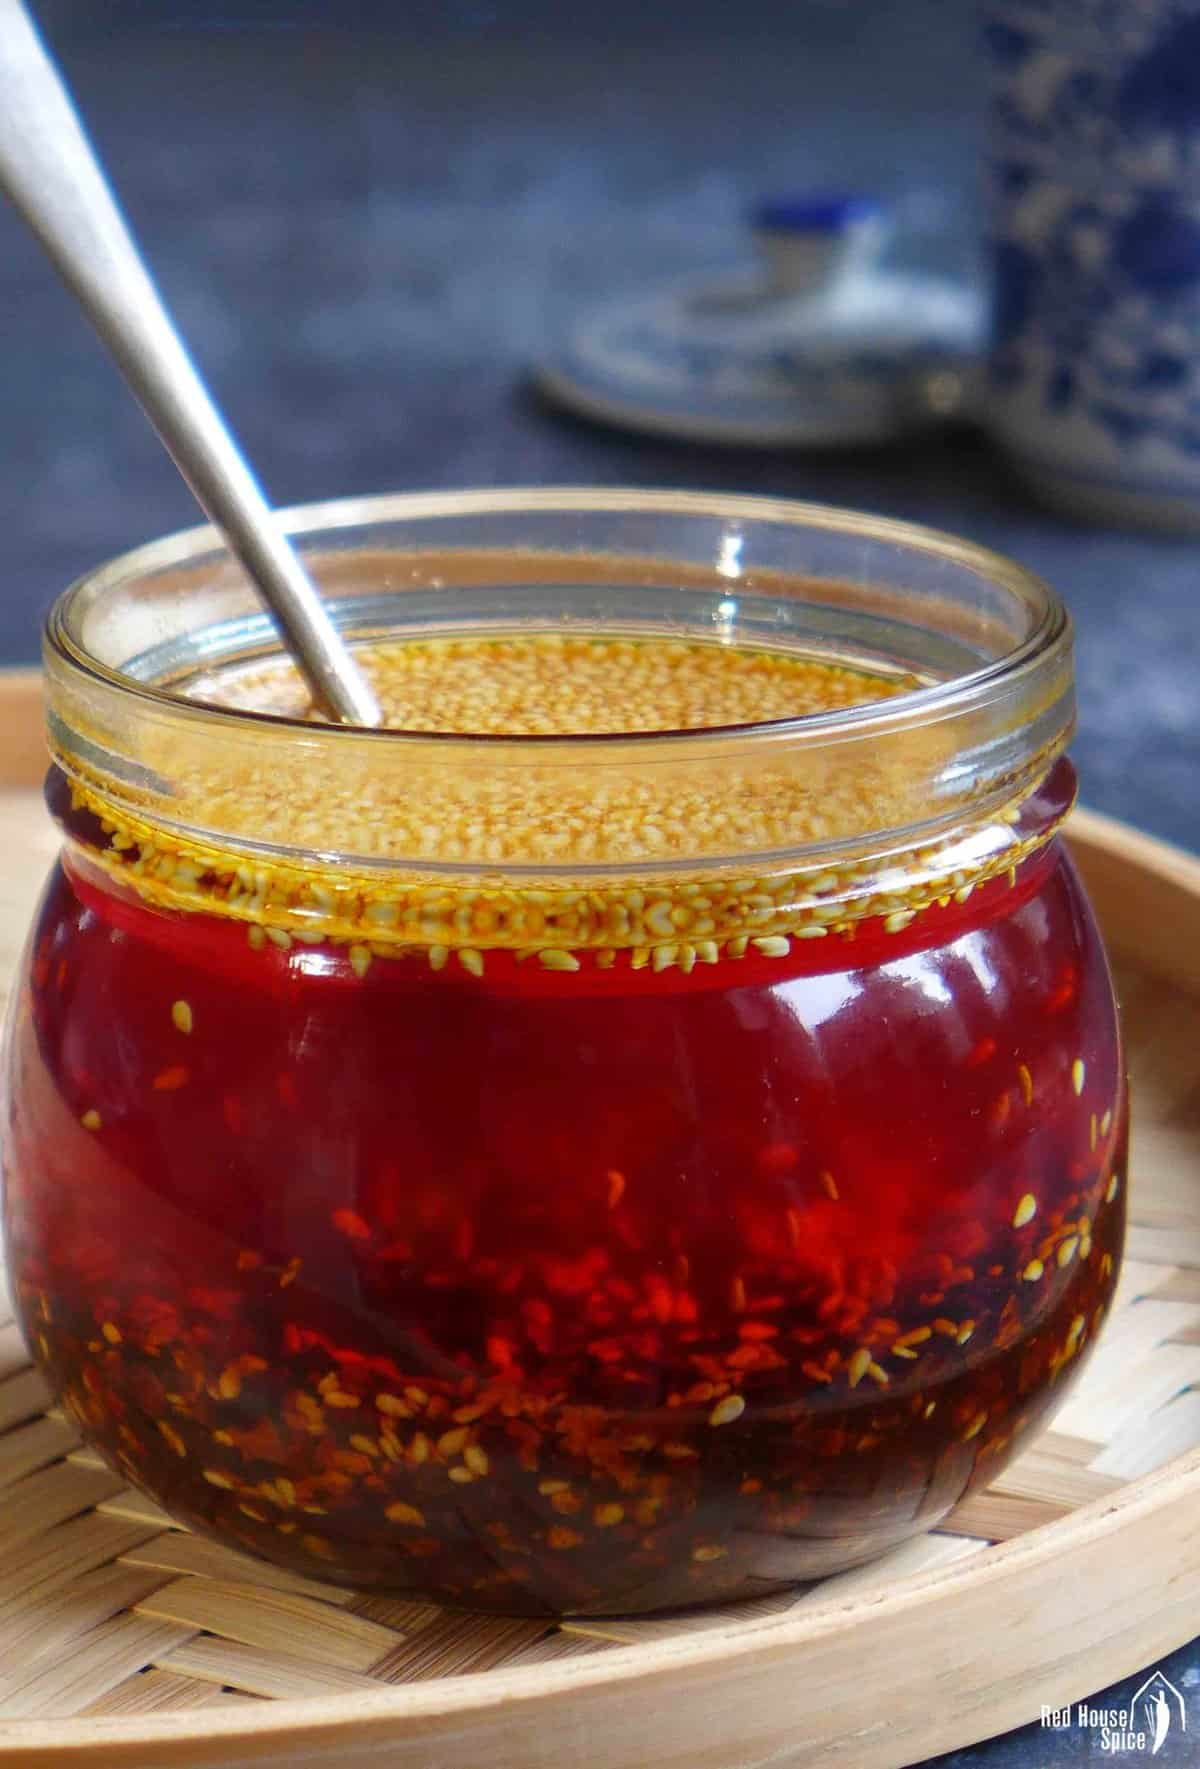
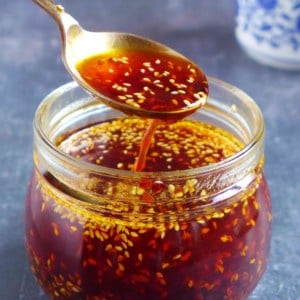
What is chili oil
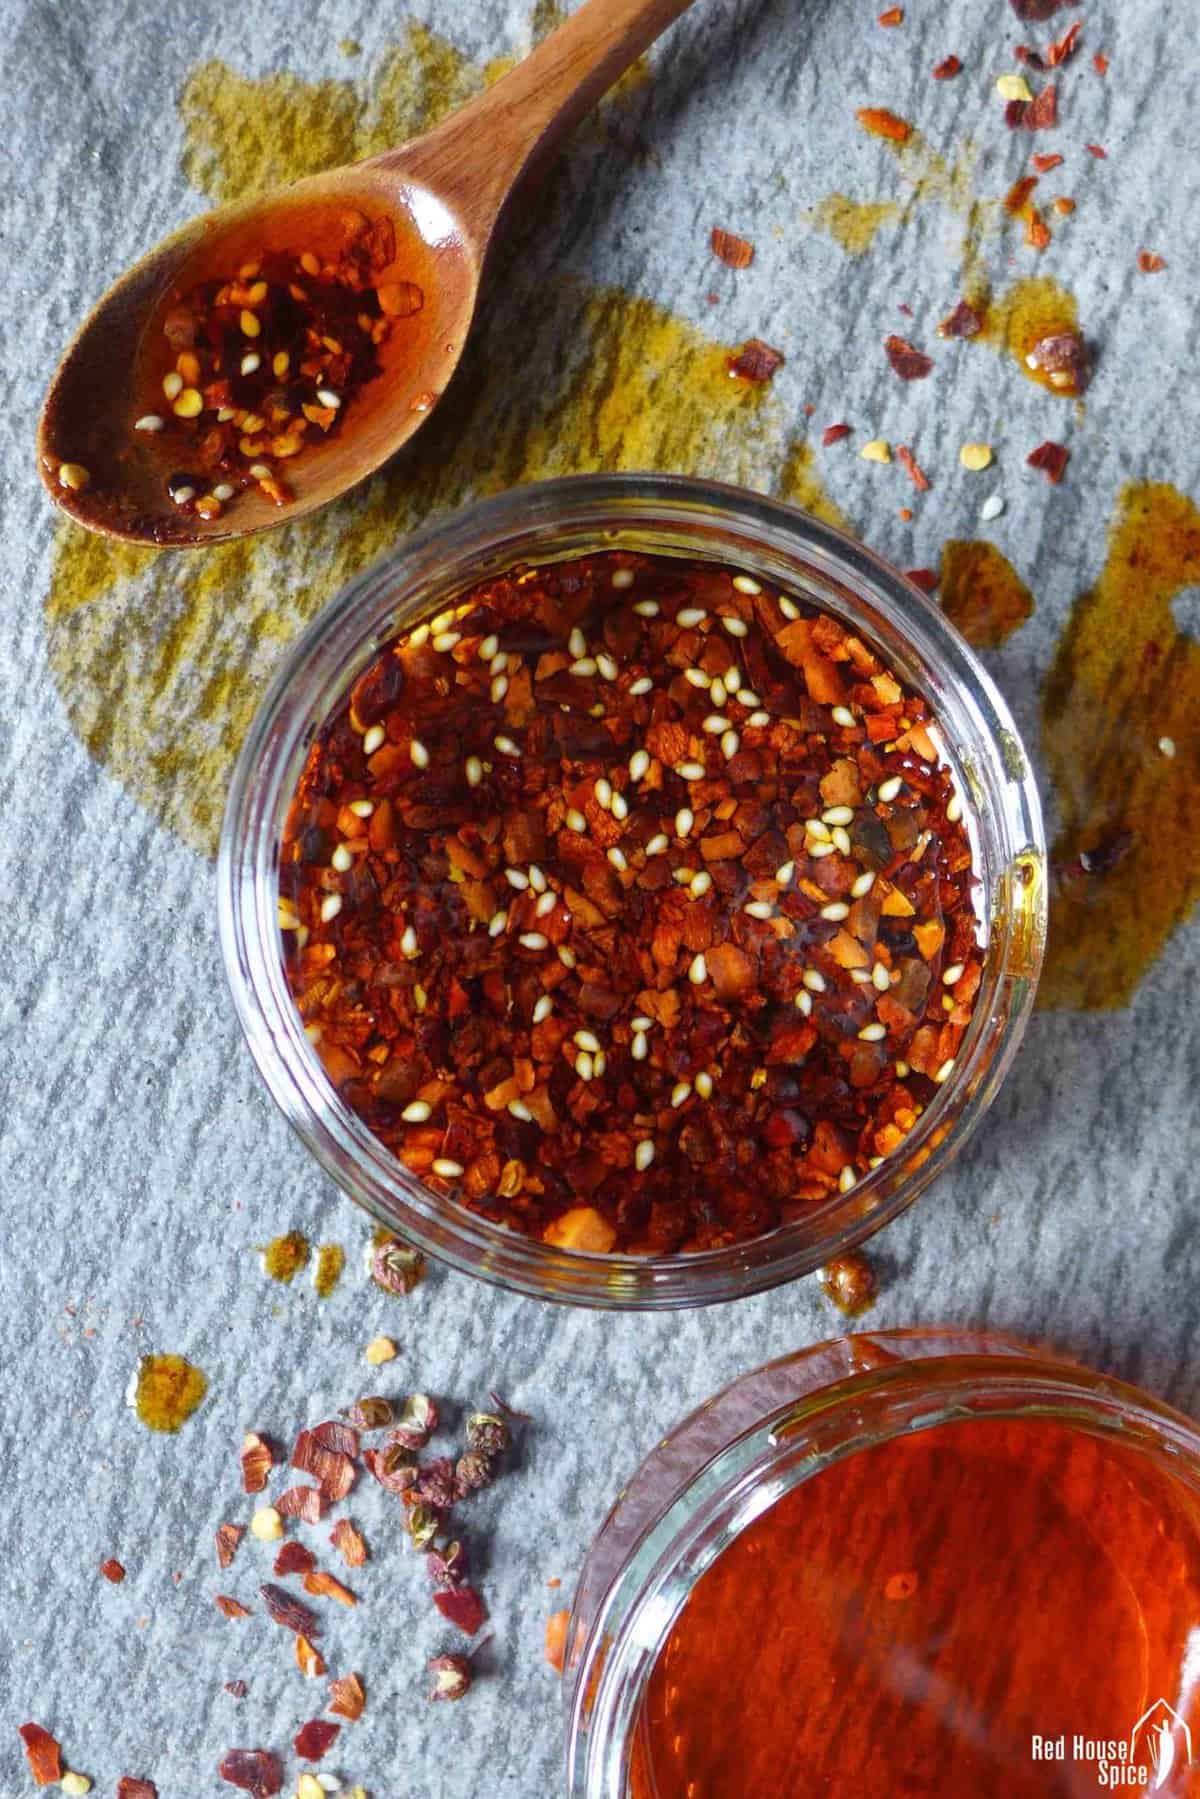
Chili oil is a pantry staple of Chinese cuisine, which is a mixture of spice-infused oil and crunchy, hot chili flakes. It’s a condiment I repeatedly encourage people to try as it makes every dish shine.
Popular in many regions in China, it has numerous restaurant and family versions with names, such as Yóu Pō Là Zi/油泼辣子, Là Jiā Yóu/辣椒油, Hóng Yóu/红油, Yóu Là Zi/油辣子, etc.
As I said when I was interviewed by SAVEUR, growing up in Gansu province in Northwest China, “chili oil was a kitchen counter mainstay, as essential and ubiquitous as soy sauce or rice vinegar”.
My parents’ homemade chili oil taught me how to appreciate spicy food. This opened the door to a more extensive gastronomic world (and unexpectedly influenced my blog name years later).
Apart from being hot, another key characteristic of chili oil lies in its distinctive aroma and fragrance. That is why I used “Not Just Hot” to name my fund-raising supper club in London which had several dishes dressed with my homemade chili oil.
Why make your own
Commercial chili oil isn’t hard to find nowadays, but I strongly recommend you make your own from scratch. Here are a few reasons why:
- It tastes better than most, if not all, shop-bought chili oil.
- There aren’t any hidden, “suspicious” ingredients.
- It’s very simple to make. And it’s cheap too.
- You can make a big batch as it has a long shelf life.
- It’s possible to adjust the spice level based on your tolerance.
- It makes a wonderful gift for family and friends.
Pro tips
Before I introduce the details of my chili oil recipe, here are some top tips to bear in mind:
- Source good quality chili flakes no matter where they come from.
- Stir in a drop of vinegar (or soy sauce) to prevent burning.
- Take your time to infuse the oil with aromatics and spices.
- Test and control the oil temperature to achieve the best aroma.
- There are several ways to alter the hotness.
Ingredients & substitutes
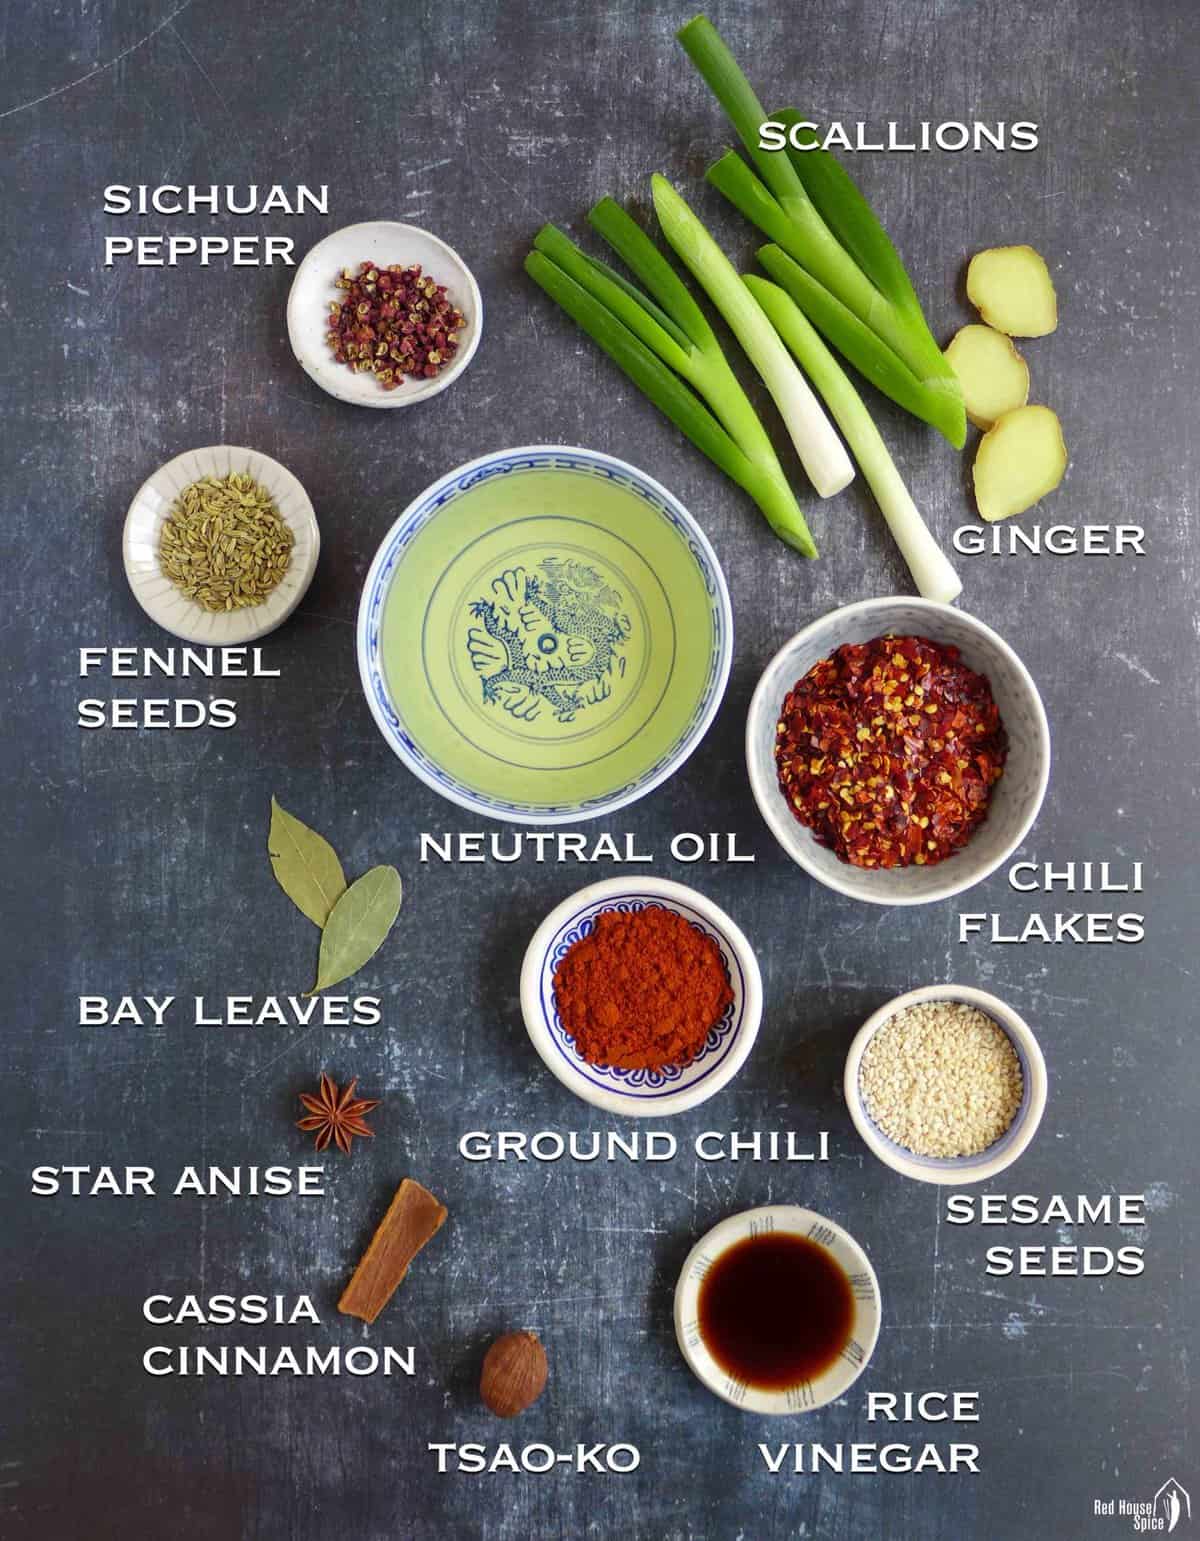
I classify all the ingredients into five groups. Read on to learn more about each of them and their substitutes.
Chili
I use both chili flakes and ground chili. You could use the flakes alone if the latter is unavailable, but the mix of both creates the optimal taste and color (you shouldn’t use ground chili alone).
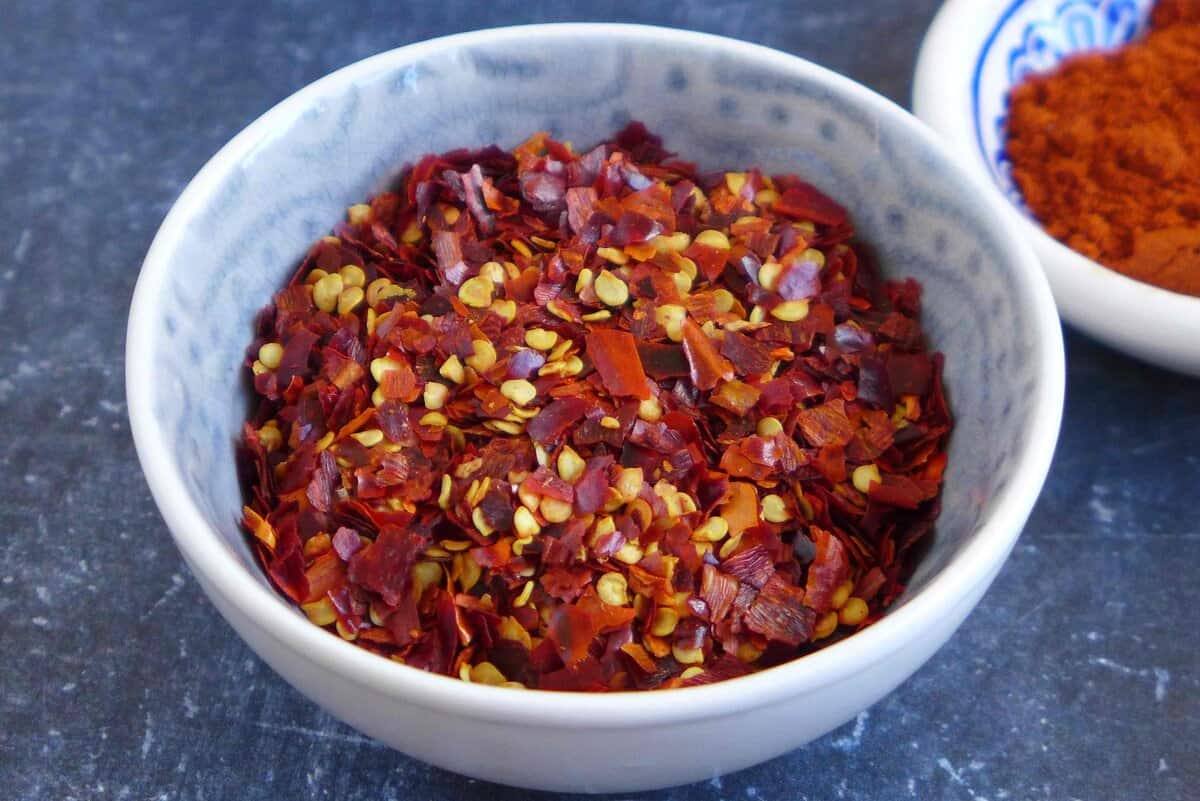
Chili flakes are also known as crushed dried chili or red pepper flakes. When choosing them, I think their quality is more important than their origin.
You might see many recipes that limit the choice to Sichuan chili flakes. Please be aware that other Chinese regions (e.g. Shannxi, Gansu, Guizhou, Yunnan, etc.) also produce high-quality chili flakes, and the ones for Indian and Thai cooking are great too.
Good chili flakes should look fresh, bright and have a fairly even color and size. Also, check the heat level to suit your preference.
By ground chili, I mean dried chili in powder form without any additional ingredients. It mainly contributes to the color of the chili oil.
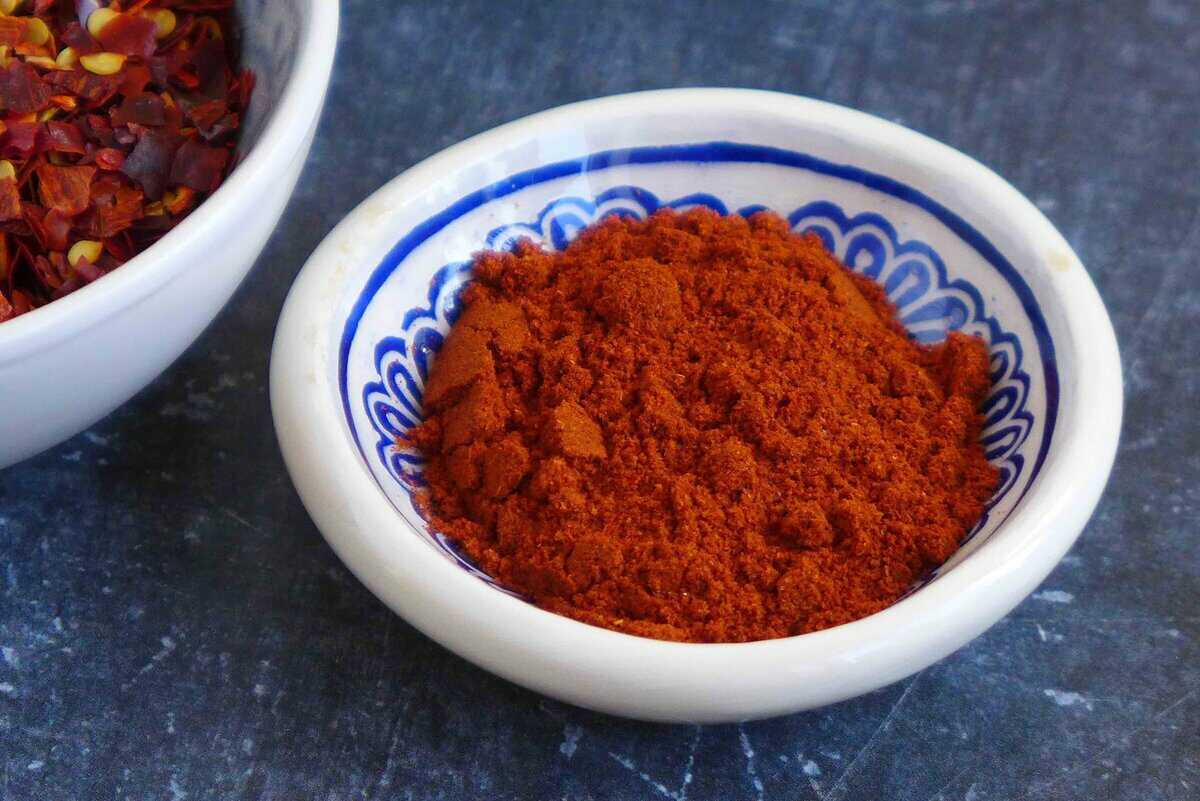
It’s sometimes labeled as chili powder (e.g. those for Chinese or Indian cooking). I don’t recommend chili powder sold in mainstream supermarkets which is usually a mixture of ground chili and other spices, such as cumin, oregano, etc.
Paprika and Korean chili powder (Gochugaru) are good substitutes, especially if you wish to control the heat, as they are quite mild.
Oil
Neutral flavored cooking oil with a high smoking point is called for this recipe, such as sunflower, vegetable, canola, rapeseed, corn, peanut, soybean, avocado oil, etc.
Olive oil is not recommended as it has a distinctive taste and is not supposed to be used with very high heat.
Spices
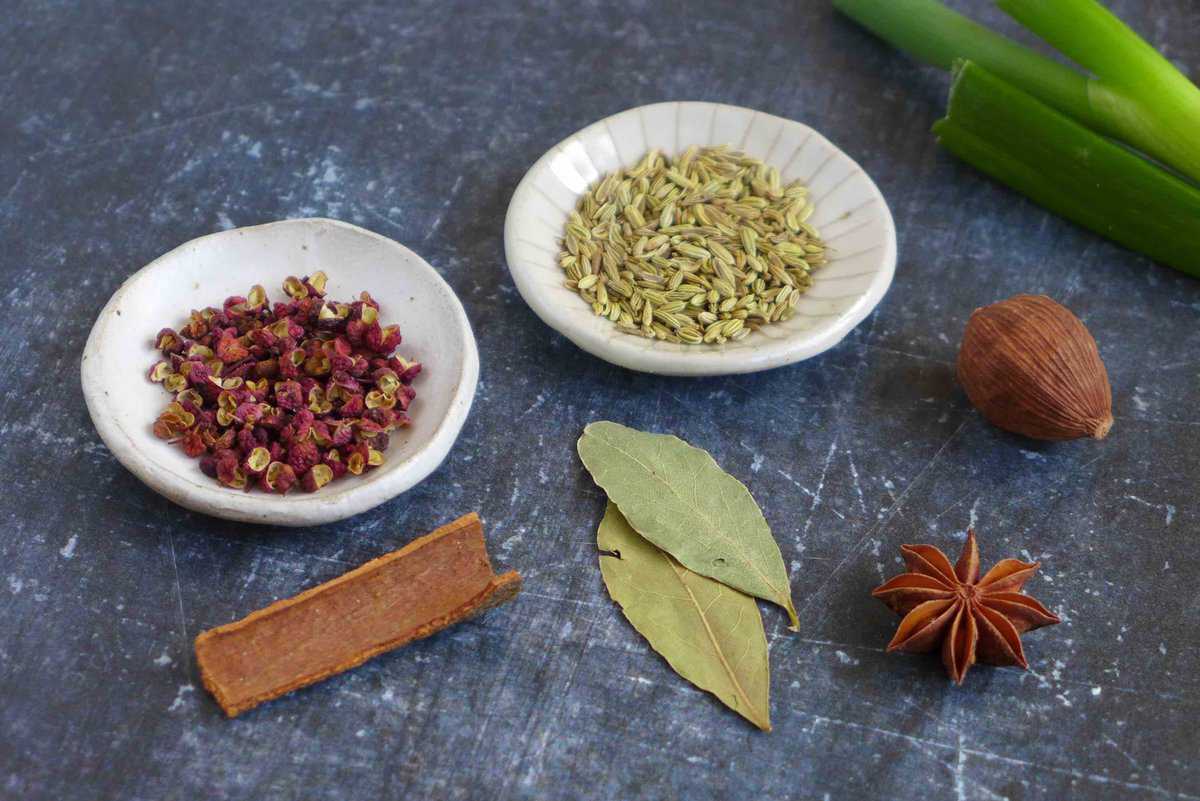
To make your chili oil stand out, with a profound aroma and a subtle numbing sensation, you’d need to include a few spices to infuse the oil. My regular choices are whole Sichuan peppercorns, star anise, cassia cinnamon stick, bay leaves, fennel seeds, and Tsao-ko (Chinese cardamom).
Try your best to include all of the above. Skip a couple if you find it hard to source. You may replace whole Sichuan pepper with ground Sichuan pepper. In this case, add it to the chili mix instead of cooking it in the oil.
Aromatics
Scallions and ginger are included to lend aroma to the oil. The former can be replaced by sliced shallots or onion.
Other add-ons
You’ll also need some toasted sesame seeds, salt, and a dash of black rice vinegar (Chinkiang vinegar) or soy sauce.
The addition of vinegar is a method popular in the Northwest region of China where I grew up. It moisturizes the chili mix. This helps to prevent burning when the chili comes to contact with the hot oil. It also adds a hint of aroma to the chili oil.
Equipment
Apart from a small pan/pot for heating the oil, you’ll need:
- A large, heat-proof bowl for pouring the hot oil in
- A small bowl for the chili mix
- A fine-meshed strainer
- A jar for storage
🛎 TIP: You could pour the hot oil directly into the jar for storage. In this case, make sure it can withstand high heat and it’s a little bigger than the ingredient volume to avoid spillage caused by the bubbling hot oil.
Cooking steps
Step 1: Prepare the chili mix
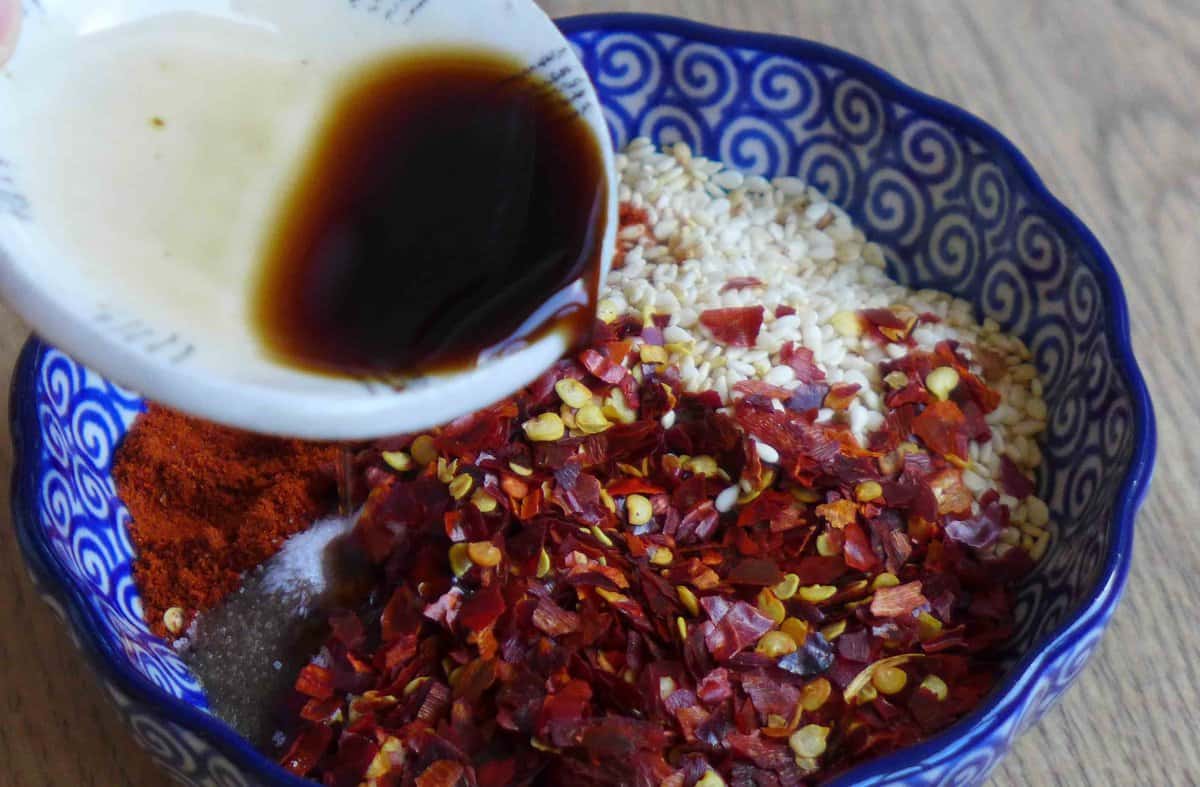
Put chili flakes, ground chili, toasted sesame seeds, and salt into a small bowl. Add a little black rice vinegar (if unavailable, replace it with soy sauce). Mix well and set aside.
Step 2: Heat & infuse the oil
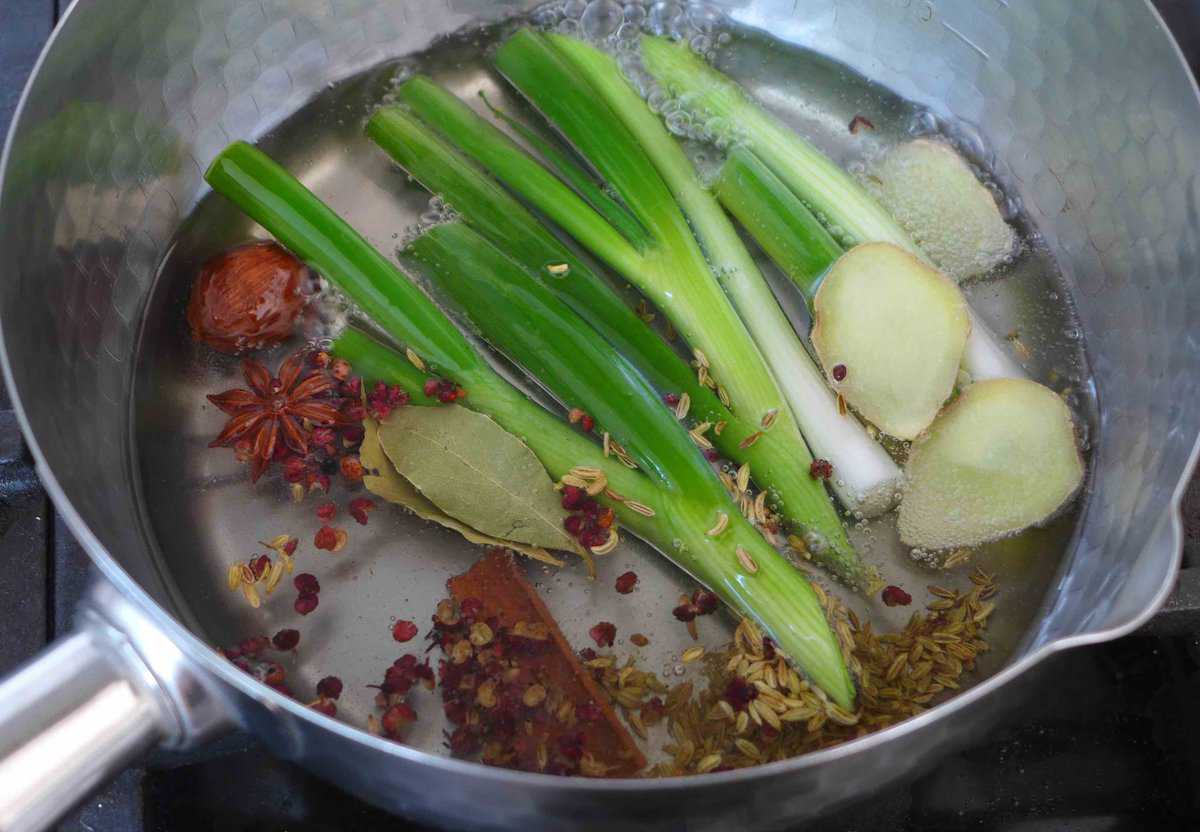
Pour oil into a saucepan (ideally one convenient for pouring). Add all the spices and aromatics. Simmer over low heat until the scallions turn brown (do not burn though). This process usually takes me about 20 minutes.
While waiting, make sure within easy reach you have the following ready as the next step needs to be done fast: a large, heat-proof, empty bowl, a fine-meshed strainer, the chili mix, and a spoon.
🛎 TIP: For best-tasting results, do not rush during this step. Keep the heat low and allow enough time for the spices and aromatics to release their aroma fully.
Step 3: Test the oil temperature

If you have a thermometer, check the oil temperature. When it reaches 350°F/175°C, remove the pan from the heat. Otherwise, drop a few chili flakes into the oil to test. If they bubble and spin immediately, the oil is hot enough.
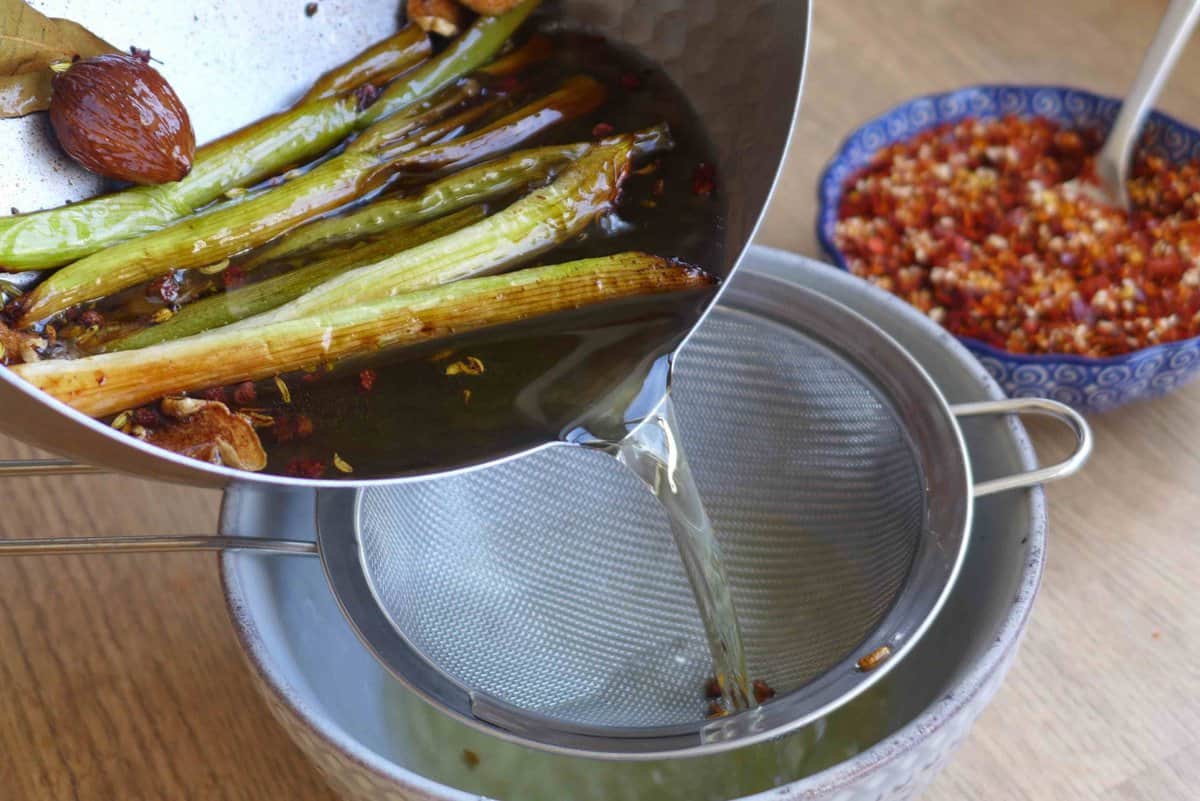
Pour the hot oil into the heat-proof empty bowl through the strainer (discard the spices and aromatics).
🛎 TIP: If the chili flakes you use are very fine, you’ll need to lower the oil temperature to 320°F/160°C.
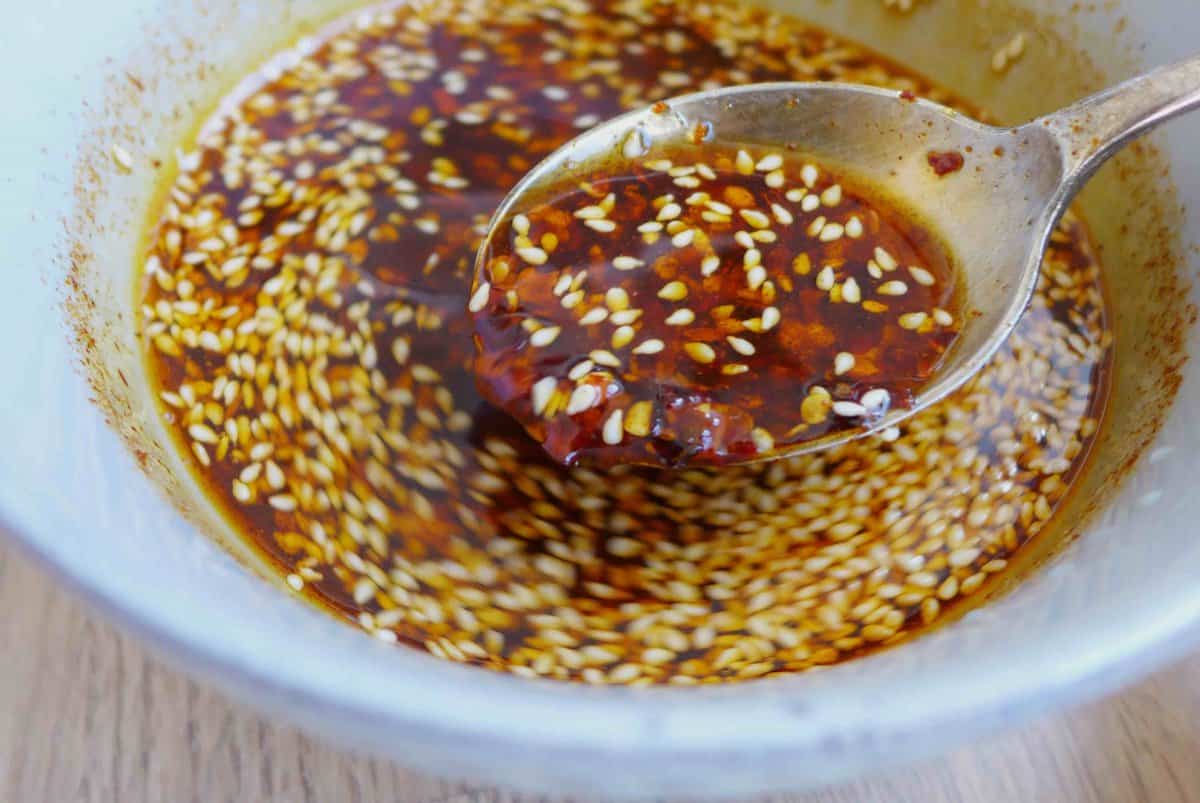
Step 4: Add the chili mix

Add half of the chili mix to the hot oil. You should see sizzling bubbles straightaway. Add the second half once the bubbles calm down a bit. Use the spoon to mix well. Leave to cool.
🛎 TIP: If you are still unsure whether or not the oil is at the right temperature, spoon in a small amount of chili mix to test. If the bubbles are overly intense and you smell a strong burnt smell, wait for a while to let the oil cool down a bit. If no bubbles appear, you’ll need to reheat the oil in the pan.
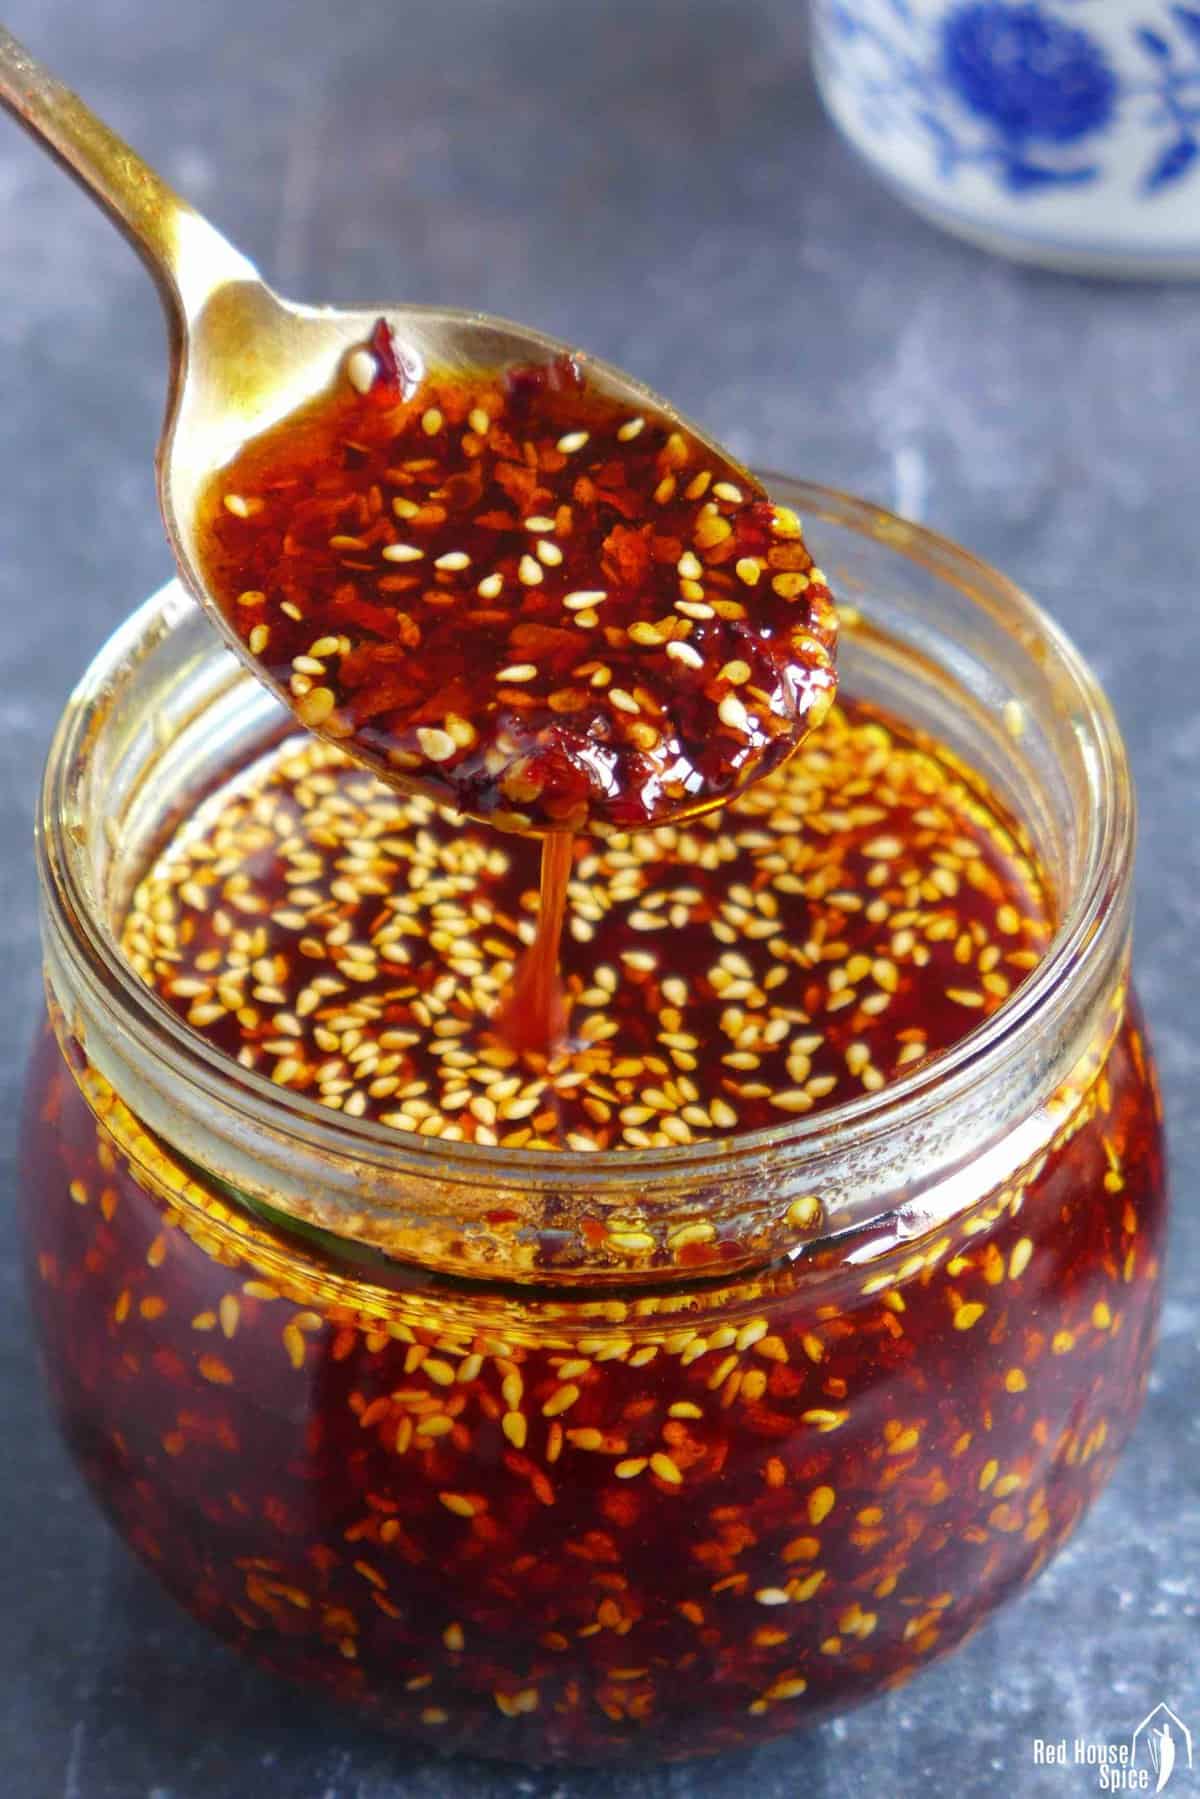
Step 5: Leave to infuse
Once completely cooled, transfer the chili oil to the storage jar. Leave to infuse for at least 12 hours before using. This allows the flavors to combine.
A fast alternative method
Sometimes when I’m short on time (e.g. only realize my jar is empty while the meal is about to be served), I make a super fast version of chili oil. It’s obviously not as good as the recipe above but still good enough to compliment your meal. Here are the simple steps:
- Mix chili flakes, ground chili, ground Sichuan pepper (optional), toasted sesame seeds, and salt. Stir in a little black rice vinegar or soy sauce.
- Heat the oil then pour it directly over the spice mixture (test the temperature with a few chili flakes or sesame seeds). Mix well to combine.
How to adjust the spiciness
A pool of bright red oil may seem super spicy, but good quality chili oil is not supposed to be overly spicy but distinctively aromatic. Here are a few factors that influence its spiciness. Please feel free to customize to suit your own tolerance to heat.
- Choose chili flakes and ground chili that have a low level of heat.
- The chili seeds contribute a lot to the hotness so use chili flakes that contain few seeds.
- Alter the chili-to-oil ratio. If you use less chili and more oil, the overall taste will be milder. Do the opposite if you’d like it hotter.
- The spiciness of the chili oil tends to reduce over time. If you leave it for a couple of weeks, it’ll taste less sharp but more fragrant.
- Use it sparingly in dishes. Increase the quantity while you grow your tolerance.
Ways to use it
Always use a dry, clean spoon to handle chili oil. Since the chili flakes sink to the bottom, stir them first then scoop out a mixture of the oil and the crunchy bits. Some recipes, such as Sichuan Mouthwatering Chicken, call for red oil only. In this case, pass the chili oil through a strainer to get the pure oil.
Unsure what are the best ways to use this magic condiment? Here are some of the classic examples.
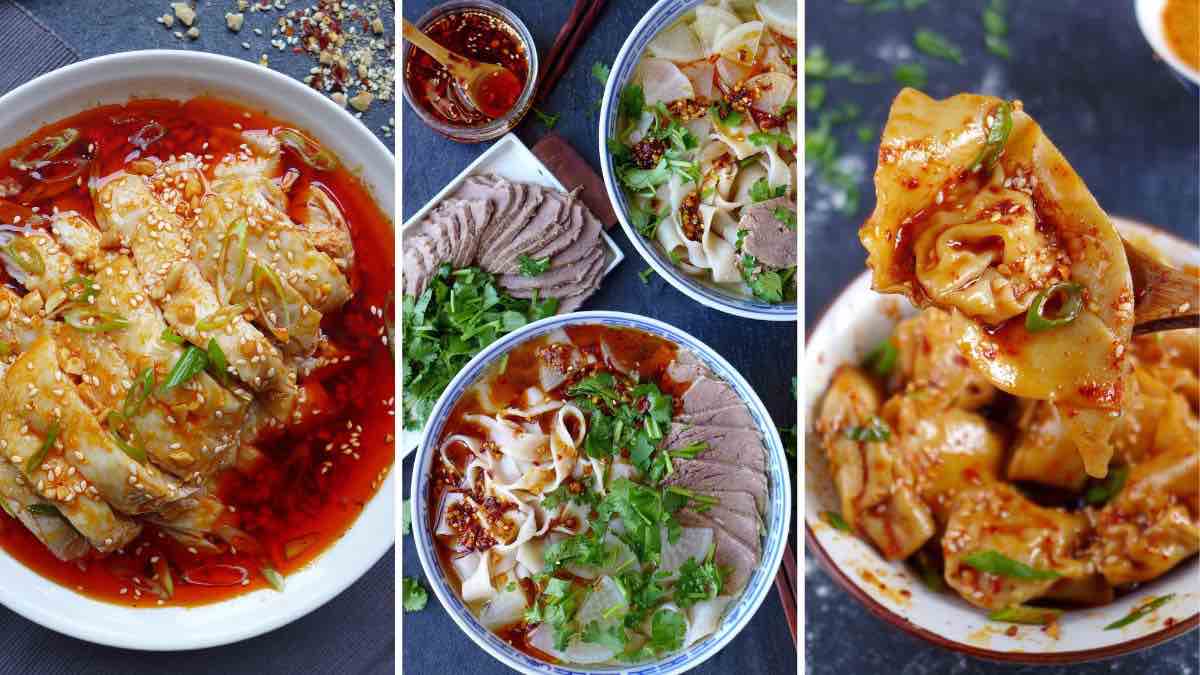
- Incorporate it in dressings for cold dishes such as Bang Bang Chicken, Smashed Cucumber, Braised Beef Shank, etc.
- Spicy up noodles or noodle soups. It’s essential to Dan Dan Noodles, Chongqing Noodles, Hot & Sour Glass Noodles, Lanzhou Beef Noodle Soup, etc.
- Mix it into fried rice, such as Egg Fried Rice, Pork Fried Rice, etc.
- Use it as a dipping sauce for Dumplings, Steamed Bao, Pan-fried Buns.
- Add it to wontons, such as Sichuan Chili Oil Wontons or Classic Wonton Soup.
- Drizzle over plain Congee, alone or with other toppings.
- Smear over bready food, such as Scallion Pancakes, Egg & Scallion Crepes, or Plain Steamed Buns.
- Use it in any other dish that needs a flavor boost
How to store
Chili oil has a long shelf life thanks to its high-fat content. My parents and my own family always leave it on the kitchen counter or cabinet (away from direct sunlight of course). I usually have it in a container with a loose lid and a designated spoon that sits in it all the time. It disappears way before we start worrying about spoilage (so many dishes “need” an elevation of chili oil!)
If you make a big batch and are not going to use it up quickly, you can store it in an airtight jar in the fridge for up to 6 months. Alternatively, keep a small amount on the counter for easy access and leave the rest in the fridge.
Recipe FAQs
A: In this case, the chili oil might not have the best aroma. You could return the chili oil (including the solid bits) to the pan and reheat for a while to further toast the chili.
A: They’re not an ideal substitute. However, you can easily turn them into chili flakes. Toast them over low heat in a dry pan until fragrant (Remove their seeds before toasting if you like a milder taste). Leave to cool then crush it in a spice grinder or mortar and pestle.
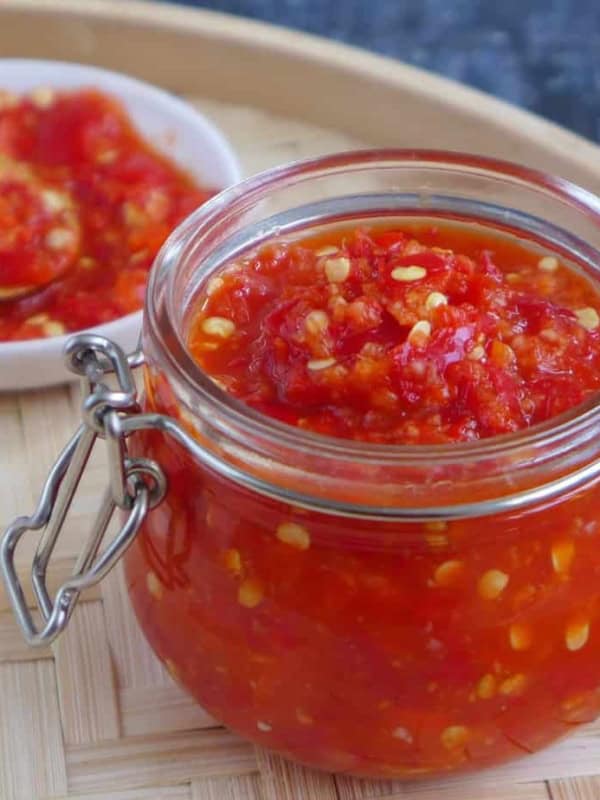
A: Fresh chili pepper isn’t suitable for this recipe. Check out my recipe for Pickled Chili Garlic Sauce and Chiu Chow Chili Oil which show great ways to use fresh chilies.
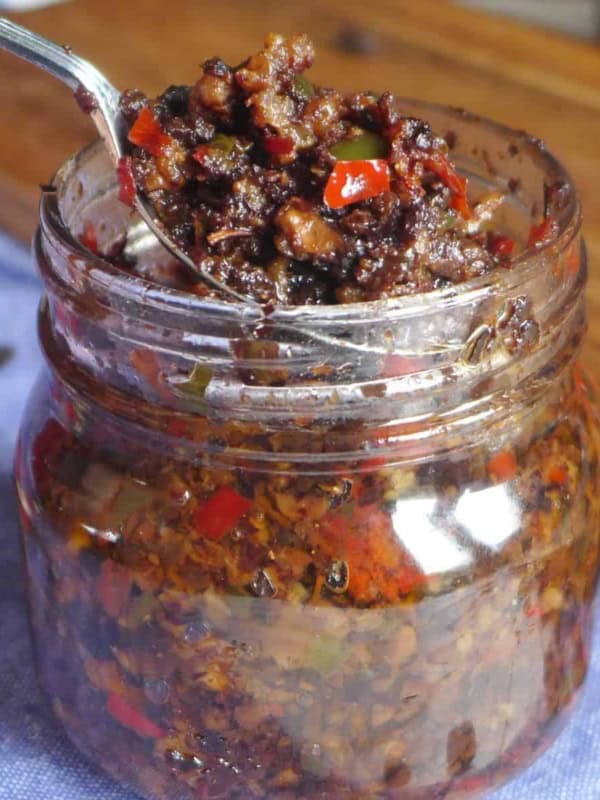
A: They are quite different. This chili oil has a higher oil-to-chili ratio and a “cleaner” taste which doesn’t overpower the key flavors of a dish.
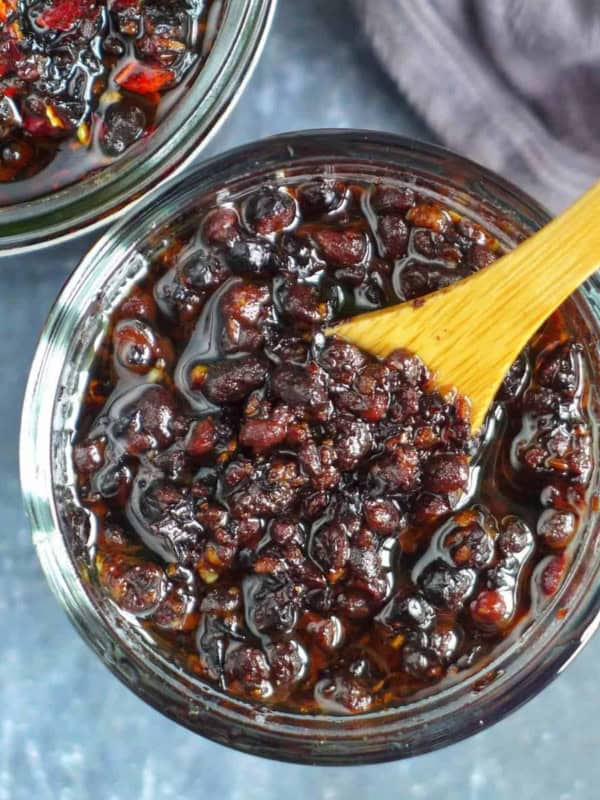
Chili crisp tends to have much more solid bits and contain additional ingredients other than chili, such as fermented black beans, nuts, dried meat, etc. For certain dishes, I find it undermines other flavors.
Other homemade sauces


📋 Recipe
Love this recipe? Please leave a 🌟🌟🌟🌟🌟 rating and a comment. Thank you!
Homemade chili oil (油泼辣子)

Video
Ingredients
For the chili mix
- ¼ cup chili flakes
- 1 tablespoon ground chili, see note 1 & 2
- ½ teaspoon salt
- 2 tablespoon sesame seeds, toasted
- 1 teaspoon black rice vinegar, or soy sauce
For the oil
- 1 cup cooking oil
- 1 teaspoon whole Sichuan peppercorn, See note 3
- 1 teaspoon fennel seeds
- 1 star anise
- 1 piece cassia cinnamon, aka Chinese cinnamon
- 2 bay leaves
- 1 Tsao-ko, aka Chinese black cardamom (optional)
- 3 slices ginger
- 2 stalks scallions, aka green onion, spring onion
Instructions
- In a small bowl, mix chili flakes, ground chili, salt, sesame seeds and black rice vinegar (or soy sauce). Have another deep, dry, heat-proof bowl ready (see note 4). Place a fine mesh strainer over it.
- Pour oil into a small pan/pot. Add all the spices and aromatics. Simmer over low heat. Watch attentively. Turn off the heat immediately when the scallions turn brown (It took me about 20 minutes). Test the temperature with a thermometer (it needs to reach 350°F/175°C). Alternatively, drop in a few chili flakes to test. The oil is hot enough if they bubble and spin immediately.
- Pour the oil into the empty bowl through the strainer. Discard everything caught in the sieve.
- Add half of the chili mixture to the oil. You should see it bubbling intensively. Add the remaining when the bubbling calms down. Stir well with a clean dry spoon.
- Leave to cool uncovered. Then transfer to a container of your choice. Wait for at least 12 hours before using it to allow all the flavors to combine.
- Storage: The lifespan of chili oil is about 2 months in the kitchen cupboard (dry, cool and away from direct sunlight) and about 6 months in the fridge.
- Usage: Both the oil and the chili flakes are for consumption. Use a clean spoon to stir well before serving. If your dish requires pure chili oil, use a strainer to filter out the chili and sesame seeds.
Notes
- Mix chili flakes, ground chili, ground Sichuan pepper (optional), toasted sesame seeds, and salt.
- Heat the oil then pour it over the mixture. Stir well to cook evenly.
Your Recipe Notes
Nutrition
Nutrition information is automatically calculated, so should only be used as an approximation.


Just made this cant wait to try it
Thanks for trying my recipe Alison! Hope it adds extra deliciousness to many dishes.
Thank you very much for blessing us with your skills and wisdom. Will try out soon.
Happy cooking Jan!
This is way better than the store bought one and it’s so easy once you got the ingredients. Thanks so much
So happy to hear that Eva! Thanks for trying my recipe.
This solves a problem that I have with Laoganma, soy oil. Soy stimulates the body to produce estrogen. Something men don’t need. Only double fermentation of soy eliminates this.
Now I can make my own chili oil without soy. I do enjoy noodles with Laoganma, but the soy content is troublesome. Thank you
Glad you enjoyed this recipe, Skash!