
A classic dim sum food, steamed custard buns are loved for their fluffy texture and rich flavour. Follow my recipe to make them to a restaurant standard.
Pin this now to find it later!
Pin ItTable of Contents
A dim sum classic
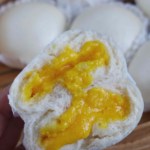
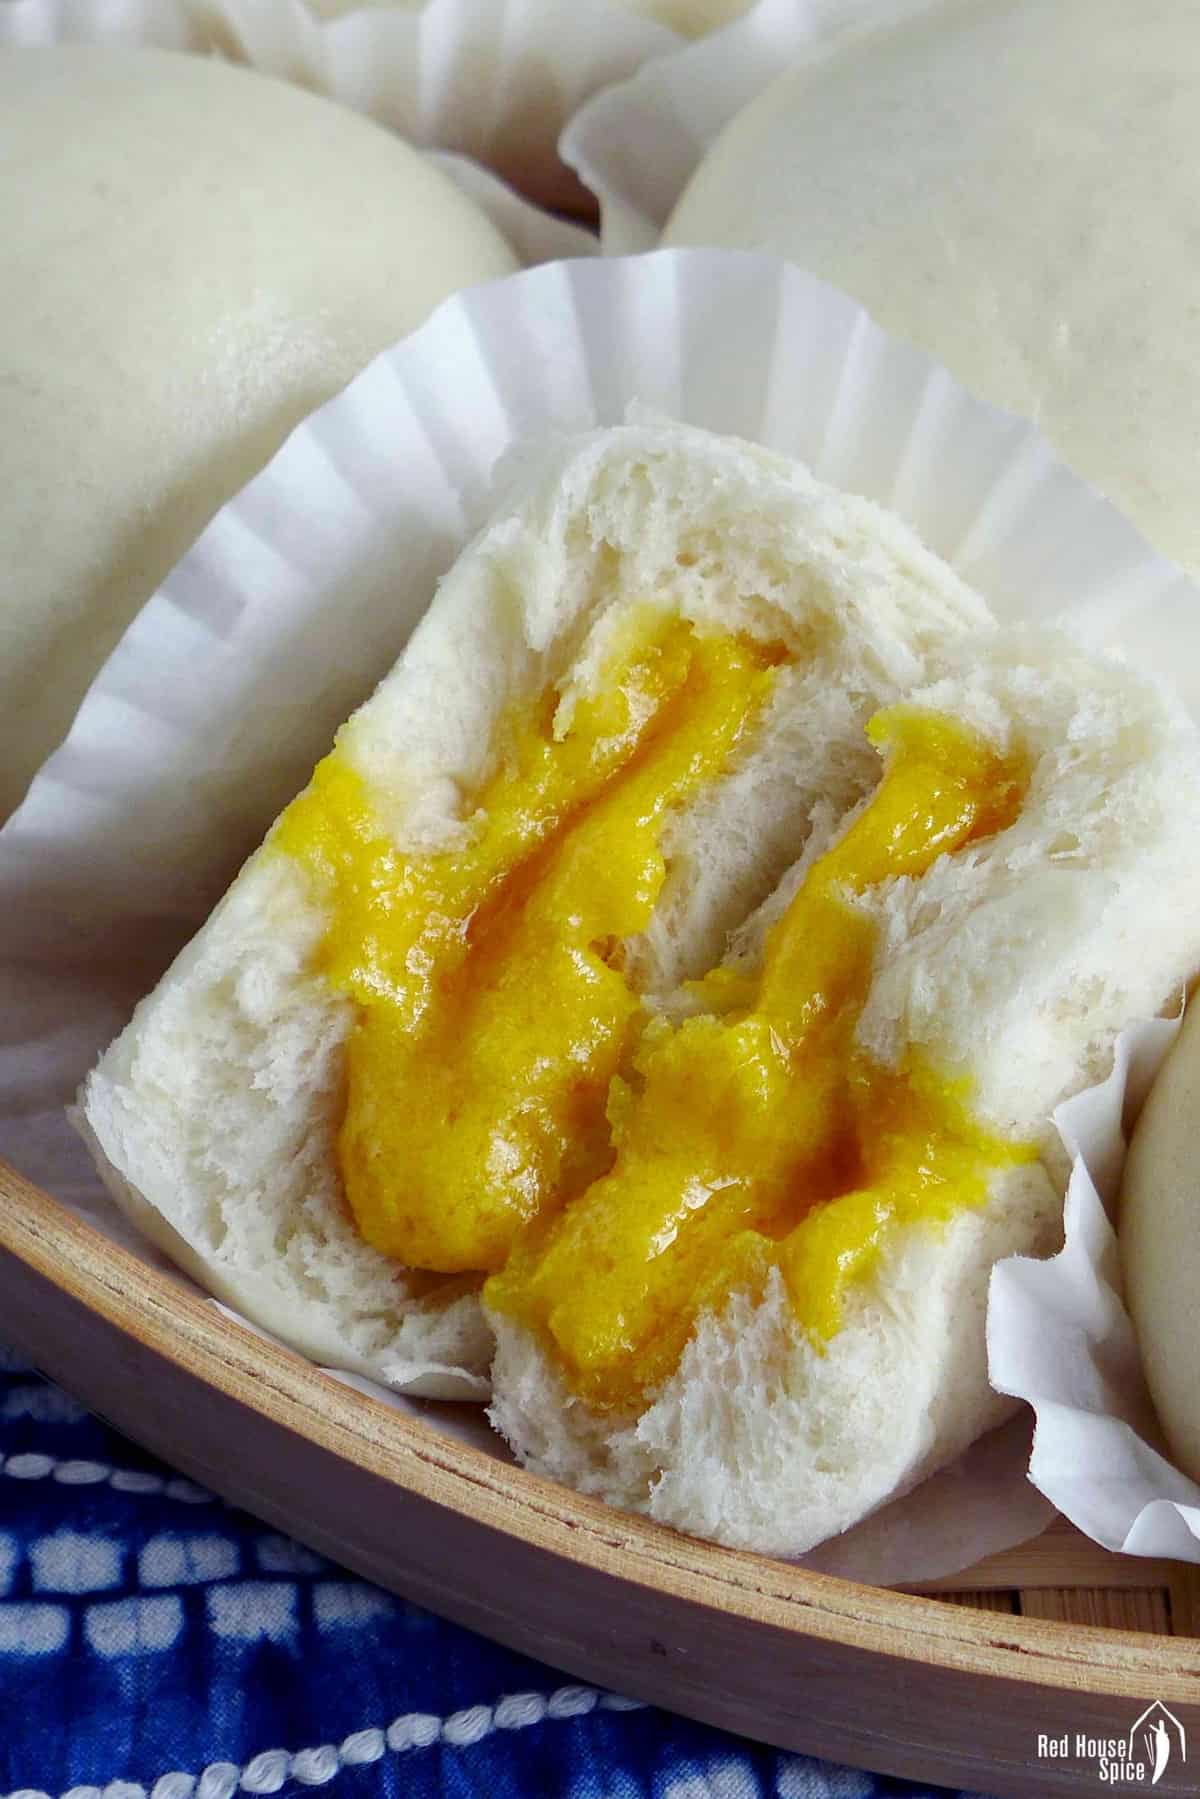
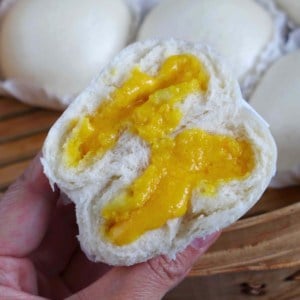
If you’re a regular dim sum restaurant goer, you probably have tasted steamed custard buns (Nai Wong Bao, 奶黄包), a classic Cantonese treat made of leavened dough and an egg-milk based sweet filling. I absolutely adore its fluffy, cotton-like texture and creamy, fragrant taste.
Have you ever considered making them at home? You should definitely give it a try! My tried and tested recipe will walk you through the process with many tips and tricks to help you succeed. Here is the summary of three simple steps:
- Follow a simple four-ingredient formula to prepare a rich, smooth filling.
- Use the “yeast + baking powder” method to make a single-proof dough.
- Assemble the buns then steam for 8 minutes.
🌟 NOTE: Don’t forget to check out my post on Top 15 Most-Loved Dim Sum Recipes which features many other classic dishes.
Ingredients for the filling
It is said that every dim sum restaurant has its own recipe for the filling of custard buns. The ingredients required can be quite different. I’ve done extensive research and kitchen experiments to figure out the recipe I feel most happy to share.
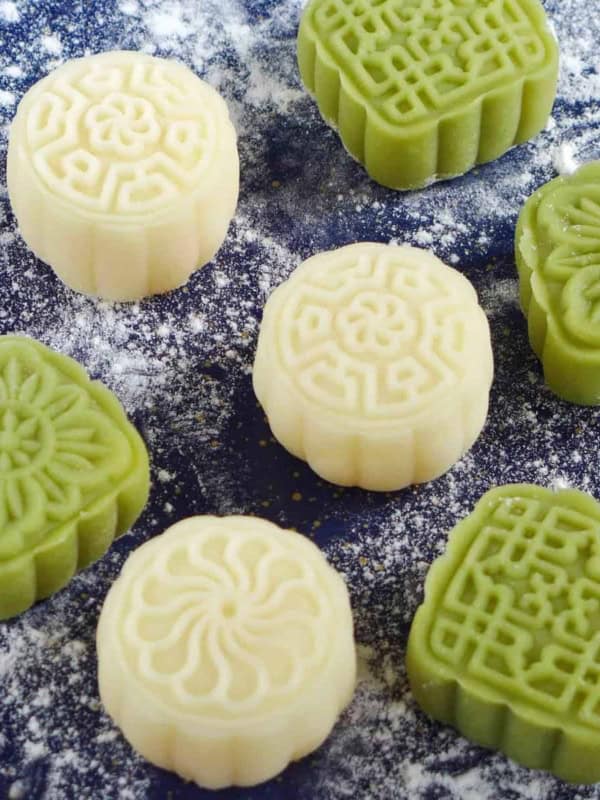
Finally, I’ve settled for a four-ingredient formula. It’s simple, easy to make and tastes absolutely delicious. I particularly love the semi runny texture which takes the filling to the next level (It’s much softer than the custard filling used in Snow Skin Mooncakes).
For making about 8 buns, you’ll need:
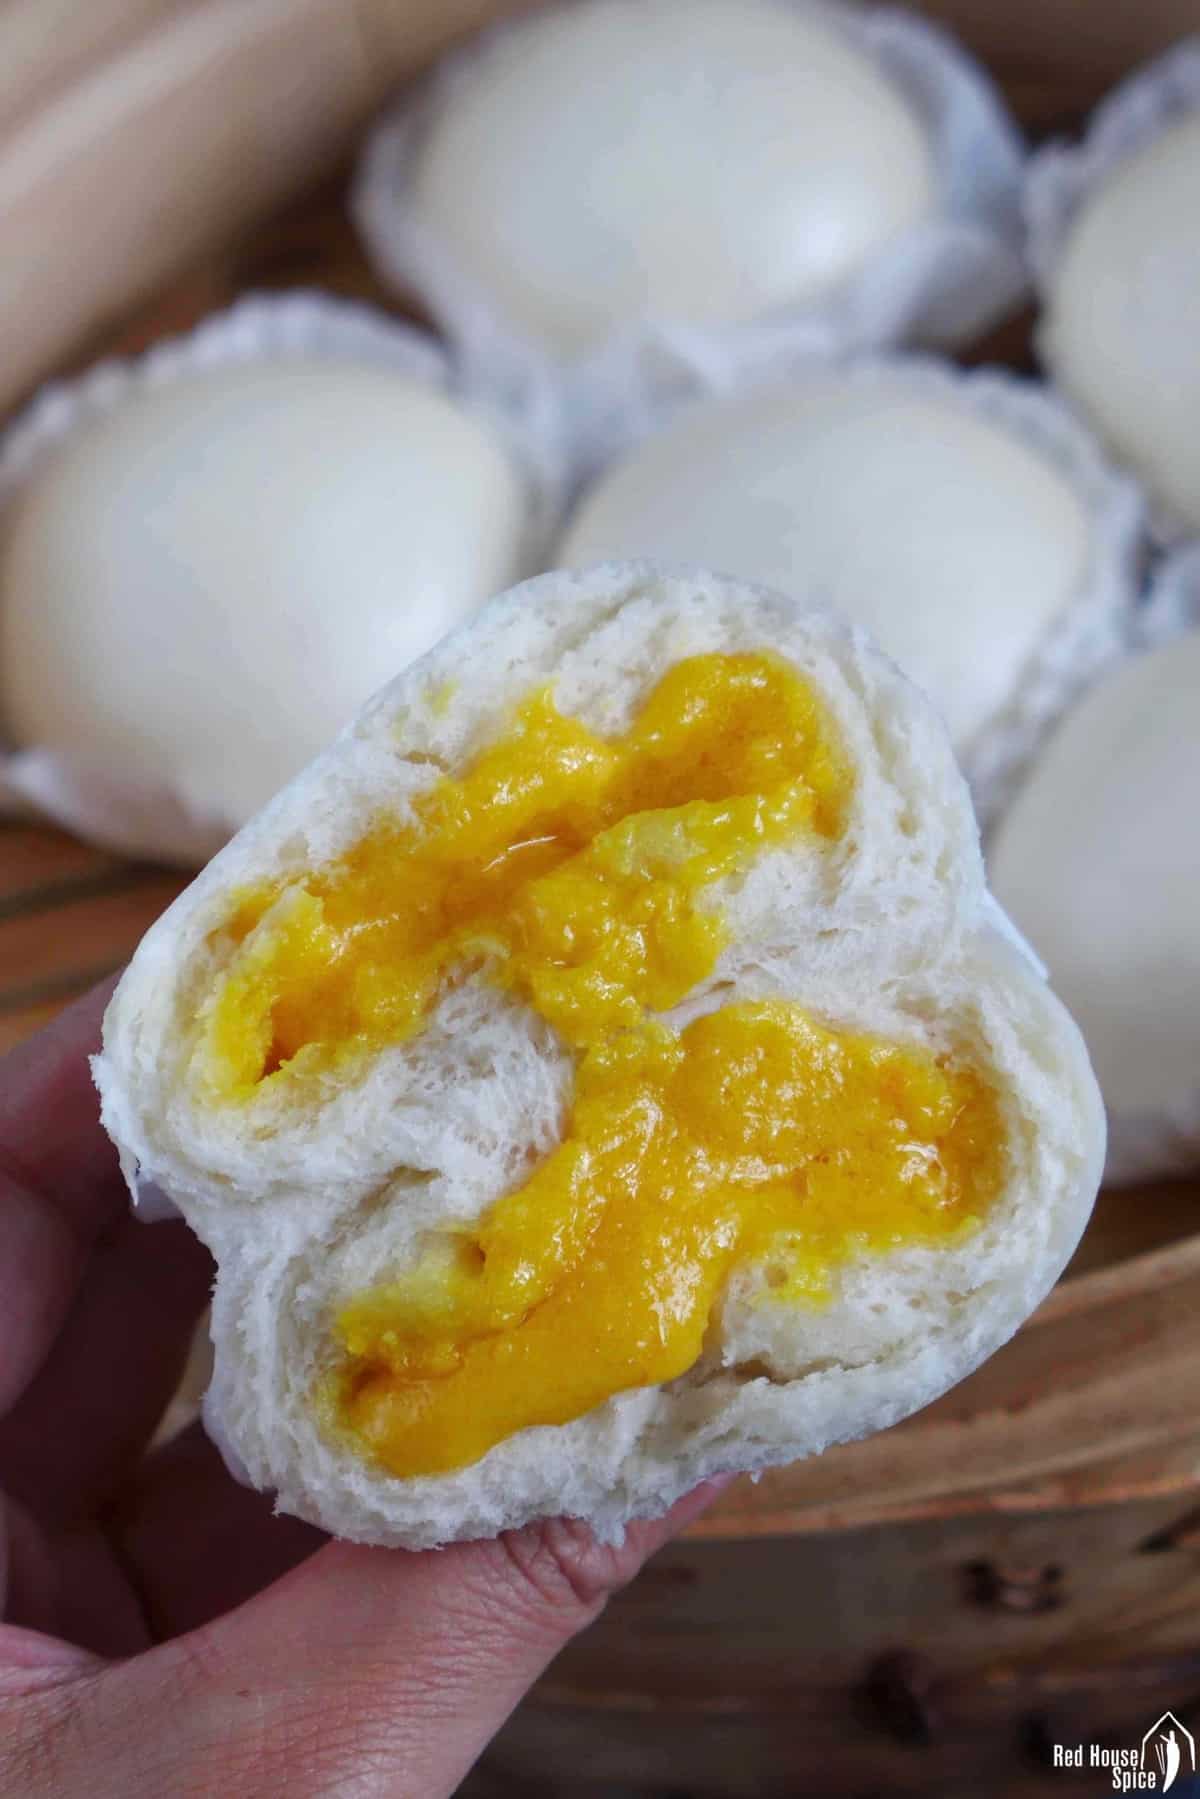
- 3 yolks of hard-boiled eggs, or cooked salted duck egg yolks
- 50g unsalted butter, softened
- 30g full-fat milk powder
- 30g sugar, or 40g if using salted egg yolks
Try salted egg yolk
Both regular egg yolks and salted duck egg yolks (咸蛋黄) work for this recipe. But if available, I highly recommend you try the latter. The combination of saltiness and sweetness is a real winner with Lotus Paste and Salted Yolk Mooncake being a classic example.
Substitute for milk powder
I usually use full-fat milk powder for this recipe. However, you may replace it with custard powder (Ji Shi Fen, 吉士粉) if it’s more accessible. In this case, make sure you use traditional style custard powder which contains egg and milk. The more popular type, such as Bird’s custard powder, isn’t a great choice as it’s made of cornstarch and flavouring, etc. But it would be OK if you’d like your buns dairy-free.
Prepare the filling

No matter which type you use, the yolks need to be cooked before mixing with other ingredients. While they’re still warm, use a spoon to mash them into a fine powdery texture. If you’re a perfectionist and would like to avoid any lumps, press the yolks through a fine sieve.
Add softened butter, milk powder and sugar. Take your time to mix everything very well to create a smooth paste. Since none of the ingredients in this filling are raw, I suggest you add the sugar gradually. This way you can taste and adjust to suit your own sweetness preference.
Make the dough
The dough for custard buns is Chinese-style leavened dough that creates a soft and fluffy texture after steaming. I’ve shared a few different formulas, such as yeast only dough for Sheng Jian Bao, yeast plus baking powder version for Mantou, etc. To imitate the restaurant version, I think the formula I’ve used for Char Siu Bao and Red Bean Buns works the best for today’s recipe.
To make 8 buns, you’ll need the following:
- 175g low-gluten flour, or all-purpose flour
- 1 tsp instant dry yeast
- 1 tsp baking powder
- 1 tbsp sugar
- 1 tbsp neutral cooking oil
- 90g lukewarm water, adjust if necessary
Flour choices
Since steamed custard buns are a sweet treat, the best choice would be low-gluten flour which creates a soft, cotton-like texture, such as cake flour or special bao/bun flour. Buns made with bao/bun flour also look much whiter, just like what you’d get in a dim sum restaurant.
That said, please feel free to use all-purpose flour if low-gluten flour is difficult to source. In this case, slightly increase the water volume (e.g. from 90g to 95g) as flour with higher gluten content has a higher water absorption capacity.
- If making the dough manually, mix and combine all the ingredients into a rough-looking dough. Leave it to rest for 10 minutes then knead again until smooth.
- If using a stand mixer, add all the ingredients into the bowl. Run the machine at a low speed for about 8 minutes.
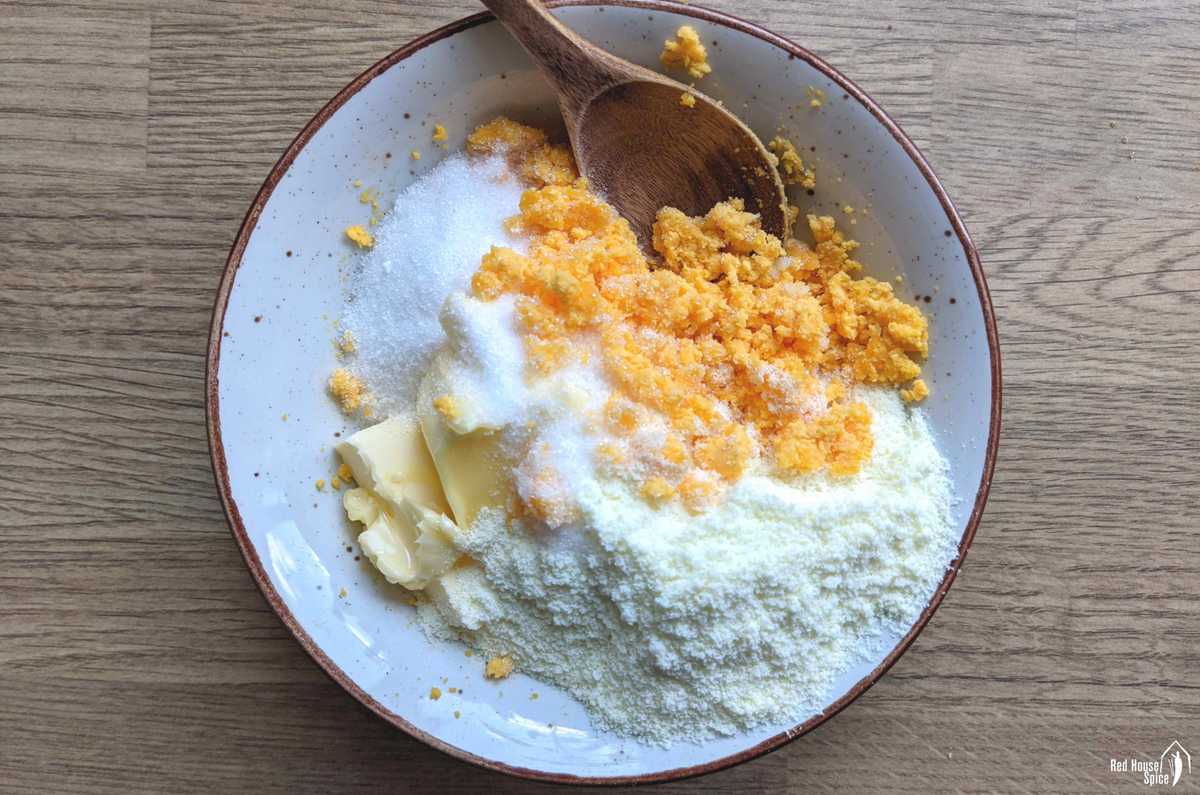
The finished dough should be on the soft side but not at all sticky. Since it contains baking powder, you can move on to the next step of bun assembling straightaway without proofing (unlike traditional yeast-only dough).
Roll the wrappers
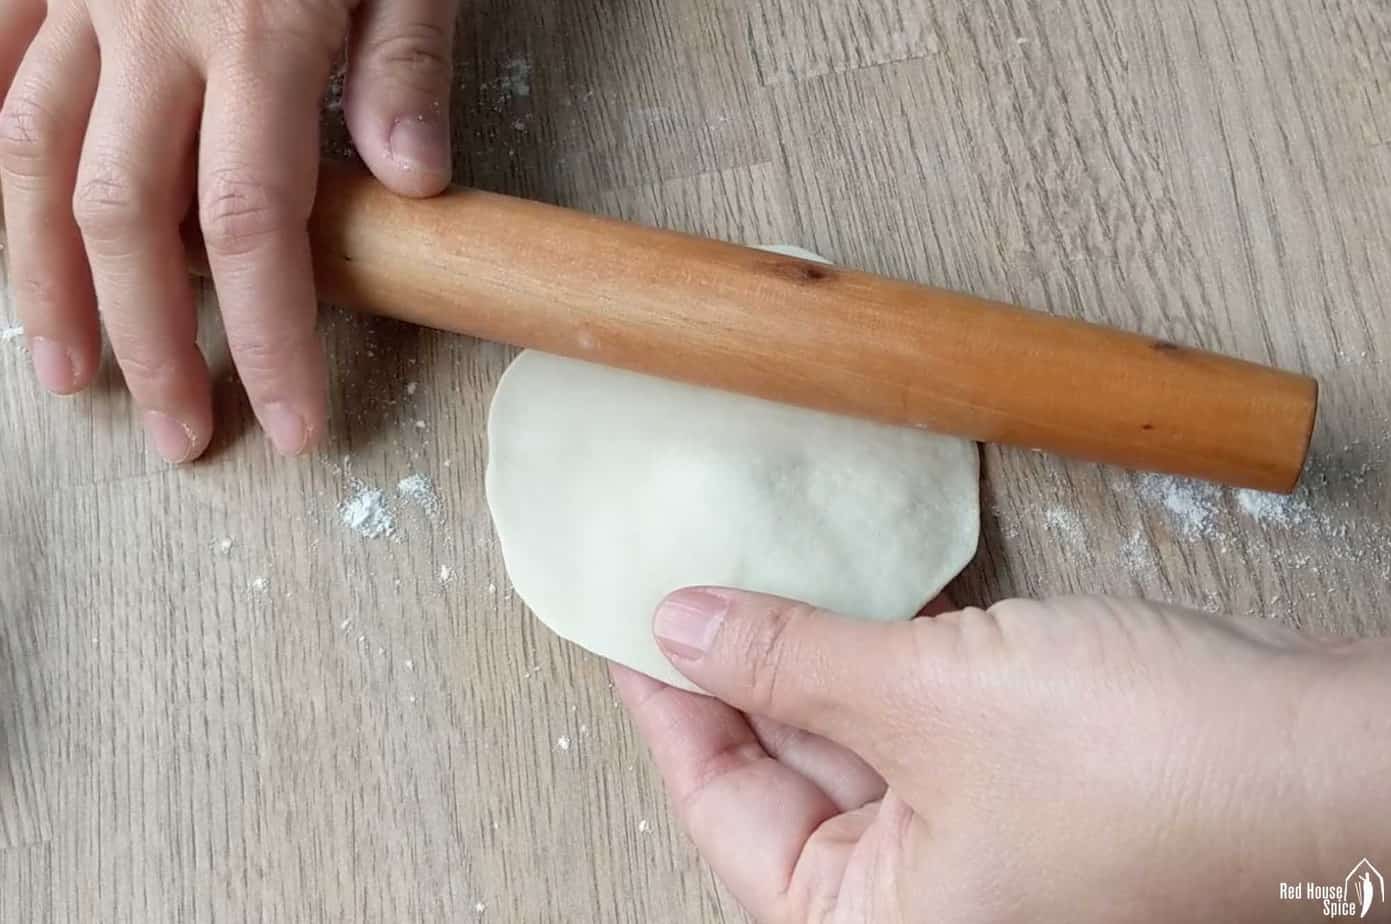
Use your hands to shape the dough into a rope, then cut it into 8 equal parts. With your palm, press one piece into a disc. Flatten it into a wrapper with a rolling pin (about 9cm in diameter). Ideally, it should be slightly thinner on the edge and thicker in the middle (Please refer to the method shown in the video).
🛎 Tips:
- To achieve a super smooth look after steaming, add one more step: knead each dough piece for about 10 seconds before you roll it into a wrapper.
- Dust the work surface and the dough with a little flour to prevent sticking. Also, make sure to cover unused dough or wrappers to avoid drying out.
Assemble the buns
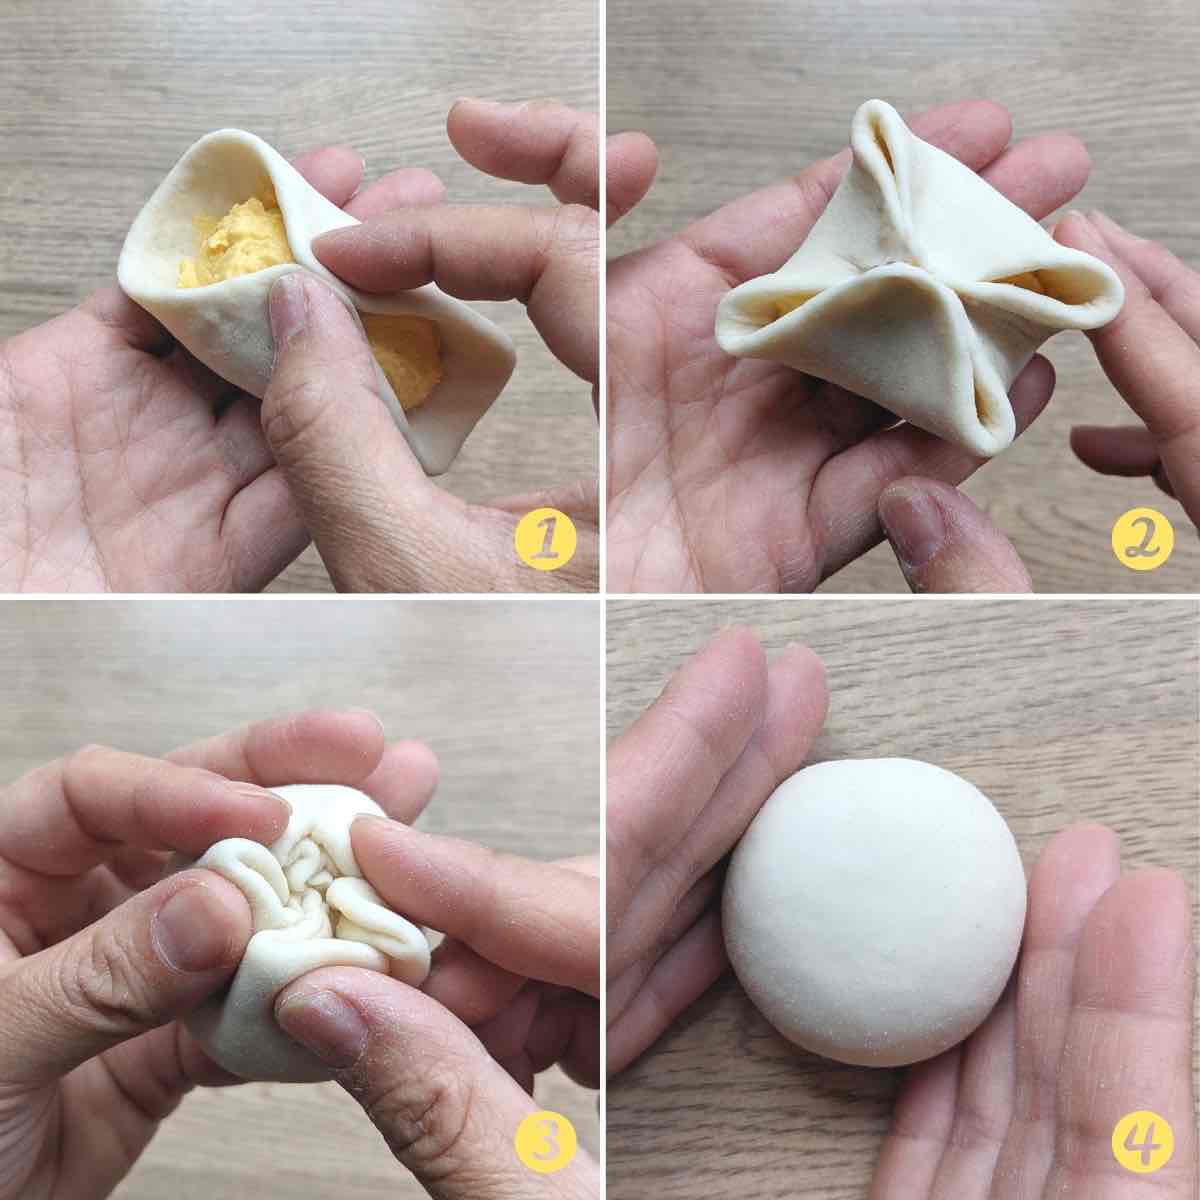
Compared to Baozi (savoury stuffed buns), it’s much easier to assemble custard buns. Put a spoonful of the filling in the middle of a wrapper and seal it into a ball. No fancy pleating is required as the sealed part is facing down while steaming.
Follow the simple four-corner method shown in the image above (also in the video) or any other way you feel comfortable with. No matter which technique you use, it’s crucial that each bun is completely sealed. Otherwise, the filling will leak out when softened during steaming.
Rest and Steam
With the sealed part facing downwards, place all the buns into a steamer basket. To prevent sticking, I used cupcake paper moulds which are the perfect size for these buns. Alternatively, line the basket with parchment paper or brush a thin layer of oil if using a metal/plastic steamer.
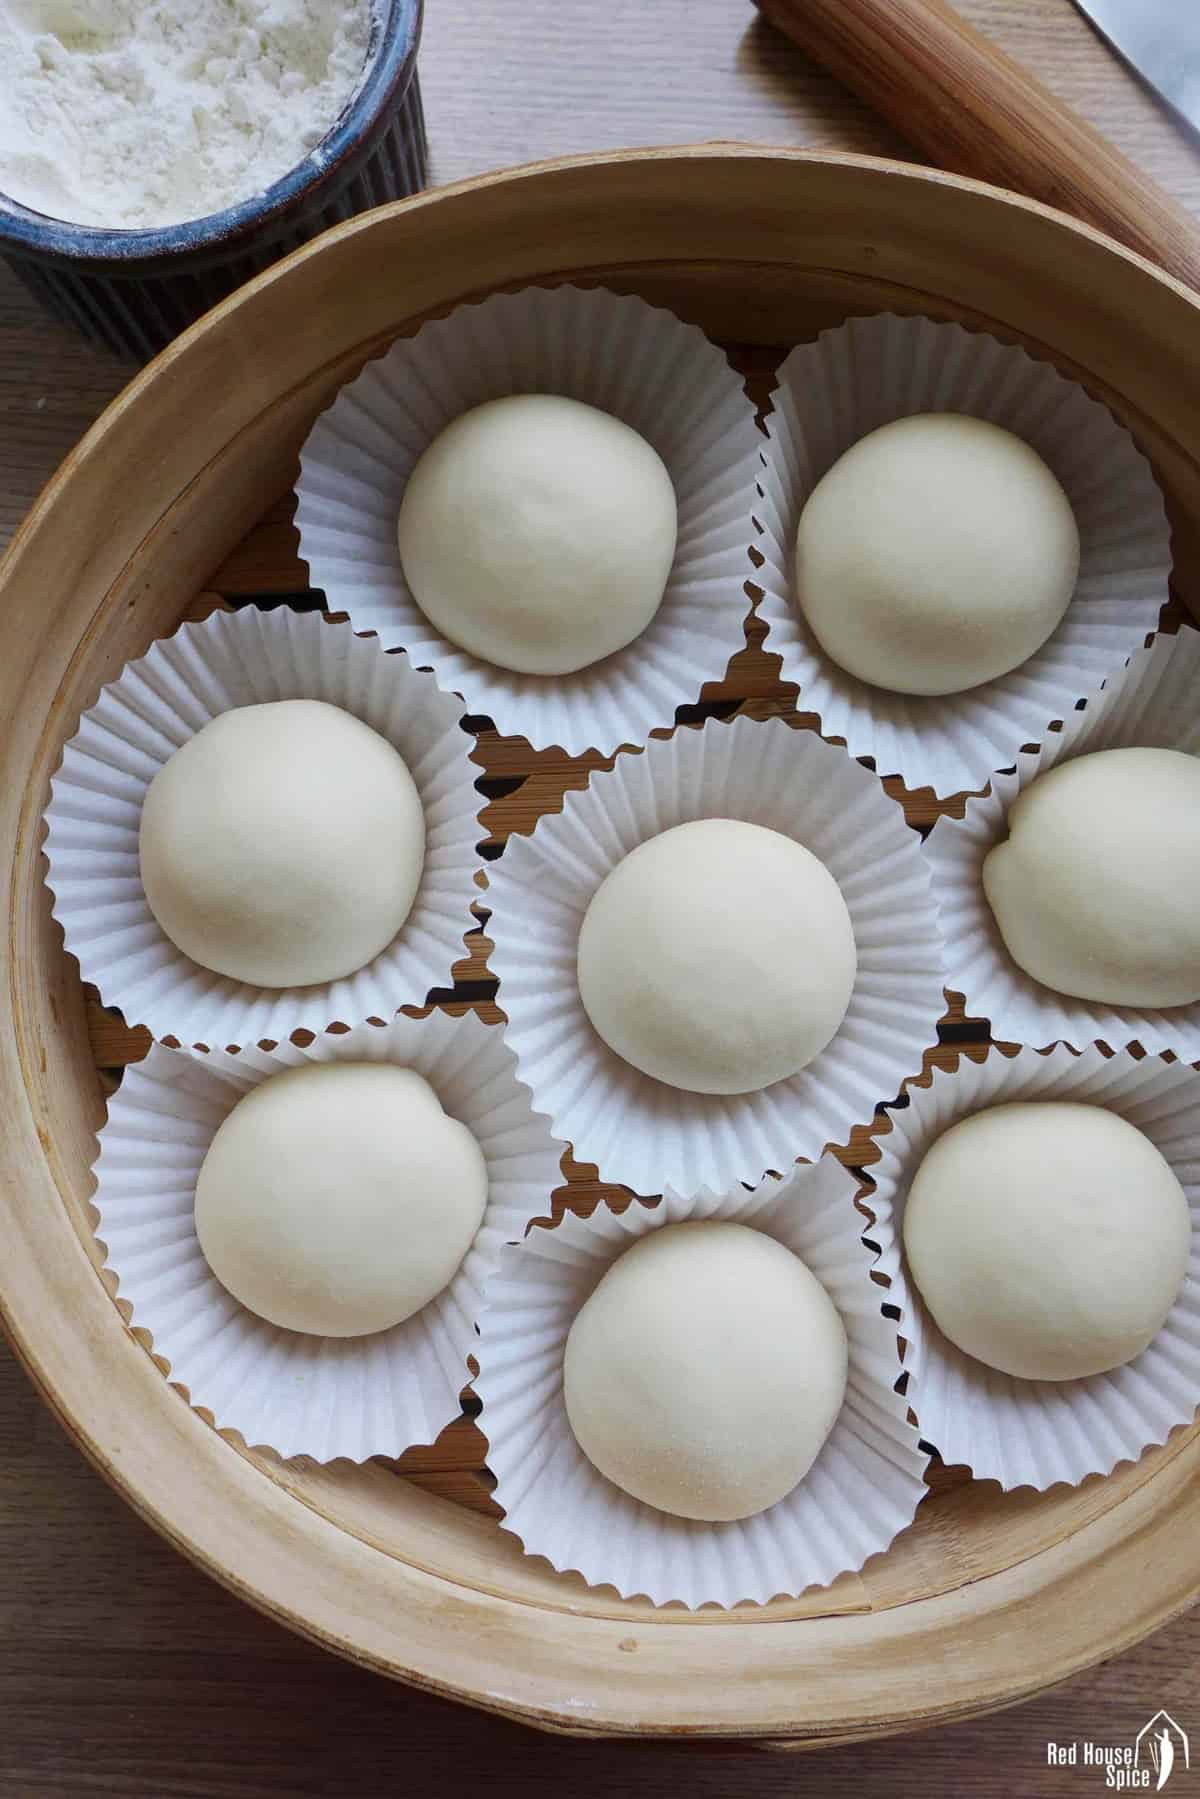
Leave the buns to rest in a warm place to proof for about 30 minutes. During this process, they’ll grow a little bigger (but won’t double) and become plumper (the surface of the wrappers looks tighter and smoother).
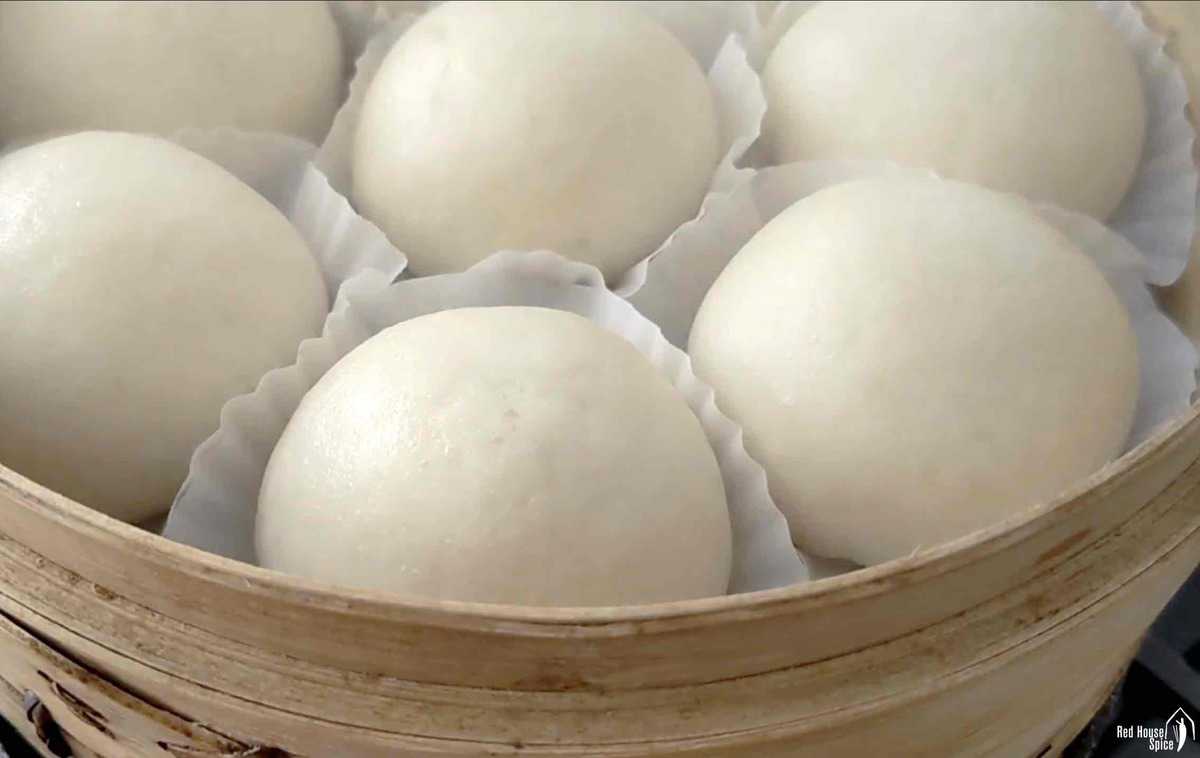
Now, let’s cook! Bring water to a full boil in a wok/pot. Then place in the steamer basket. Cover with a lid. Leave to steam over medium-high heat for 8 minutes. If making a bigger batch, you can stack up 2-3 baskets and steam all at once (The cooking time remains the same).
Store and reheat
Don’t delay enjoying your freshly cooked custard buns! Silky, semi-runny filling in light, fluffy wrappers, they taste heavenly when hot. Once cooled, the texture will become less pleasurable.
Made a big batch and have some leftovers? Keep them in the fridge for up to 4 days or in the freezer for 3 months. To reheat, defrost the buns in the fridge then steam for 3 mins. Alternatively, steam for 6 mins without defrosting.
🛎 Note: In case you’d like to know, it’s not recommended to freeze uncooked buns as they’re made of leavened dough (unlike dumplings).
Other Classic Treats
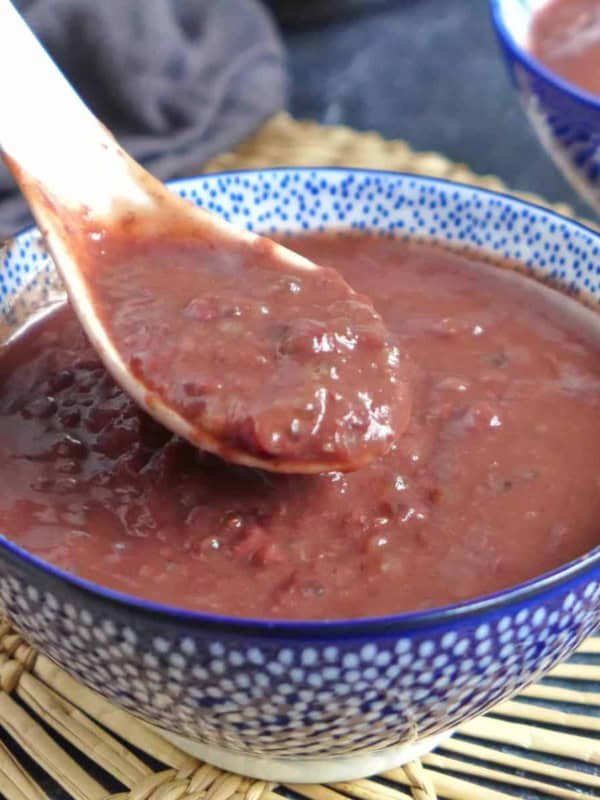
Once you’ve mastered the skill of making stuffed buns, you can try other fillings, such as Red Bean Paste, Black Sesame Paste, etc.
Interesting in other Chinese treats and desserts? Check out these recipes:

📋 Recipe card
Love this recipe? Please leave a 🌟🌟🌟🌟🌟 rating and a comment. Thank you!
Steamed Custard Buns (Nai Wong Bao,奶黄包)

Ingredients
For the filling
- 3 yolks of hard-boiled eggs, or cooked salted duck egg yolks, see note 1
- 50 g unsalted butter, softened
- 30 g sugar, or 40g if using salted egg yolks
- 30 g full-fat milk powder, see note 2 for substitutes
For the dough
- 175 g bao flour/cake flour, or all-purpose flour, see note 3
- 1 teaspoon instant dry yeast, see note 4
- 1 teaspoon baking powder
- 1 tablespoon sugar
- 1 tablespoon neutral cooking oil
- 90 g lukewarm water, see note 5
Instructions
Prepare the filling
- Use the back of a spoon to mash the yolks to a fine texture (It’s easier to do while the yolks are warm).
- Add sugar, butter and milk powder. Mix very well until a smooth paste forms. Put into the fridge to harden a little.
Make the dough
- IF USING HANDS: Mix flour, yeast, baking powder, sugar and oil in a bowl. Add water gradually while mixing with chopsticks/spatula. Combine with your hands to form a rough-looking dough. Rest (covered) for 10 mins then knead again until very smooth.
- IF USING A STAND MIXER: Add all the ingredients for the dough into the mixing bowl. Knead on low speed for about 8 mins until a smooth dough forms.
Roll the wrappers
- Divide the dough into 8 equal parts. Work on one piece at a time and make sure you cover the rest to prevent it from drying out.
- With a rolling pin, flatten one piece into a disc-like wrapper, about 9cm in diameter. Ideally, it should be thinner on the edge and thicker in the middle (See the rolling technique in the video above).
Shape the buns
- Place a spoonful of the filling in the middle of a wrapper. Seal the bun completely using whatever method that you feel most comfortable with. Repeat to assemble all the buns.
Rest the buns
- With the sealed side facing down, place the buns into a steamer basket lined with parchment paper (or in cupcake paper moulds as shown in the post above). Alternatively, brush a thin layer of oil if using a metal/plastic steamer.
- Leave to rest for about 30 minutes until they become very light & plump (They will become a little bigger but not double in size).
Steam the buns
- Bring water to a full boil in a wok/pot. Put in the steamer basket. Cook over medium-high heat for 8 mins. Serve warm.
Store & reheat
- It’s not recommended to store uncooked buns. However, cooked buns freeze very well. Consume within three months.
- To reheat: Defrost in the fridge then steam for 3 mins. Alternatively, steam for 6 mins without defrosting.
Notes
- Option 1: Cook them in the shell in boiling water for 8 minutes. Peel off the shell and the egg whites.
- Option 2: Crack the eggs and rinse off the egg whites. Steam the yolks for 8 minutes or bake them in a preheated oven at 190°C / 375°F for 8 minutes.
Your Recipe Notes
Nutrition
Nutrition information is automatically calculated, so should only be used as an approximation.


I’m so happy I can now make custard buns at home! They’re one of my favorite sweets. Your recipe is clear and easy to follow, thanks for sharing it. But I’m still not able to fully replicate your results, the filling is not runny at all 🙁 I tried twice, first time using the same quantities you indicate and the second increasing butter (to 70g) as you suggest in another comment. But the filling is still solid. I also tried cooking them more than you suggest to heat them up more. Do you have any idea why? Btw the taste is still super even if the filling is solid 🙂
Thank you so much for trying the recipe. I’m honestly a little puzzled, as the filling shouldn’t become solid after steaming. Since it’s made from yolks, butter, sugar, and milk powder, it should actually soften as the butter and sugar melts, especially when the buns are eaten piping hot. If you found the filling firm after the buns had cooled or chilled, that’s expected, as the butter will firm up again. The only other possibility I can think of is that your egg yolks were much larger than the ones I used, which would change the filling ratio slightly. Otherwise, I’m not entirely sure what caused it.
Hi, could I ask why you don’t use cornstarch? Is it simply not needed?
I’m comparing a lot of recipes and noticed that most of them use cornstarch.
Do you mean mixing flour with cornstarch? It’s not necessary if you use bao flour or cake flour, which already have low protein content. If you’re using all-purpose flour, you can replace a small portion of it with cornstarch to lower the protein level and make the buns lighter. Happy cooking!
Can i use nonfat milk powder?
I haven’t tested the recipe with non-fat milk powder. I assume it still works but the taste wouldn’t be as rich.