

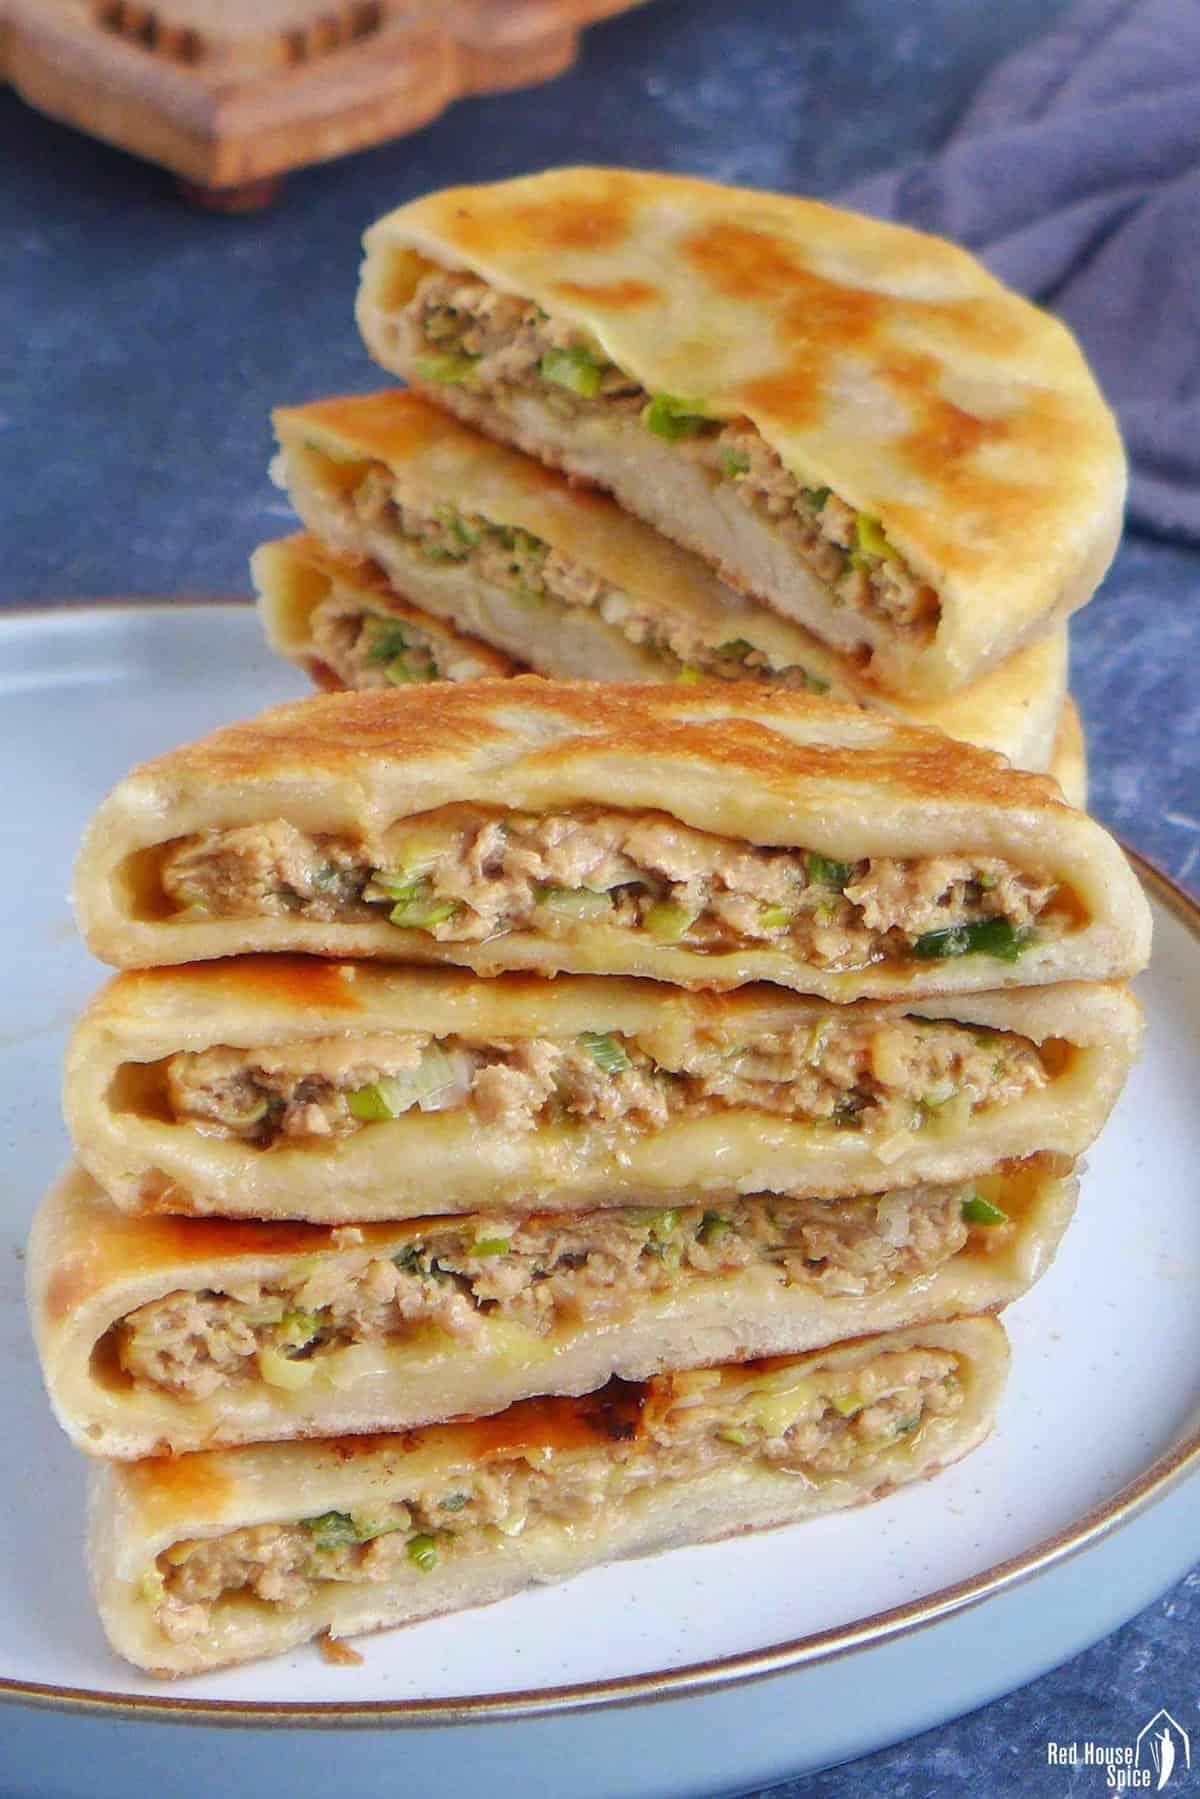
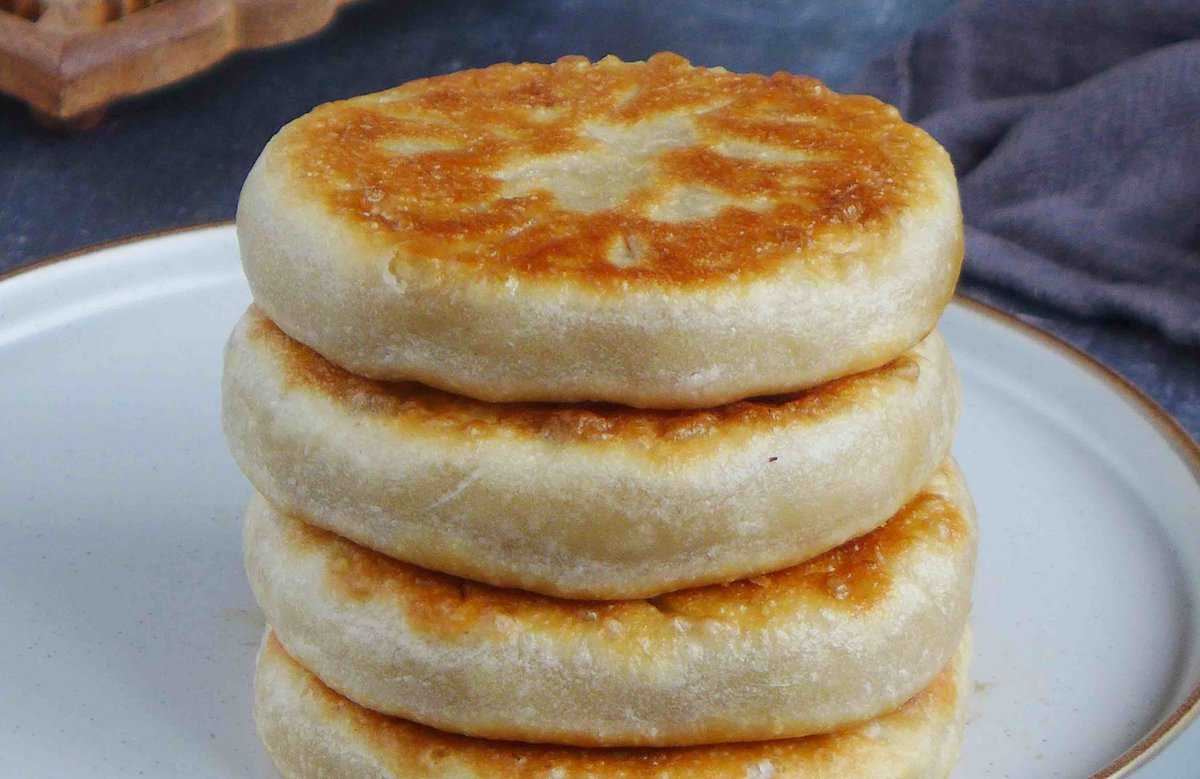
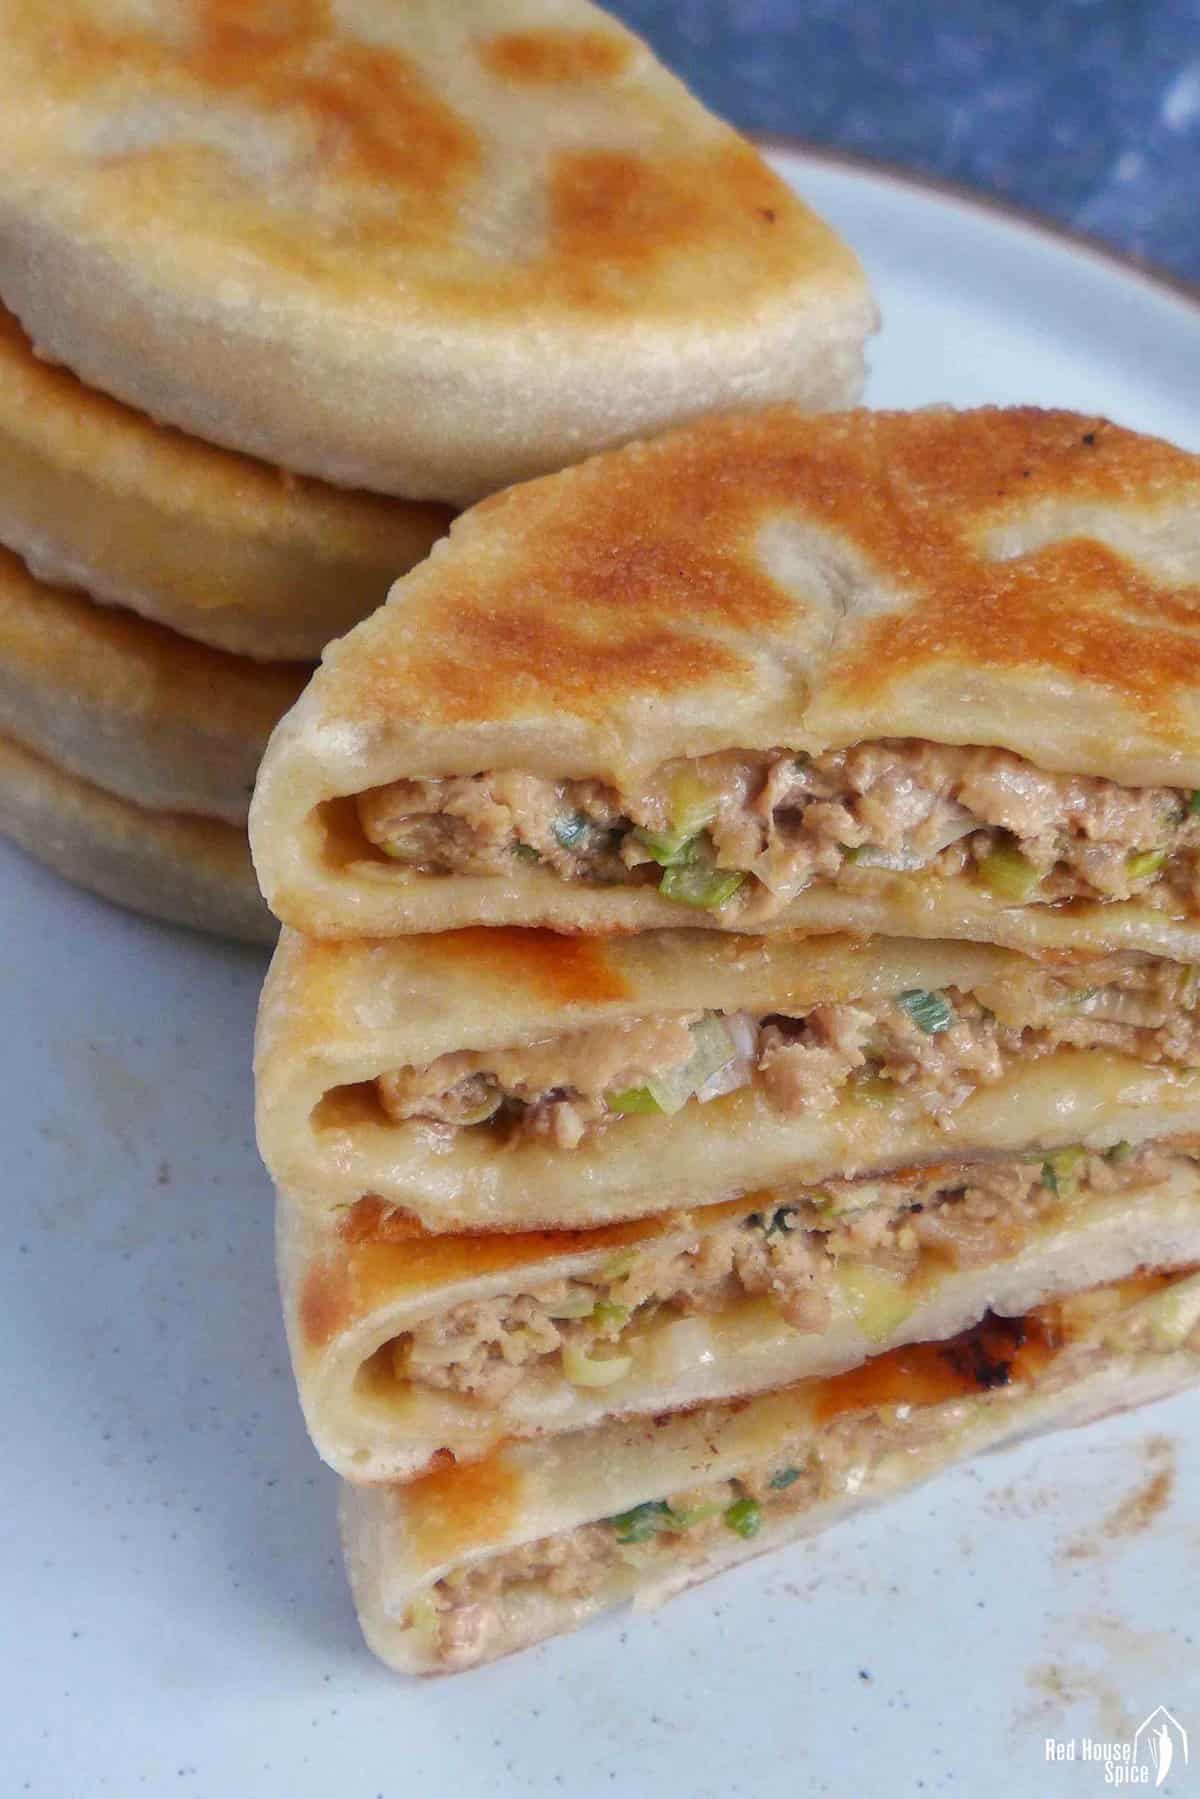
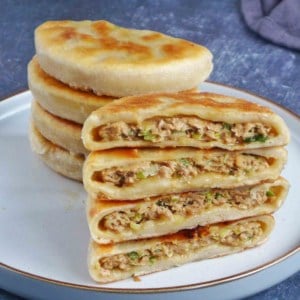
With their juicy filling encased in golden wrappers and pan-fried to perfection, Chinese meat pies are a delightful staple that you simply must try.
Pin this now to find it later!
Pin ItTable of Contents
What are Chinese meat pies
Chinese meat pies, known as Xiàn Bǐng/馅饼, are a type of stuffed flatbread popular throughout China. They offer a rich diversity of fillings, shapes, and flavors, catering to a wide range of tastes.
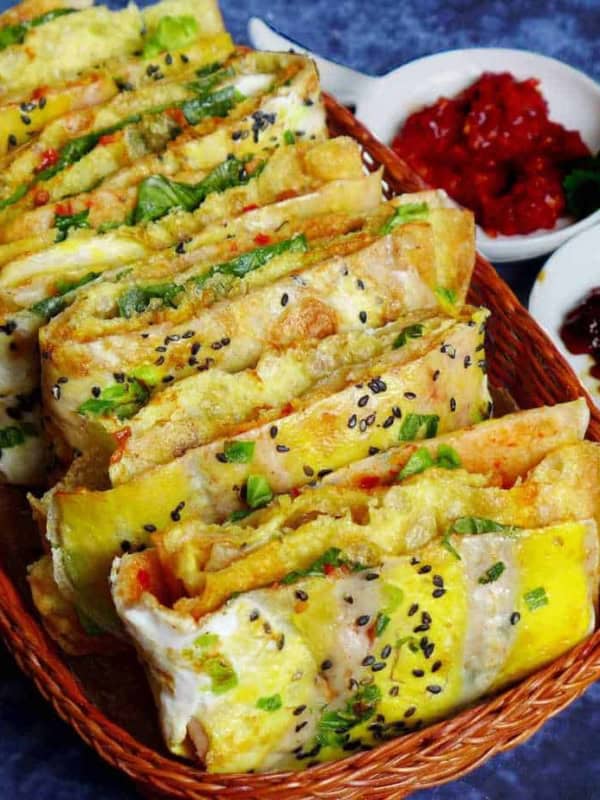
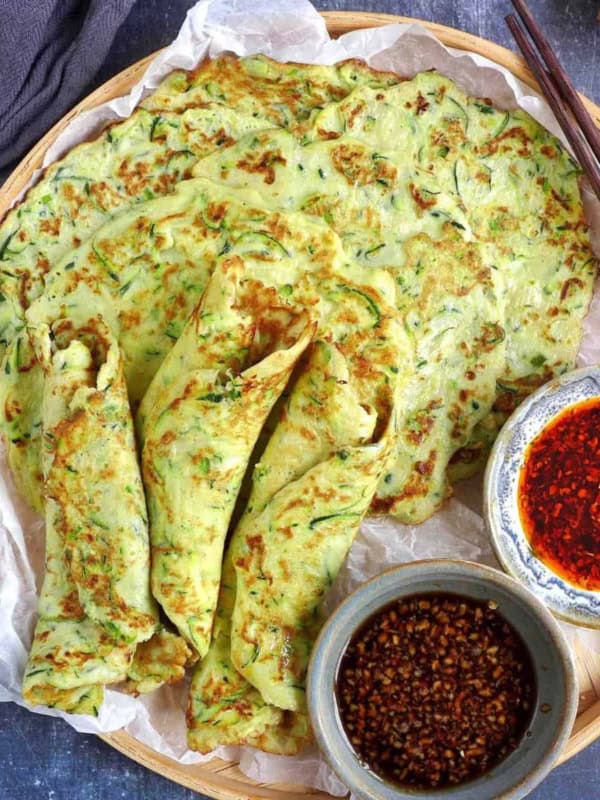
Imagine a cross between a giant dumpling and a flatbread, pan-fried to a golden shine. If you enjoyed my recipe for Crispy Stuffed Flatbread or Scallion Pancakes, you’ll find these meat pies to be an excellent alternative.
My version showcases how my parents make them, using a mixture of fatty ground meat and a generous amount of scallions. However, I’ve enhanced their dough recipe by adding extra water and a little oil, which results in a more tender mouthfeel.
Top tips
As usual, I’d like to first point out a few tips to help you achieve the best result.
- Allow enough time to rest the dough.
- Add water/stock to the filling for a juicy texture.
- Watch the tutorial to learn the assembly technique
- Freeze uncooked pies and cook whenever you wish.
Make the dough
For the dough, you only need three elements: all-purpose flour, water (both hot and room-temperature), and cooking oil. Through testing, I’ve found this combination to be the best formula for producing a soft, palatable texture in Chinese meat pies.
Here is how you make it by hand:
- Firstly, add hot water (just boiled) to the flour. Stir to distribute. Then, add room-temperature water and cooking oil.
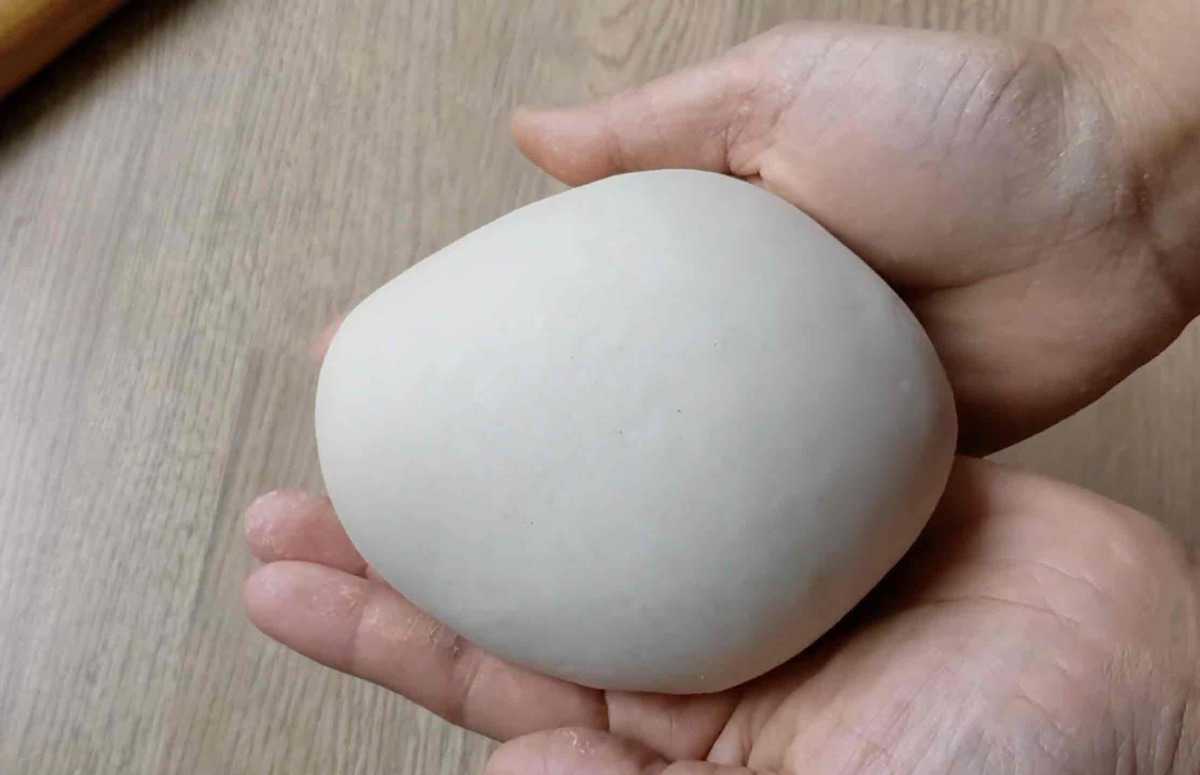
- Mix and combine to form a soft, cohesive, rough-looking dough. Leave to rest, covered, for 20 minutes. Knead it again until perfectly smooth.
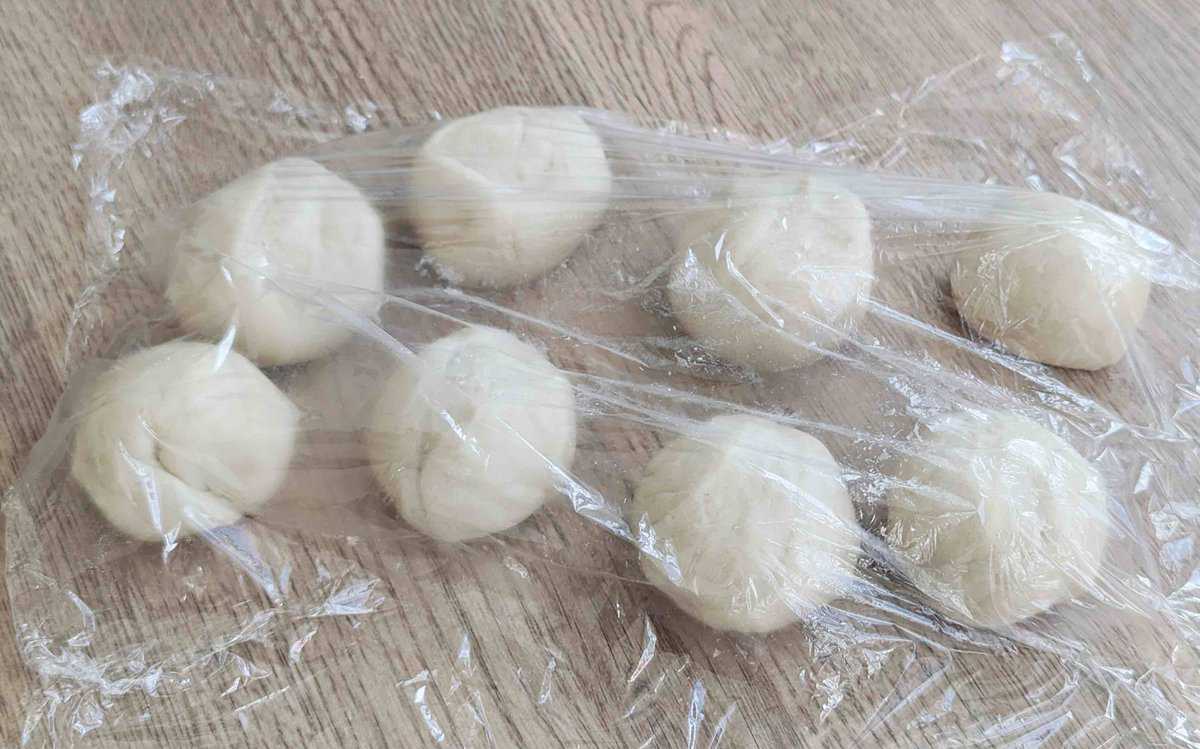
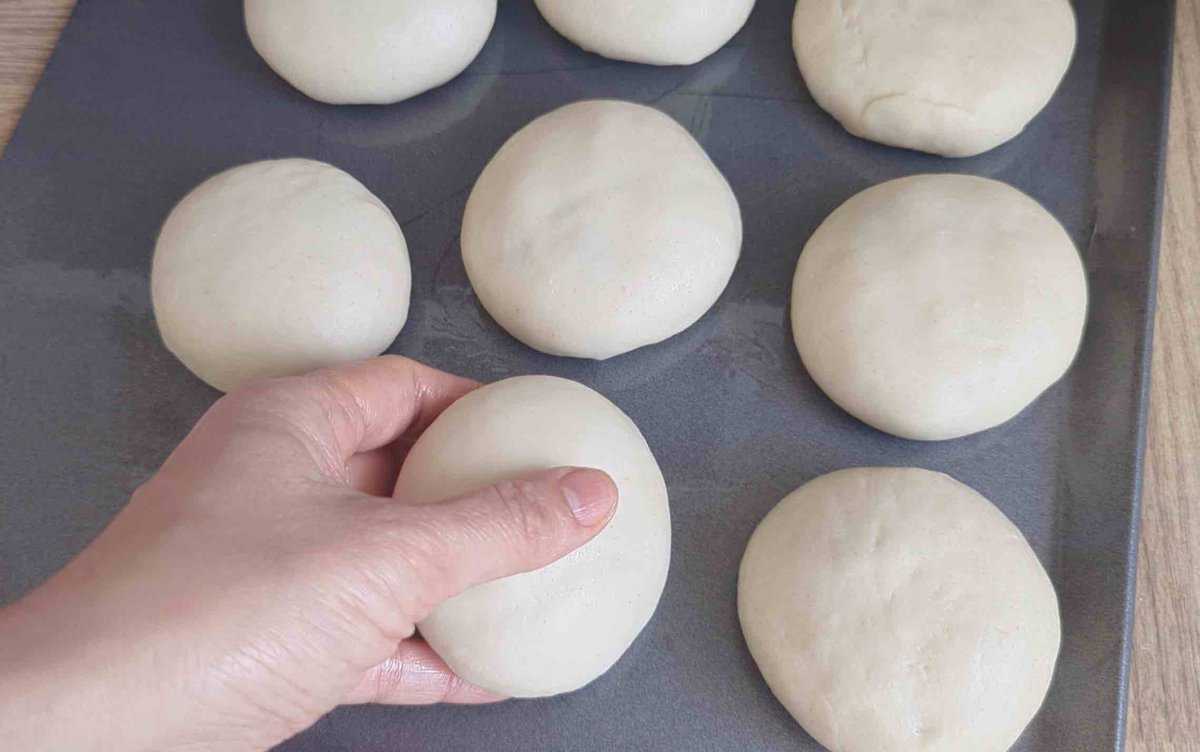
- Divide the dough into equal pieces. Coat each with a little oil and cover with plastic wrap. Let them rest for 10 minutes before assembling.
🌟 NOTES:
- This dough is supposed to be quite soft (it has a higher liquid content than dumpling dough or bao dough). Dust your hands with flour when combining and kneading to prevent sticking.
- Resting is important because it allows the gluten bonds to develop, making the dough more elastic and stretchy.
Mix the filling
Here is a list of ingredients you need for the filling (substitutes included when possible):
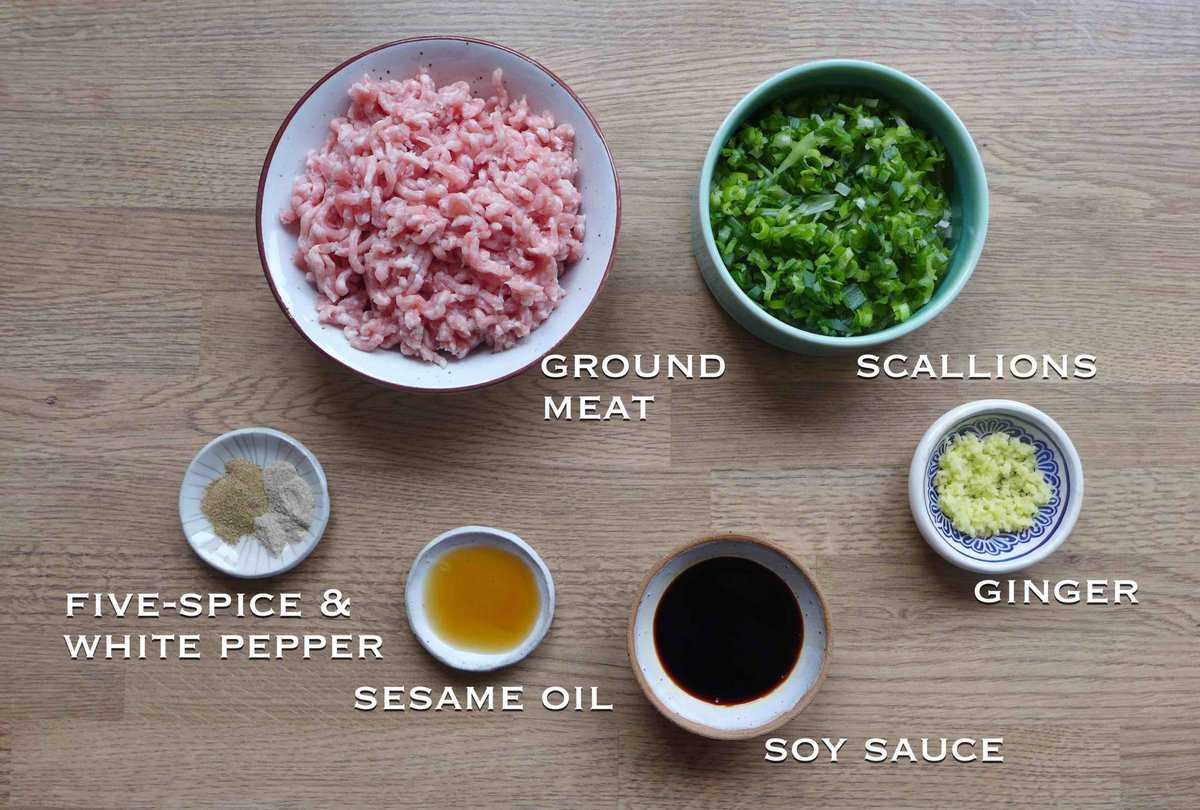
- Ground meat. It can be pork, beef or lamb.
- Scallions. Chinese chives can be used as a substitute.
- Ginger.
- Light soy sauce & dark soy sauce. The former provides the key umami saltiness, while the latter offers a caramelized sweet undertone.
- Sesame oil, for extra aroma and nuttiness.
- Ground spices. I use a combination of Sichuan pepper and white pepper. Five-spice or cumin powder are good substitutes.
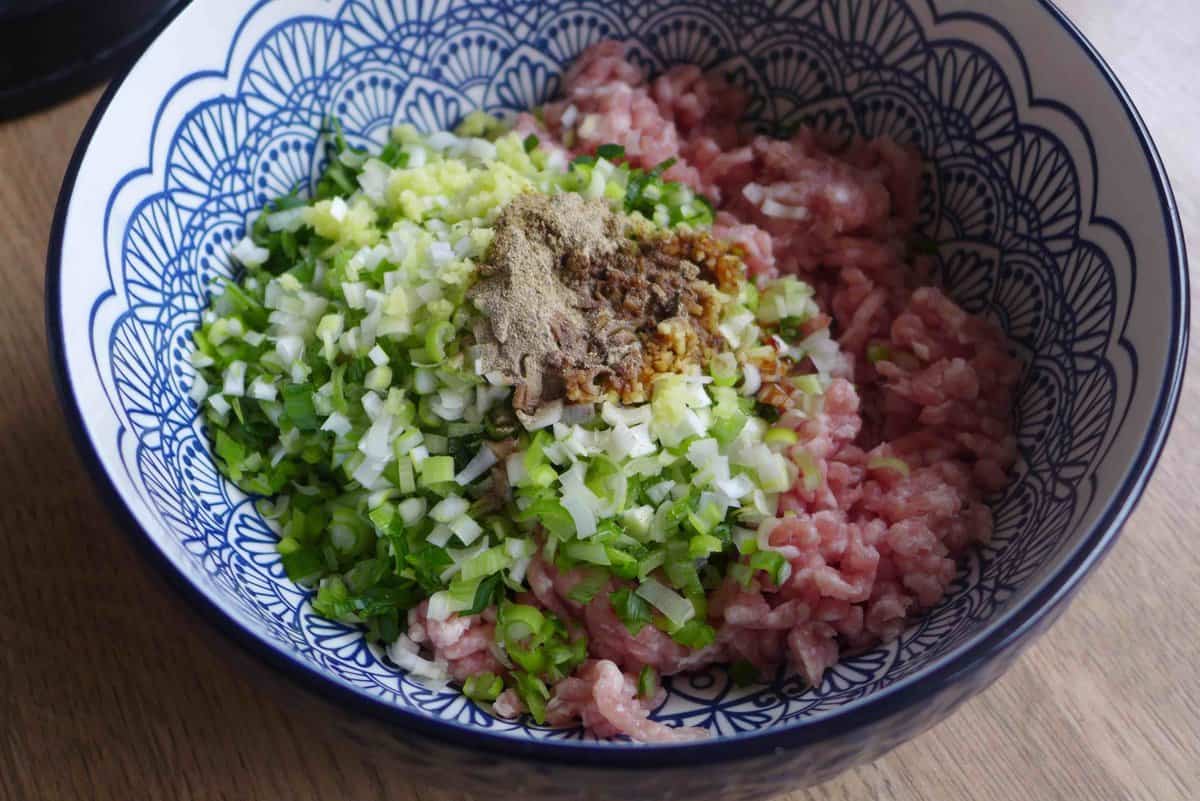
Like how I explained in my post on Dumpling Fillings, two factors contribute to a juicy, tender filling:
- Use ground meat that has a high-fat content. 15-20% of fat is what I usually choose.
- Add water, or unsalted stock if available, to the filling. Make sure to stir the mixture very well so the liquid is fully absorbed by the meat.

Assemble the pies
To shape a Chinese meat pie, you need to wrap the filling with a dough wrapper into a ball, similar to how you assemble a Baozi (stuffed bao bun).
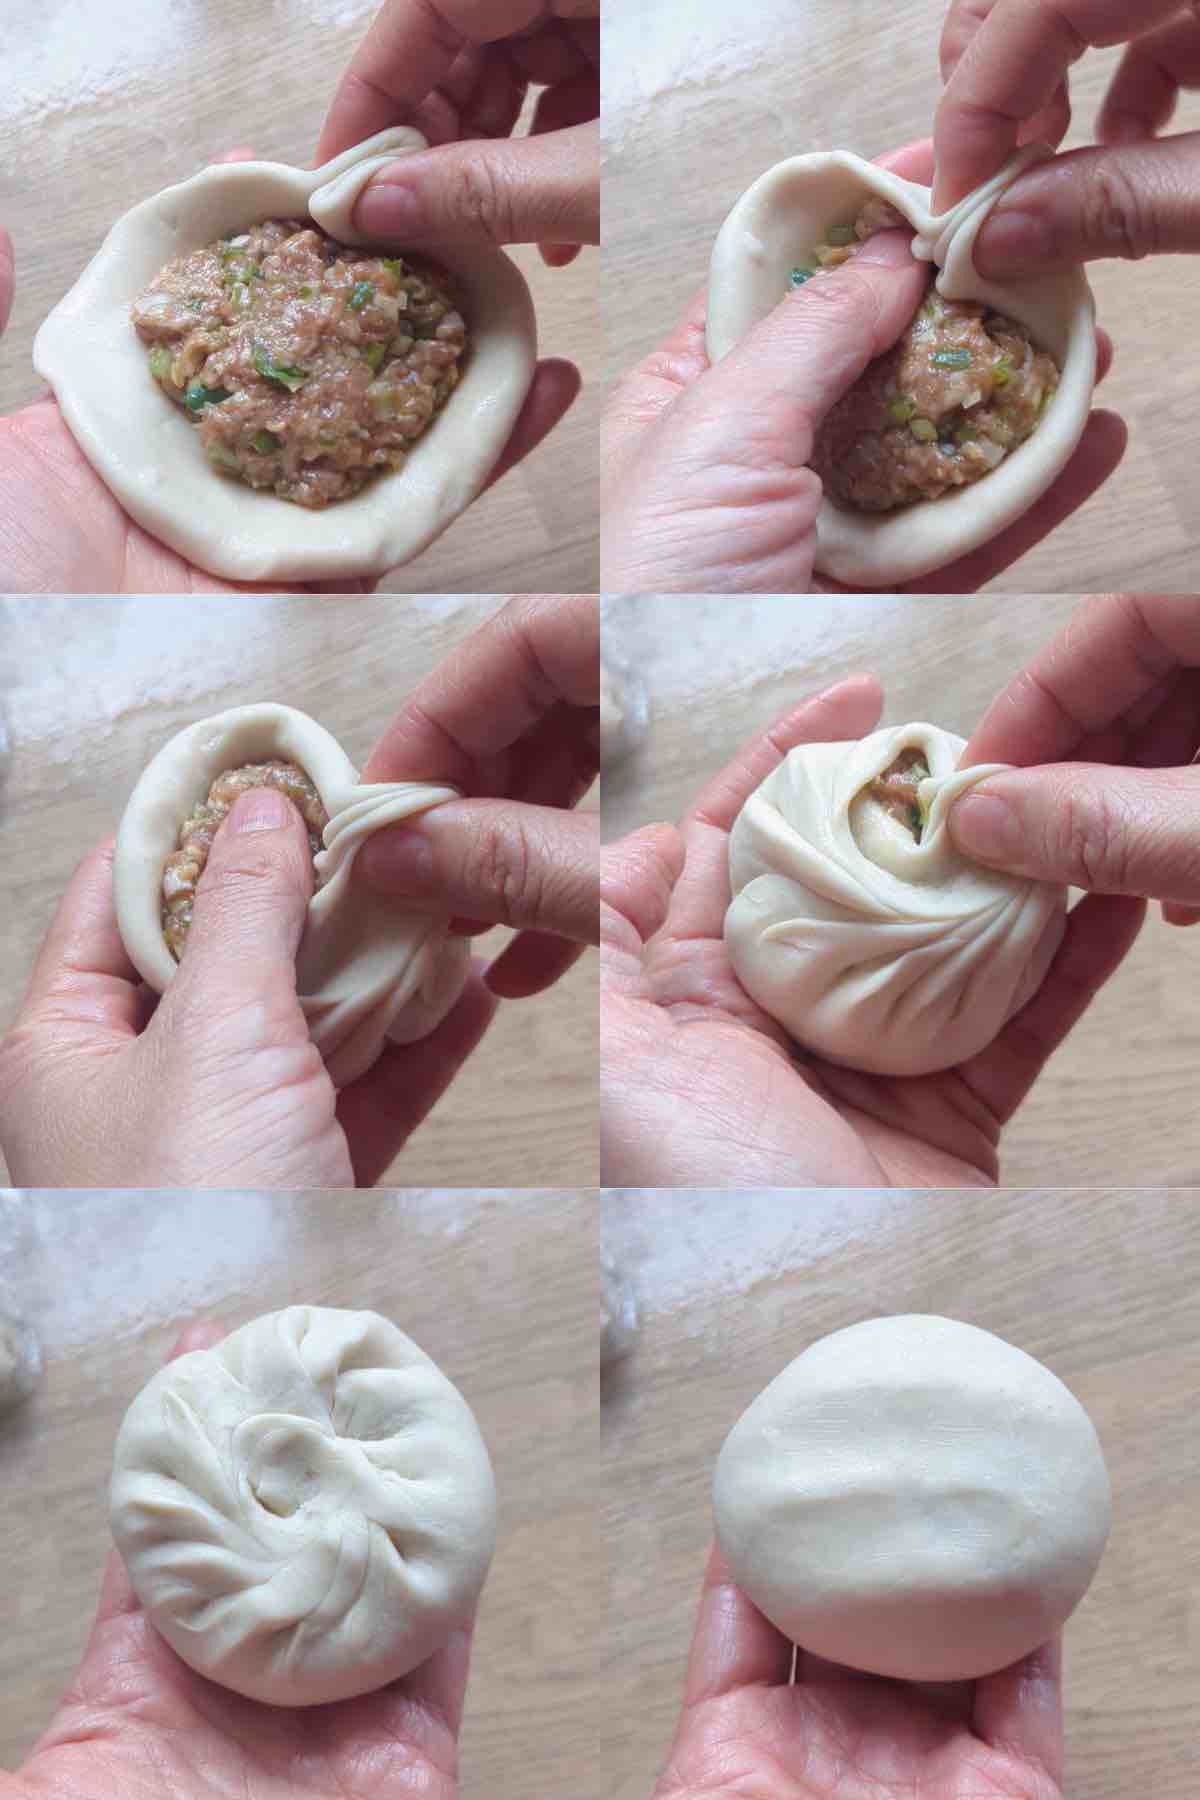
Place it over a lightly oiled tray, with the sealed side facing down, before pan-frying starts. You don’t need to flatten the balls at this stage.
To clearly understand how it works, please watch the video tutorial inside the recipe card below. Here are a few tips you may find helpful:
- Use oil, instead of flour, to coat the work surface and your hands. This way the dough stays soft and easy to stretch.
- To achieve the optimal result of Pí Bó Xiàn Dà/皮薄馅大 (meaning thin skin and big filling), stuff the wrapper with plenty of filling. Wrap it with the dough as tightly as possible.
- If you find this method challenging, simply shape the pie into a flat half-moon, like how a Chinese Chive Pocket looks.
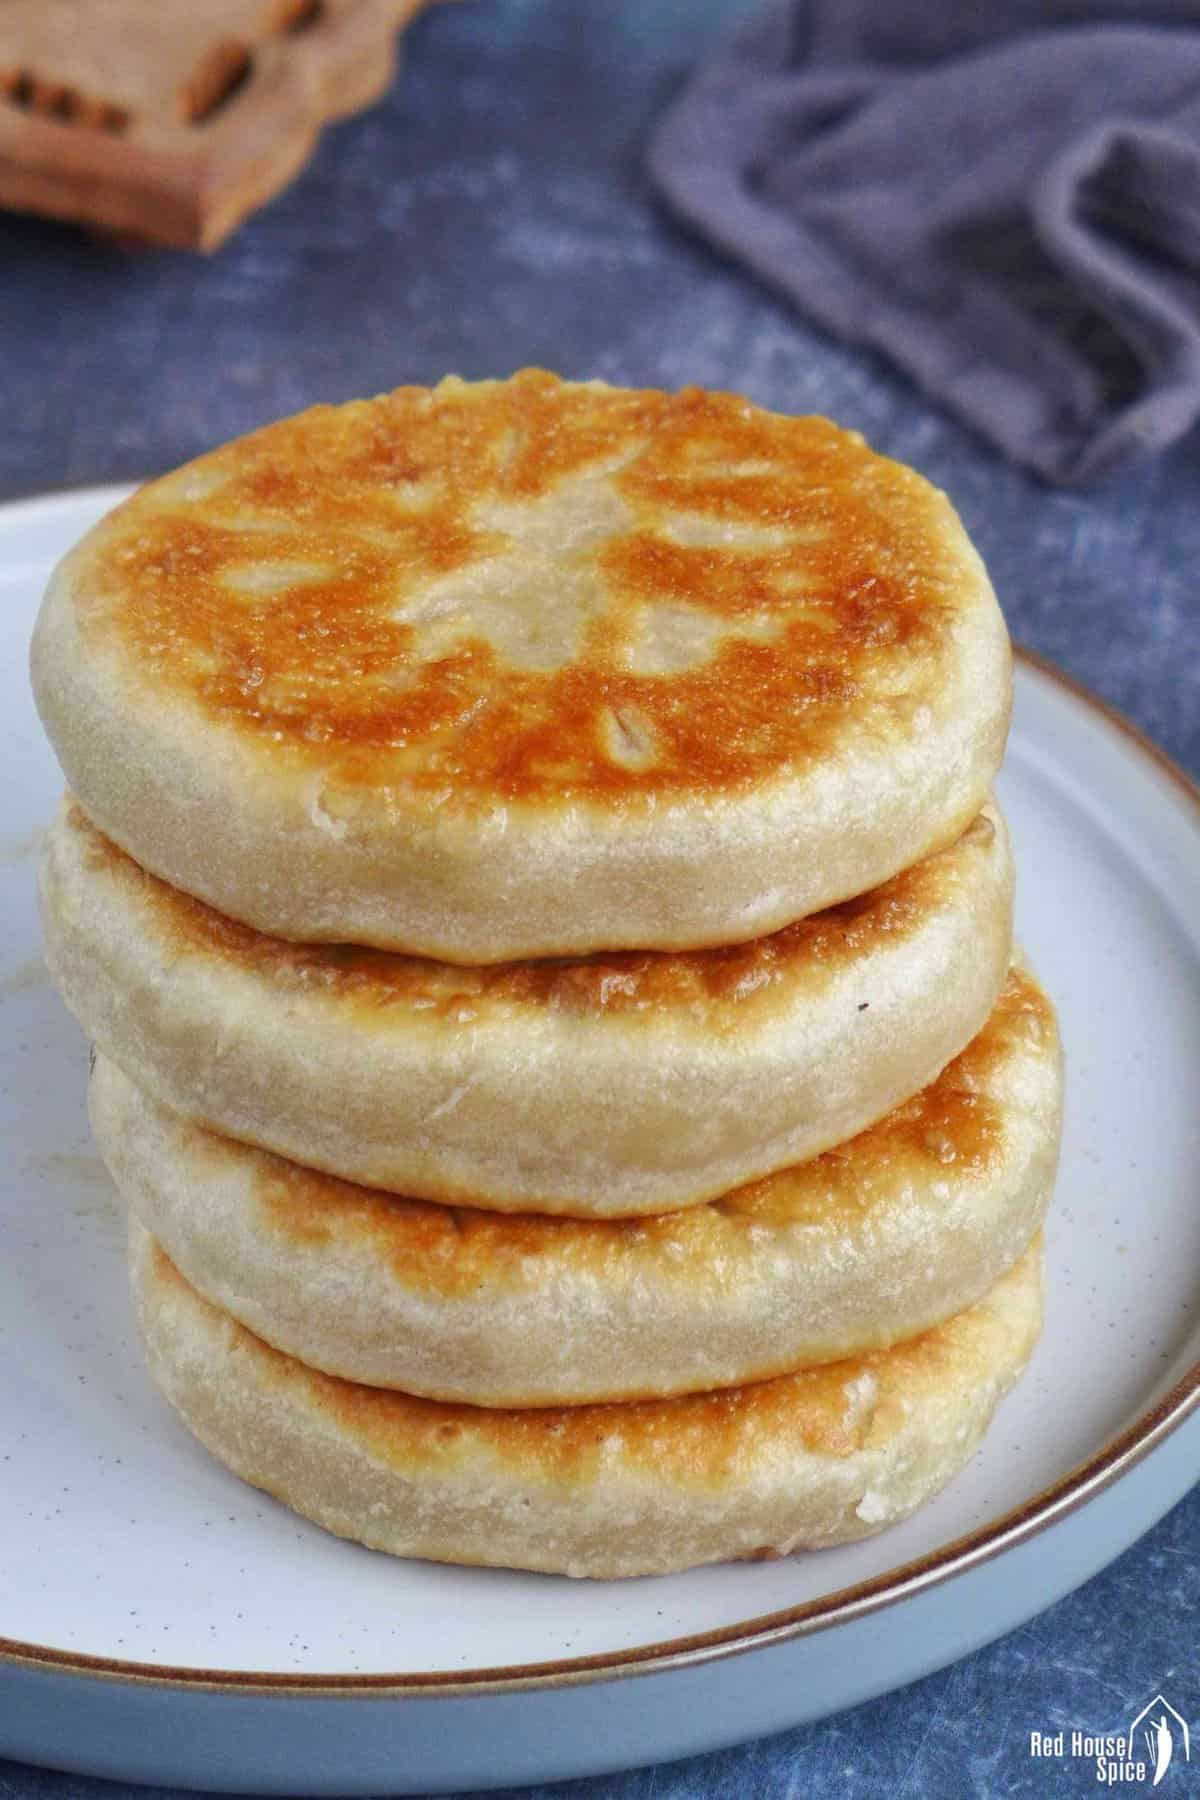
Pan-fry the pies
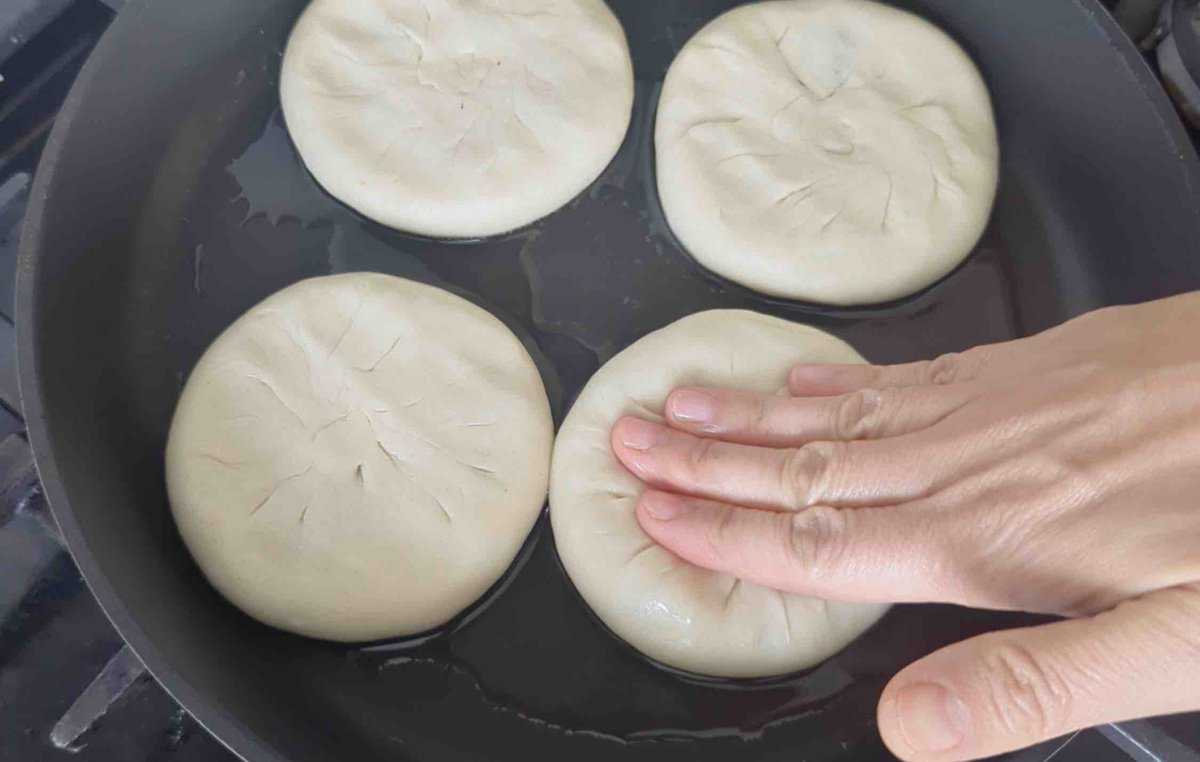
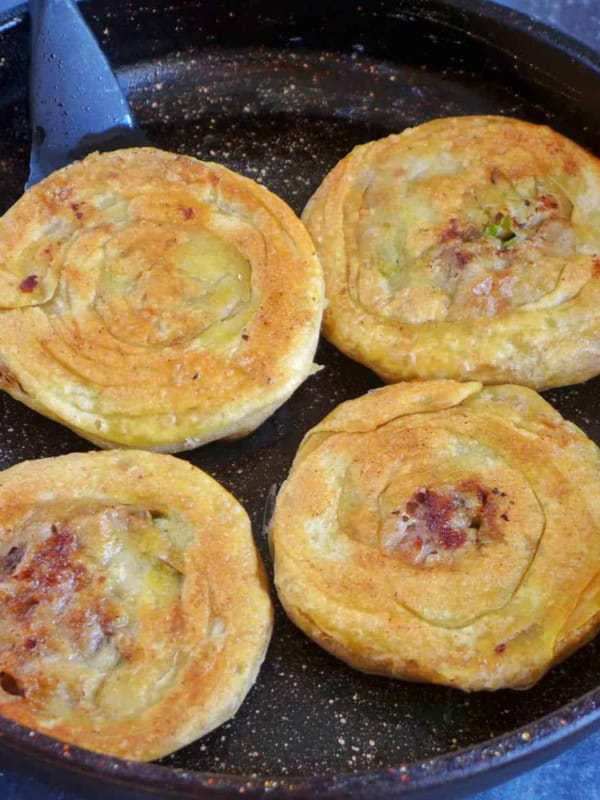
Choose a heavy-bottomed skillet/frying pan. Add enough oil to thinly cover its surface. Heat for half a minute then put in the assembled dough balls (do not overcrowd). Use your fingers, or a spatula, to flatten each into a disc.
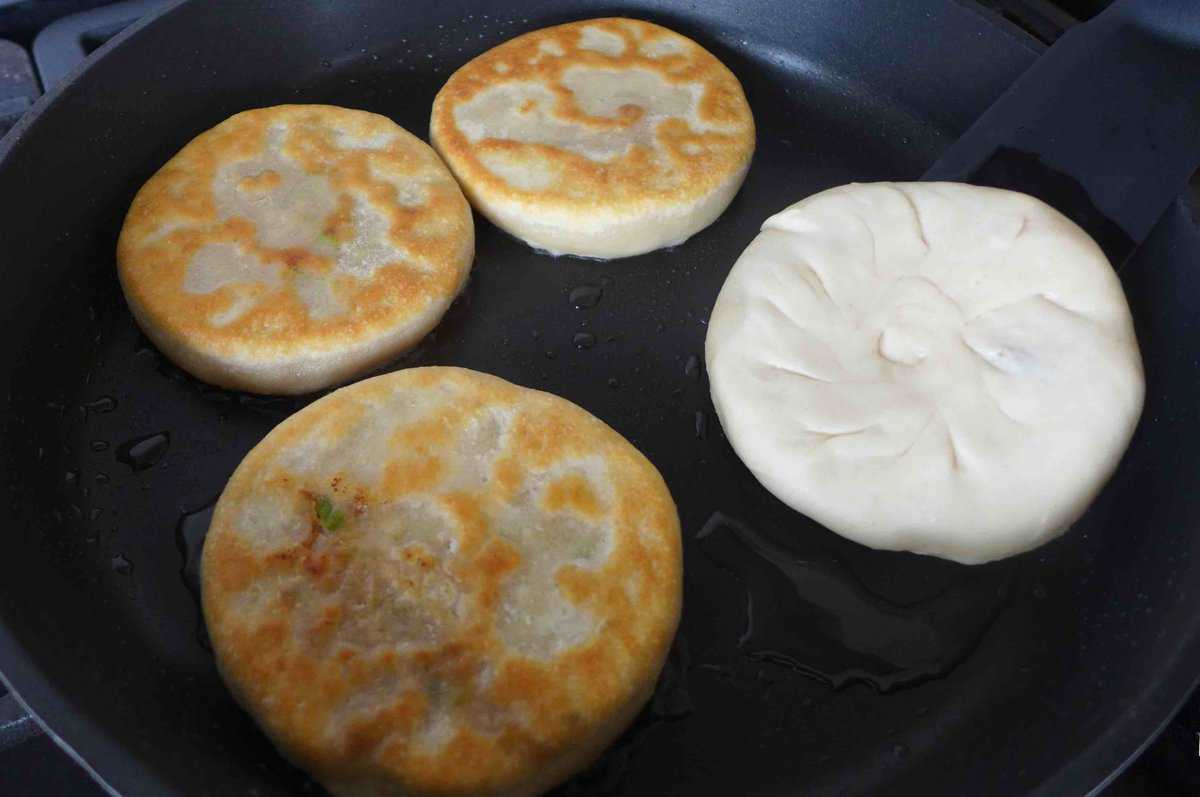
Over low heat, fry them until the first side gains a golden color. Flip over then cover with a lid. Continue cooking until the other side browns nicely.
Finally, flip over the pies again to further crisp the first side before transferring them out to a tray lined with paper towels to soak up any excess oil.
Serving ideas
Enjoy these juicy meat pies while warm. They are great on their own as breakfast or snack. Dip them in Chinese chili oil if you crave something spicy.
My family also has them for dinners, paired with bowls of congee and a few refreshing cold dishes, such as Smashed Cucumber, Scallion Silken Tofu, Tiger Salad, etc.
Make ahead
If you wish to have these meat pies as breakfast on busy mornings, follow these make-ahead tips:
- Freeze uncooked pies. Flatten the assembled dough balls into discs. Place them on a tray and keep in the freezer until fully frozen. Transfer them into airtight bags and store for up to 2 months.
- Cook frozen pies. Without defrosting, pan-fry frozen pies over medium-low heat, with the lid on all the time, until both sides turn golden.
Other comforting staples
Looking for other classic Chinese bread recipes? Check out these popular ones:


📋 Recipe
Love this recipe? Please leave a 🌟🌟🌟🌟🌟 rating and a comment. Thank you!
Chinese Meat Pies (Xian Bing/馅饼)

Before You Start
Video
Ingredients
For the dough
- 300 g all-purspose flour, aka plain flour (see note 1)
- 120 g hot water
- 45 g room-temperature water, (see note 1)
- 2 tablespoon neutral cooking oil, plus extra for coating
For the filling
- 300 g ground pork, or beef/lamb
- 6 stalks scallions, finely chopped
- 1 tablespoon minced ginger
- 1 tablespoon light soy sauce
- 1 tablespoon dark soy sauce
- 1 teaspoon sesame oil
- ¼ teaspoon ground Sichuan pepper, or five-spice powder
- ¼ teaspoon ground white pepper
- 4 tablespoon water, or unsalted stock
For pan-frying
- Neutral cooking oil
Instructions
Prepare the dough
- Put flour into a mixing bowl. Pour hot water over then mix with chopsticks. Add room temperature water and cooking oil. Stir well then combine and knead with hands.
- As soon as a cohesive dough forms (it doesn’t need to look smooth), cover it and let it rest for 20 minutes.
- Knead the dough again until it becomes smooth. Coat the work surface and your hands with a little oil to prevent sticking. Roll the dough into a log then cut it into 8 equal portions.
- Shape each piece into a ball, making sure it’s lightly coated with oil from your hands. Cover them with plastic wrap, then leave to rest for a further 10 minutes.
Mix the filling
- While waiting for the dough to rest, prepare the filling by adding all the ingredients (meat, scallions, ginger, soy sauce, sesame oil, five-spice, white pepper, and water) into a mixing bowl. Stir with chopsticks in one direction until the mixture becomes sticky.
Assemble
- Put a piece of dough on the work surface. Flatten it into a disc with your fingers, about ⅕ inch (½ cm) thick.
- Hold the wrapper with your non-dominant hand. Place ⅛ of the filling over the wrapper. Use the thumb and index finger of your dominant hand to pleat the dough to wrap the filling tightly, while using the thumb of your non-dominant hand to push the filling inwards. Seal the dough securely in the middle (please refer to the video tutorial below).
- Place the assembled pie on an oiled tray. Repeat the procedure to shape other pies.
Pan-fry
- In a heavy-bottomed skillet/frying pan, heat oil enough to cover the surface. Gently put inthe stuffed dough balls and flatten them into discs with your fingers or a spatula, about 1 inch (2½ cm) thick (see note 2).
- Leave to fry over low heat until the first side becomes golden. Flip over the pies and cover the skillet with a lid. Fry until the other side browns. Flip again to further crisp the first side for 20 seconds or so.
Make ahead
- Flatten stuffed dough balls into discs. Lay them over a tray and freeze until solid. Transfer frozen pies into airtight bags. Store in the freezer for up to 2 months.
- Without defrosting, pan-fry frozen pies in a little oil over medium-low heat, with the lid on all the time, until both sides turn golden.
Notes
Your Recipe Notes
Nutrition
Nutrition information is automatically calculated, so should only be used as an approximation.


This recipe is so well explained and easy to follow! I love the juicy filling and soft dough. The tips and make-ahead options are super helpful too. Definitely a must try.
Thanks so much for the feedback!
Looks amazing cant wait to try
Happy cooking, Jean!
I haven’t made this recipe yet, could you bake these buns?
Baking won’t work for this recipe. Have a look at my recipe for Baked Bao Buns and you can swap the filling.
Absolutely delicious !!!
So happy you enjoyed my recipe!
I made this last night and it was awesome. It is now our replacement for potstickers .
So happy to hear that!
I made these tonight and they didn’t come out correctly. It was actually my fault with the water measurements and the recipe says room temperature but the video says cold water so that in itself could have been my issue. However the meat filling is delicious. I will attempt to make these again with hopefully the right measurements and temperature of water. My dough was sticky and didn’t cook like in the video it cooked more like a steamed dumpling. Trial and error and not giving up to achieve the perfect meat pie is what I plan to do.
I’m sorry for the confusion, Kristen! Both room temperature and cold water just refer to regular tap water. It’s meant to distinguish from the hot water used in the recipe. If the dough feels a bit sticky, try reducing the water slightly or adding a bit more flour, as different flour brands can absorb water differently. I’m so glad you enjoyed the filling, and I love your determination. You’ll definitely get that perfect meat pie next time!
I AM WORRIED WILL THE BEEF COOK THROUGH?
Yes, it will cook through if following the instructions. Happy cooking!
Just made these and they taste amazing! I didn’t make the dough quite thin enough, and I miscalculated my filling amount, so they were smaller with thicker crust than is meant. They STILL taste amazing. The whole family was getting excited to try them even while it was all still raw. The kids thought it was really fun and will likely be involved next time I make them. Next time I will use more oil to get the nice crisp exterior like in your pictures and video. Thanks for the excellent recipe!
So glad to hear they turned out delicious—sounds like a fun cooking session with the family! Can’t wait to hear how your next batch goes with that extra crisp!
Super yummy, I was surprised how easy it was to make the dough. I used beef instead of pork and still came out great. 谢谢。
My pleasure to share, Spencer! Yes, beef filling works well too. I’m delighted you enjoyed the recipe.
I absolutely love it. You definitely get a five star from me. Thank you for sharing your recipe.
My pleasure to share Tammy! So happy to know you enjoyed this recipe.