
A tried-and-tested recipe for Char Siu Bao, a Chinese dim sum stuffed bun that’s famous for its fluffy, cotton-like wrapper and saucy Char Siu filling. Many cooking tips and a tutorial video are included.
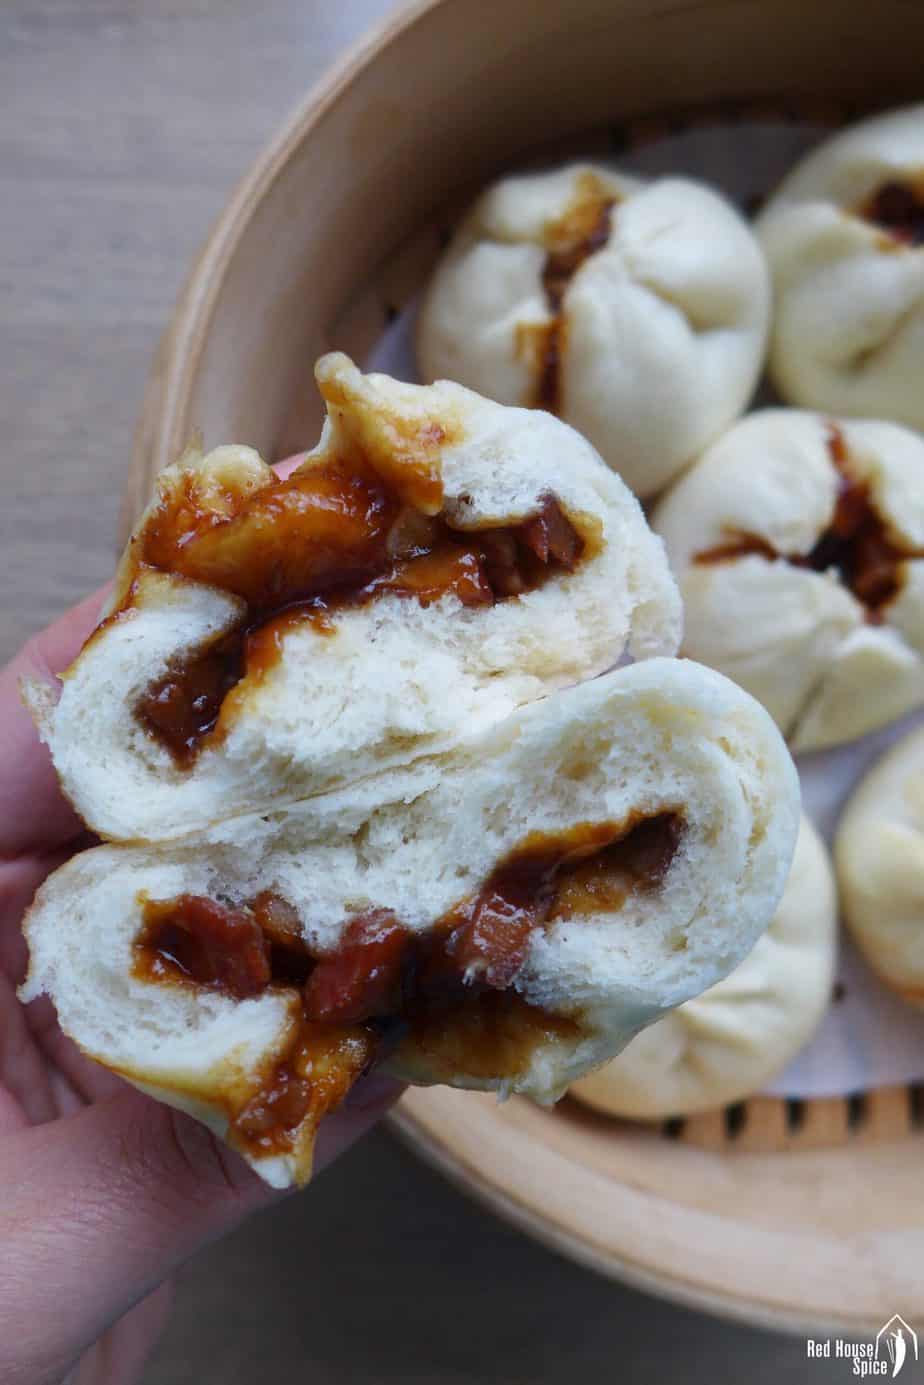
Table of Contents
What is Char Siu Bao
I’ve recently conducted a survey on my Instagram stories about Chinese dim sum dishes. Not surprisingly, Char Siu Bao/叉烧包 (Chinese BBQ Pork Buns) was among the most-loved dim sum choices.
In Canton (Guangdong/广东), China where dim sum originated, it’s considered one of the “Four Heavenly Kings of Dim Sum (早茶四大天王)” that you must order at a Yum Cha restaurant (The other three are Har Gow, Shumai and Egg Tart).
Compared to regular Chinese bao buns, dim sum style Char Siu Bao has distinctly different features:
- The cooked wrapper has an extra light and fluffy texture. It also has a noticeably sweeter taste.
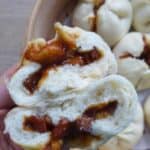
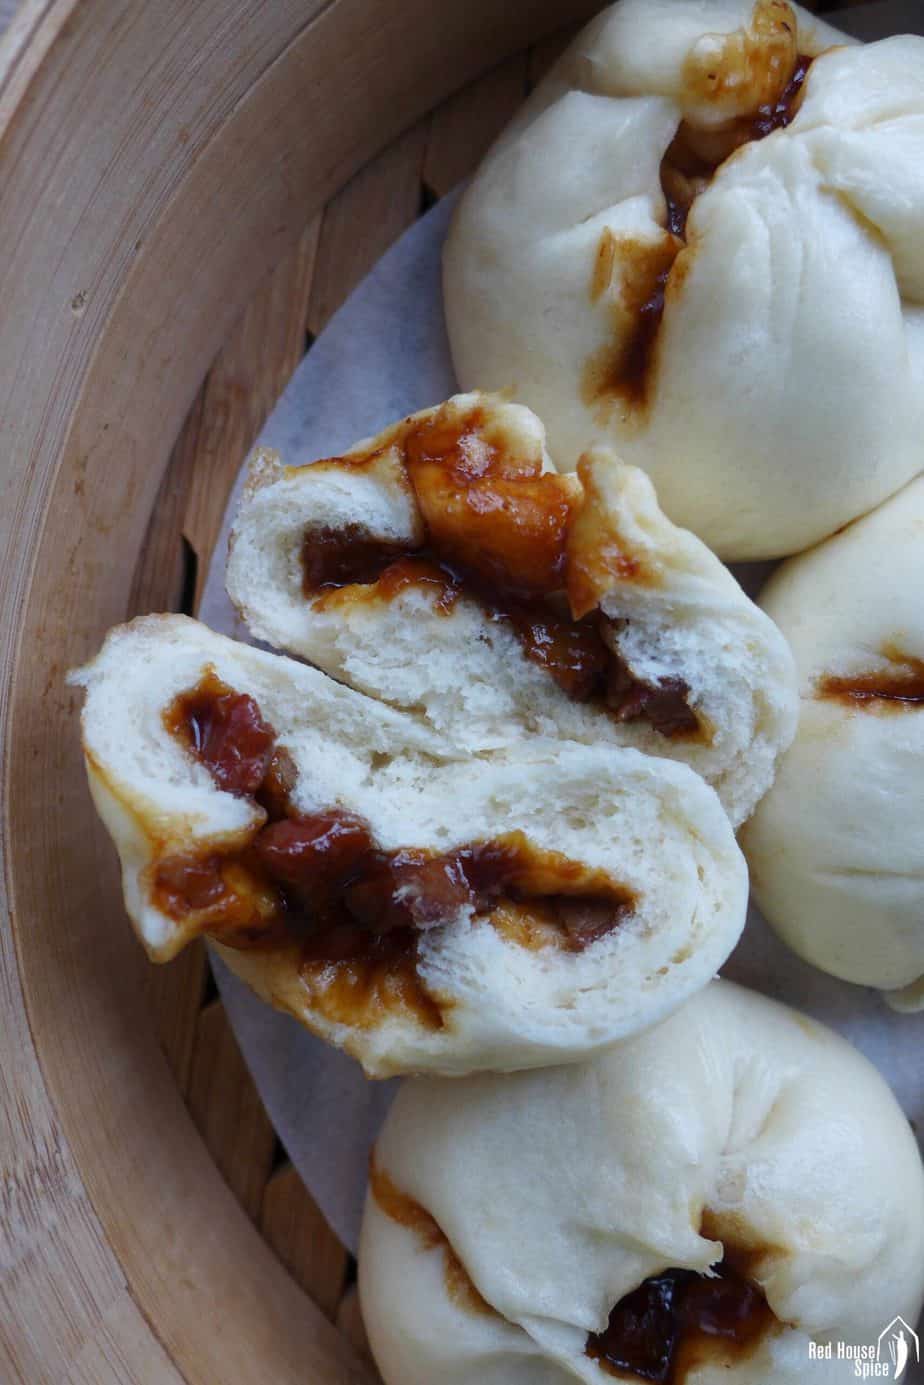
- The filling is cooked before wrapping. Apart from the meat Char Siu (Chinese BBQ pork), it also contains a jelly-like dark sauce which becomes runny after steaming.
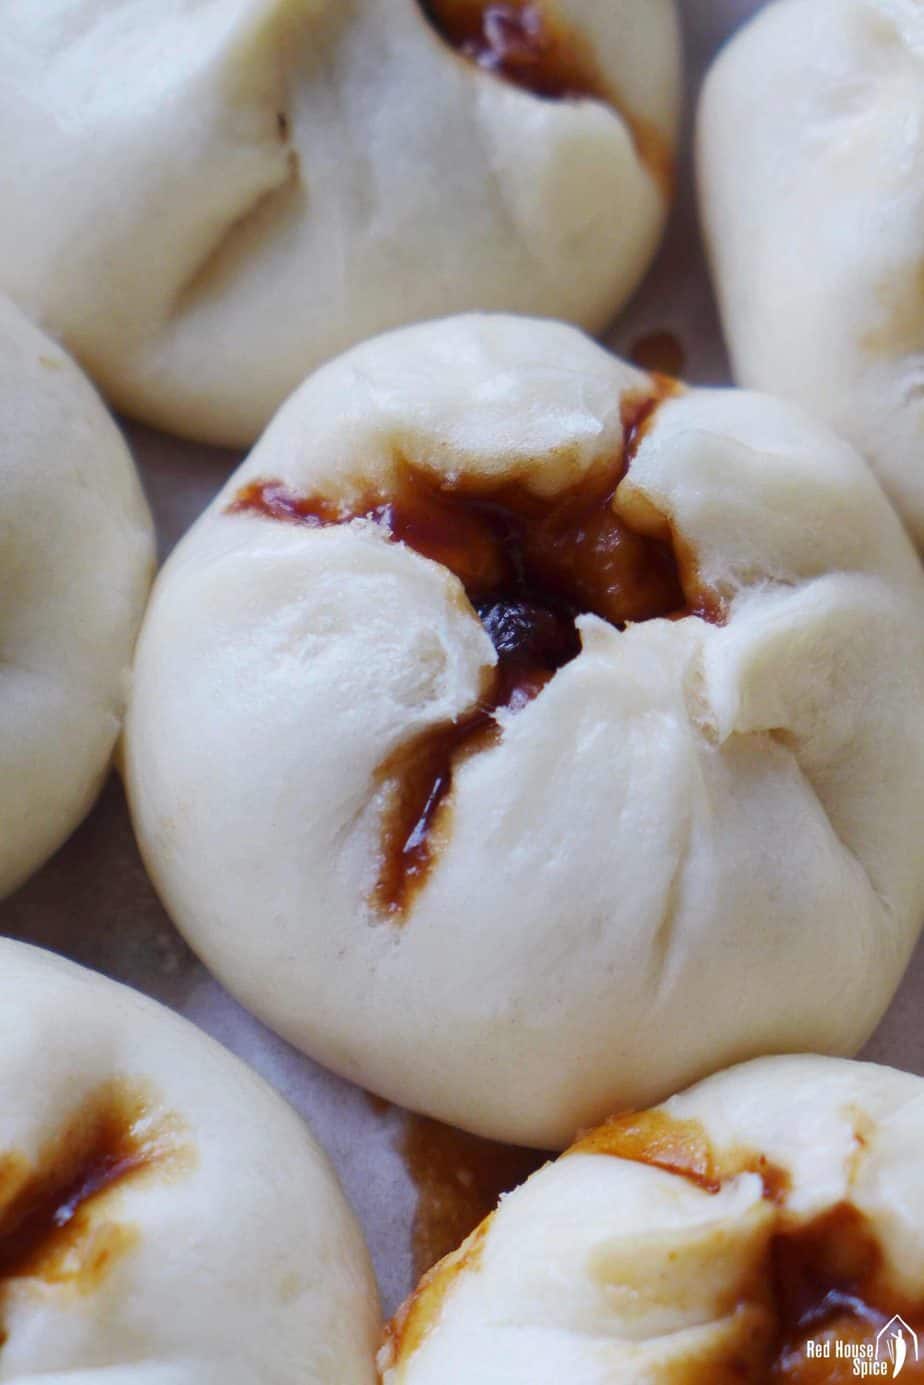
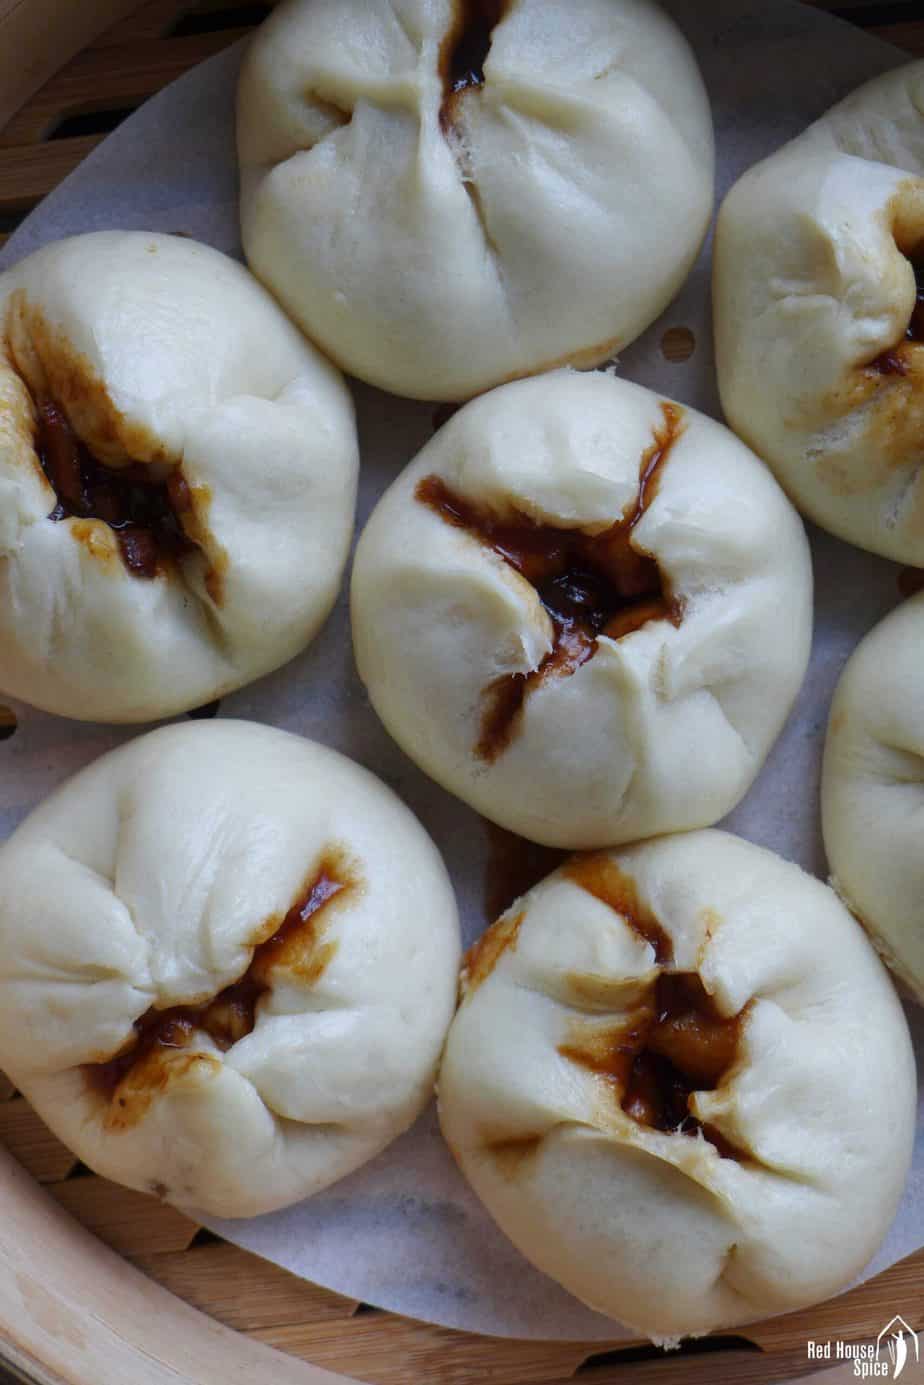
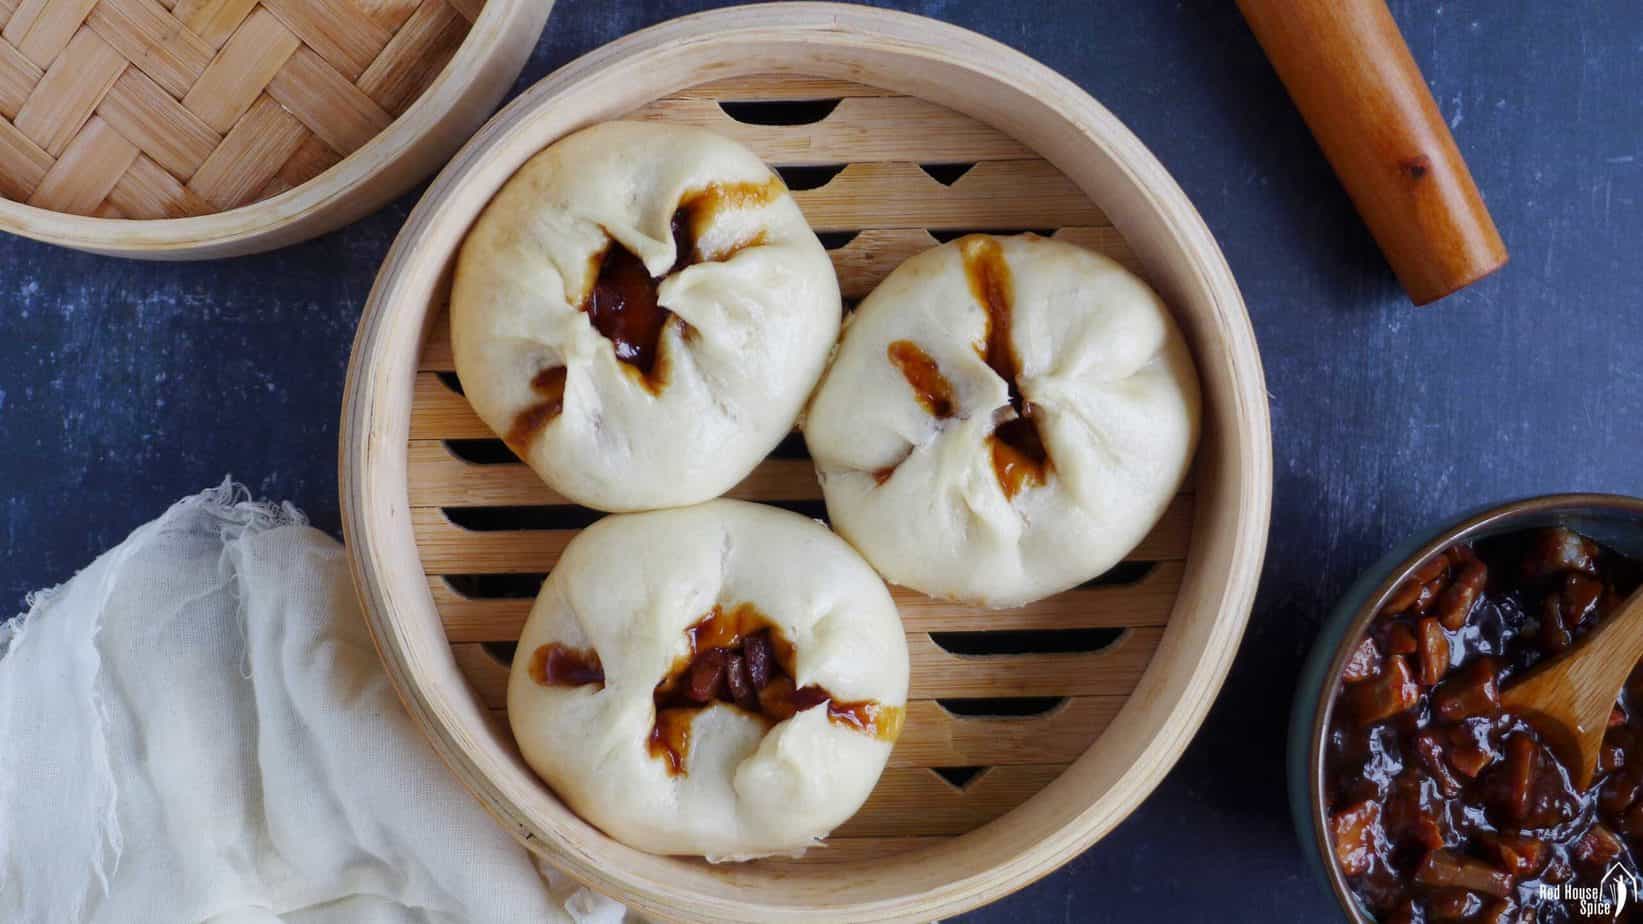
- After steaming, the bao opens up on the top revealing the appetising filling.
Filling
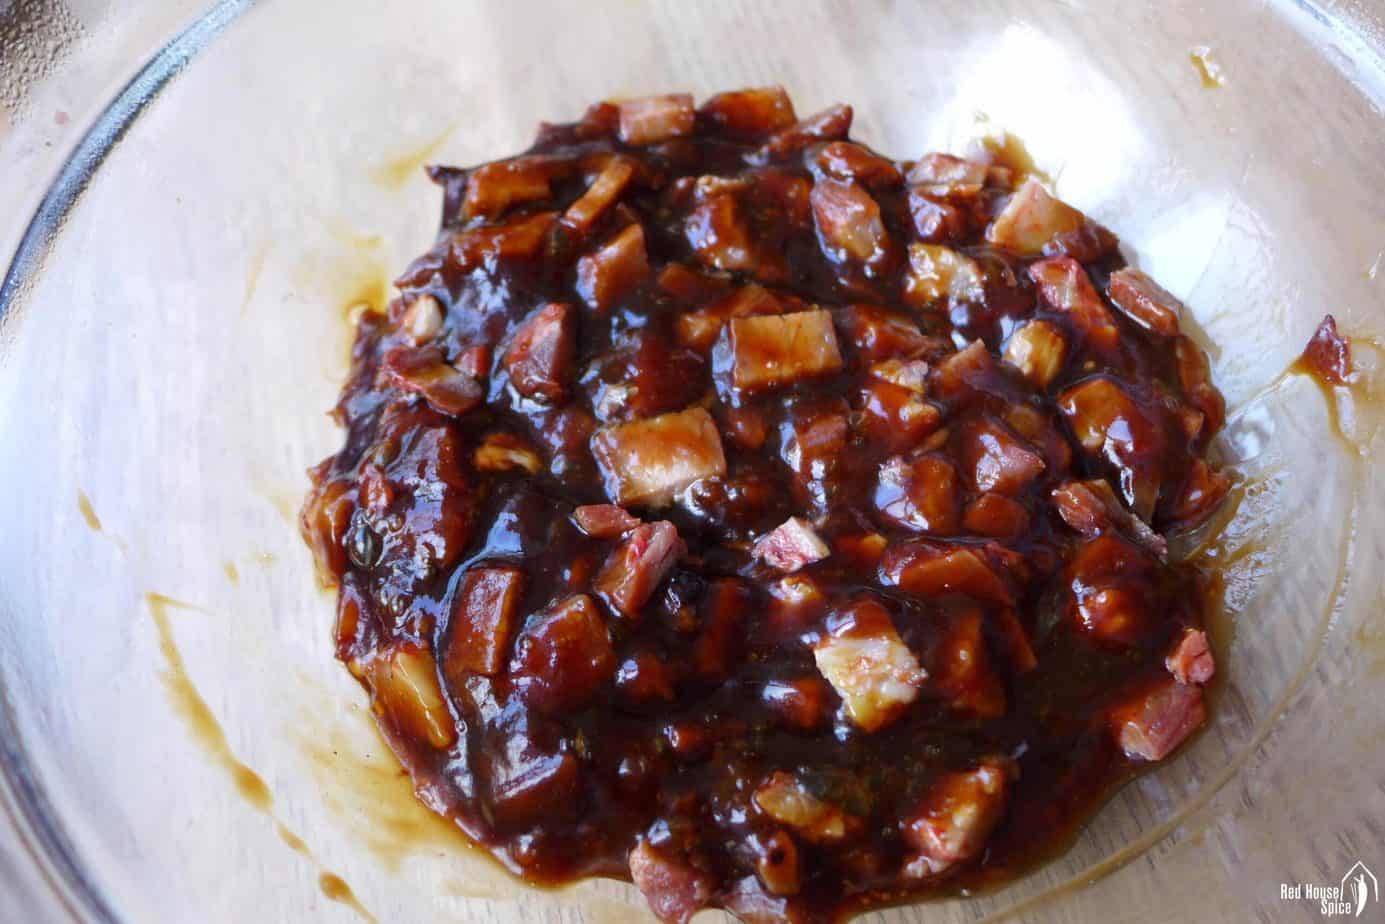
As I mentioned above, the filling for Char Siu Bao is a mixture of two elements: coarsely chopped Char Siu and a jelly like sauce. Since there is a cooling process involved, I suggest you make the filling before you start working on the dough.
Here is what you need to do:
- Fry sliced onion in a little oil until golden and fragrant.
- Add water, oyster sauce, Char Siu sauce and dark soy sauce. Leave to boil and infuse for 30 seconds. Then remove the onion with a slotted spoon.
Pin this now to find it later!
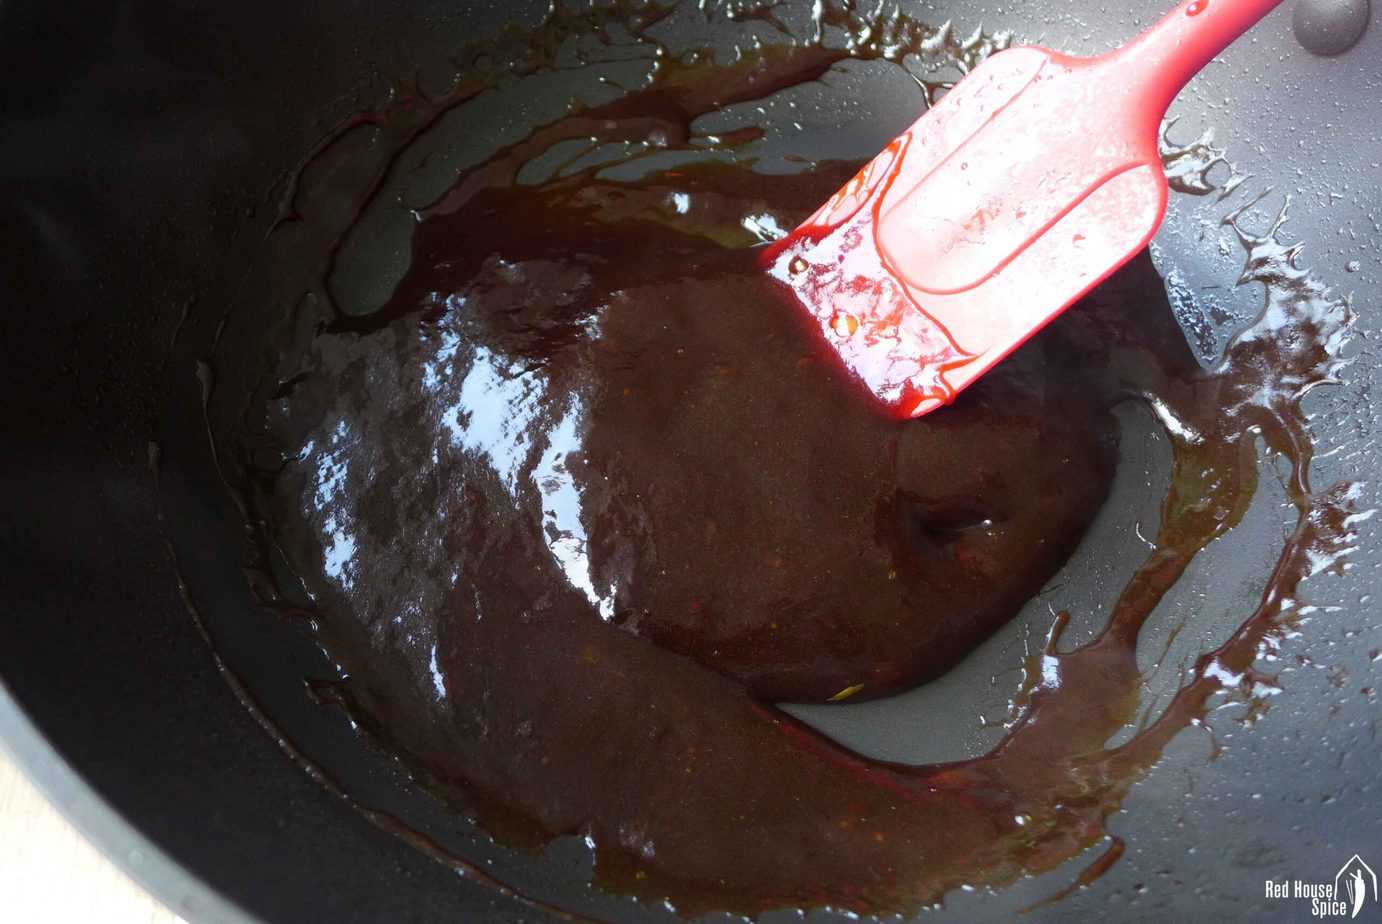
Pin It- Pour in the mixture of tapioca starch (or corn starch) and water. Over lowest heat, stir constantly as the liquid solidifies. Once it turns into jelly, transfer out to cool.
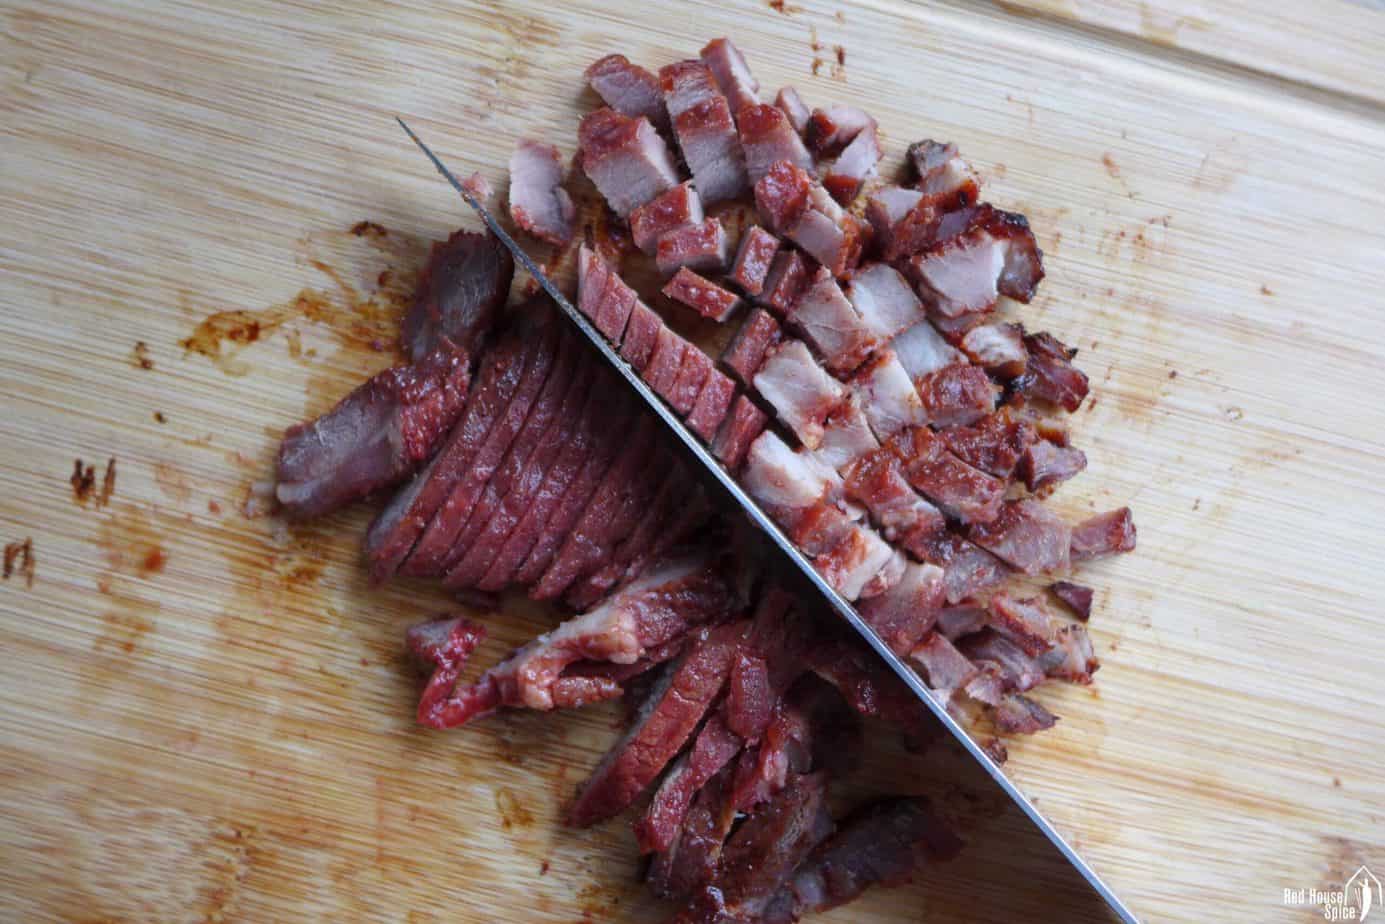
- Coarsely chop Char Siu into small pieces. Add to the sauce then mix well to evenly combine. Have you tried making Char Siu yourself? If not, I highly recommend you give it a try following my Easy Char Siu recipe.
🛎 TIPS:
- Onion is only used for flavouring the sauce so it’s removed before pouring in the starch water. That said, I sometimes chop it small and keep it in the filling. Please feel free to do so if you wish.
- If you’re allergic to seafood and wish to exclude oyster sauce, try looking for its vegetarian alternative which is labelled as “mushroom vegetarian stir-fry sauce”.
- I use the Char Siu sauce made by Lee Kum Kee/李锦记 which is widely available in Chinese/Asian supermarkets. It adds an aromatic, sweet taste to the filling. However, you may skip it if unavailable. In this case, increase the volume of oyster sauce accordingly.
Dough
Making of Chinese style yeast dough is easy as the ingredients are common and no extensive kneading is required. However, it can be quite challenging and tricky to get it perfect (I know many of my blog readers are perfectionists like me).
Two regular dough recipes
In my previous recipes for bao/buns, I introduced two approaches: For Sheng Jian Bao and Steamed Bao Bun, I use a traditional, yeast-only method which requires double proofing. For Mantou and folded Bao Buns, I use both yeast and baking powder to reduce proofing to once only. These two methods are interchangeable and both can be used to make Char Siu Bao.
A different formula dedicated to Char Siu Bao
But when testing and experimenting today’s recipe, I wanted to go one step further: make a dough that produces even fluffier and softer wrappers that resemble the restaurant version without adding the magical yet rare ingredient that dim sum restaurants use for Char Siu Bao (I will explain it in the later section). Here is the formula that I’m finally happy with (for making 14 bao):
- 350g white flour
- 2 tbsp sugar
- 2 tsp baking powder
- 2 tsp instant dry yeast
- 1½ tbsp neutral cooking oil
- 180g lukewarm water, adjust if necessary
Tip: To ensure a good result, I recommend you measure the flour and water by weight (especially if this is your first time making bao). Measuring by cups is less accurate.
What type of flour shall I use?
I know for sure that you’re going to ask this question. Before I explain further, here is the short answer: Any white flour that has a low or medium gluten content.
Different from northern Chinese bao/buns, Char Siu Bao is famous for its super fluffy, cotton-like wrapper which has very little chewiness. So low-gluten white flour is ideal for producing the desired texture. I use special bao flour that I bought from Chinese supermarkets. Cake flour falls into this category so it’s also a good option.
Don’t worry if you have trouble sourcing low gluten flour! Use medium gluten all-purpose flour (plain flour) instead. The cooked wrapper is a little chewier but the taste is just as good. I promise! The great thing about all-purpose flour is that it’s much more accessible (cheaper too) and it’s usually less heavily processed/bleached than Chinese bao flour.
🛎 TIPS:
- You would need 10ml more water if using all-purpose flour. But please bear in mind, the ideal flour-water ratio may vary slightly depending on the brand of your flour. Adjust accordingly. The finished dough should be soft but not at all sticky.
- If you’re unsure how to check the gluten level of your flour, read the nutrition label. Low-gluten flour should contain 7-8g protein per 100g flour, whereas medium gluten flour usually contains 10-11g.
How to mix & knead
You can mix and knead the dough either by hand or in a stand mixer with a dough hook. Both methods produce great dough.
Here is how I make it manually:
- Add flour, sugar, baking powder, yeast and oil to a bowl. Stir well.
- Pour in water gradually while mixing with a pair of chopsticks/spatula until no liquid can be seen.
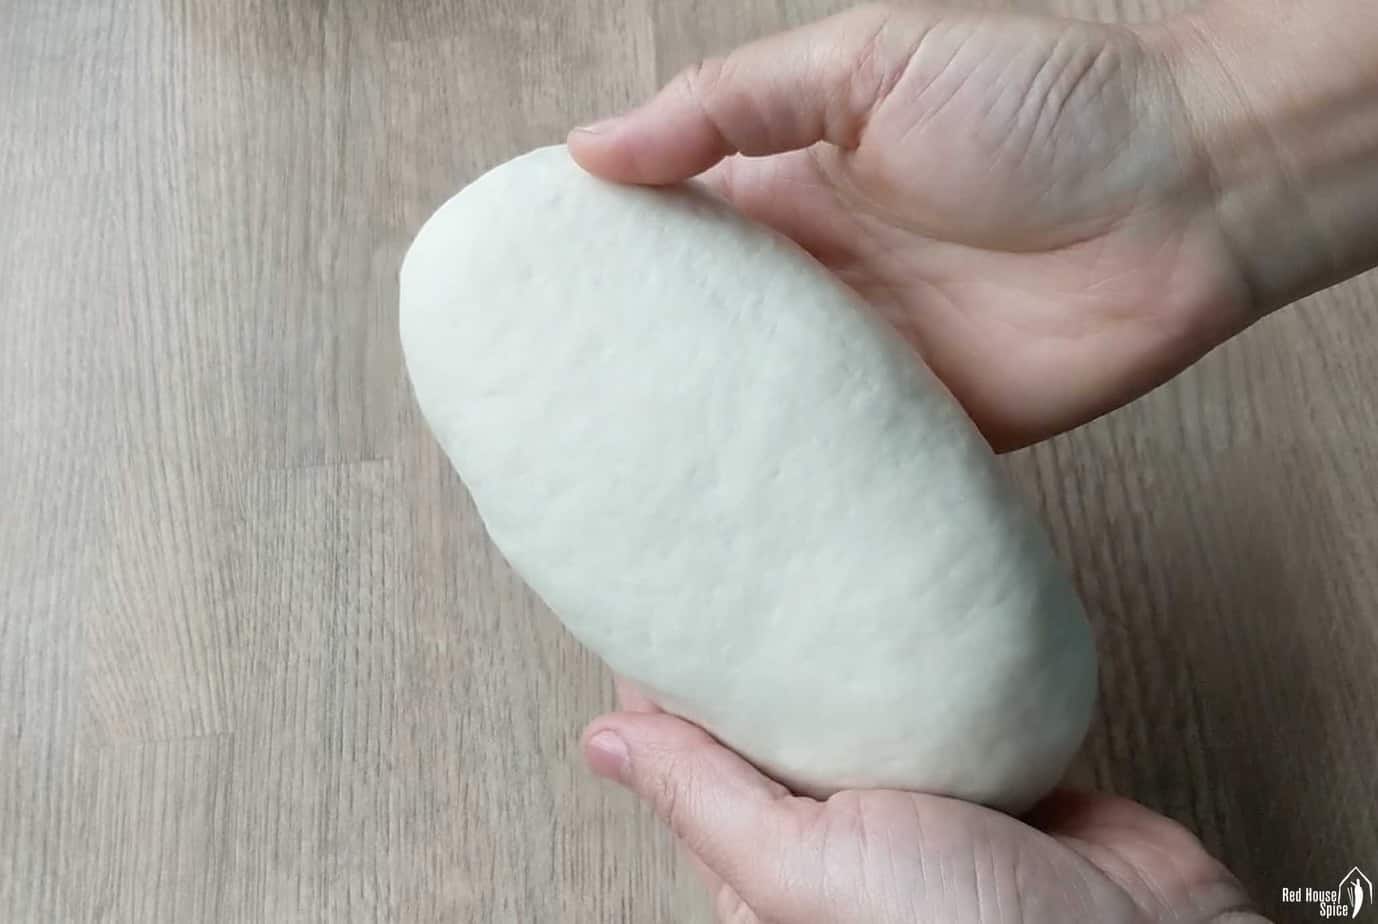
- Combine with your hands to form a rough dough. Cover and leave to rest for 10 mins then knead again for about 2 mins until it becomes very smooth.
🛎 TIPS:
- You could skip the resting and knead it all the way. But the 10 min relaxation of the dough will definitely reduce your effort to make it smooth.
- If you’re using a stand mixer, add all the ingredients into the mixing bowl. Knead on low speed. 8 mins would be enough to make it smooth.
Roll out the wrappers
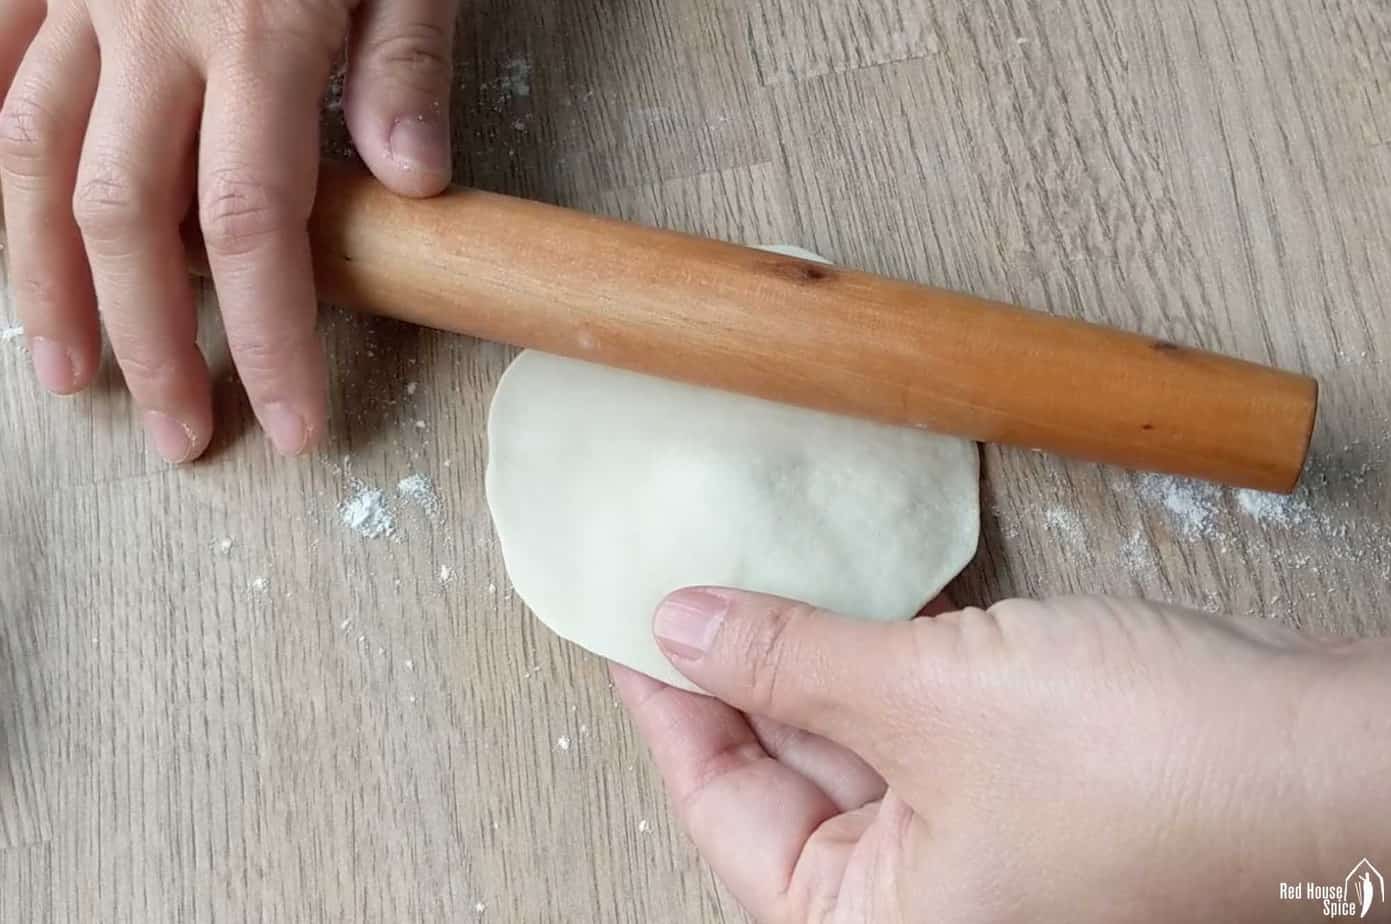
Since this dough contains baking powder, no proofing is required before assembling the bao. So now you can go straight ahead to roll the wrappers.
- I usually work on half of the dough at a time (remember to always cover the unused part). Roll it into a rope then divide into 7 equal pieces.
- With a rolling pin, flatten each piece into a round disc, 9-10cm in diameter. Ideally, the wrapper should be thick in the middle and thin on the edge. Check out my rolling technique in the tutorial video below.
Pleat
Looking at the images, those who are unfamiliar with Char Siu Bao might think that I’ve failed to seal the bao properly. In fact, as I mentioned at the beginning of the post, this filling-revealing look is one of its characteristics.
The look of restaurant versions
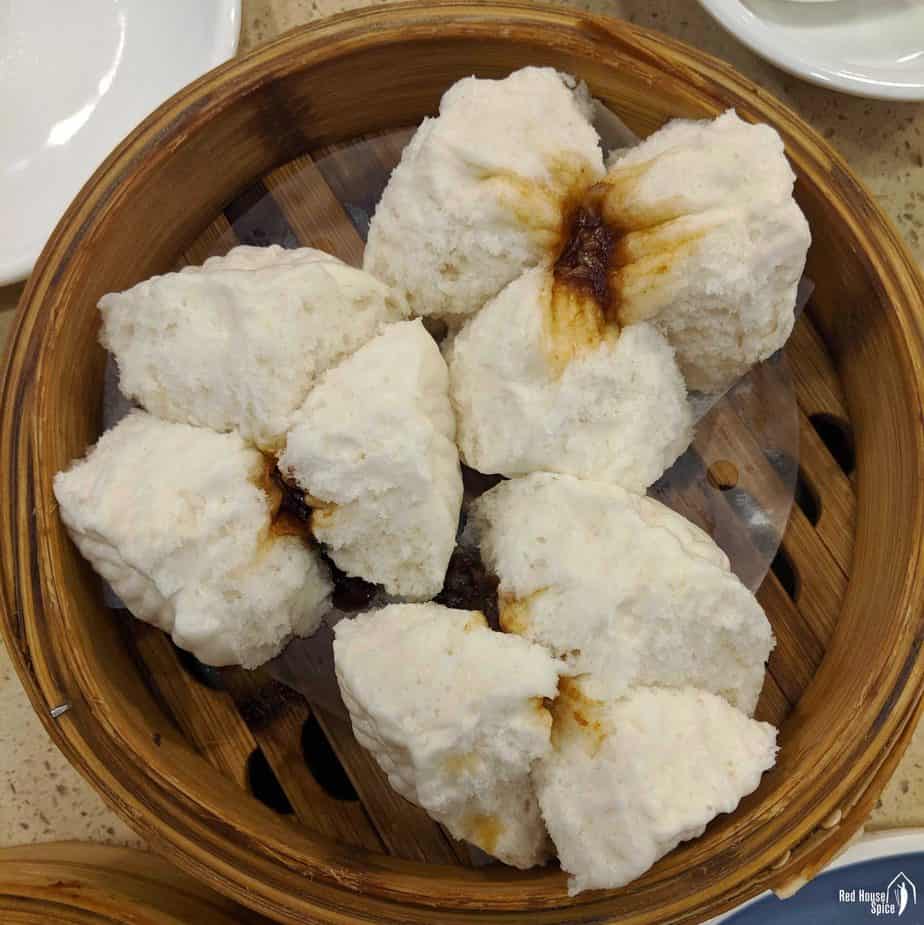
You might have noticed that my version of Char Siu Bao looks different from the restaurant ones (see image above). This is because my dough doesn’t include ammonium bicarbonate (溴粉), a rare leavening agent that commercial Char Siu Bao calls for. This chemical compound releases a large amount of carbon dioxide gas when heated forcing the dough to crack open.
My alternative folding method
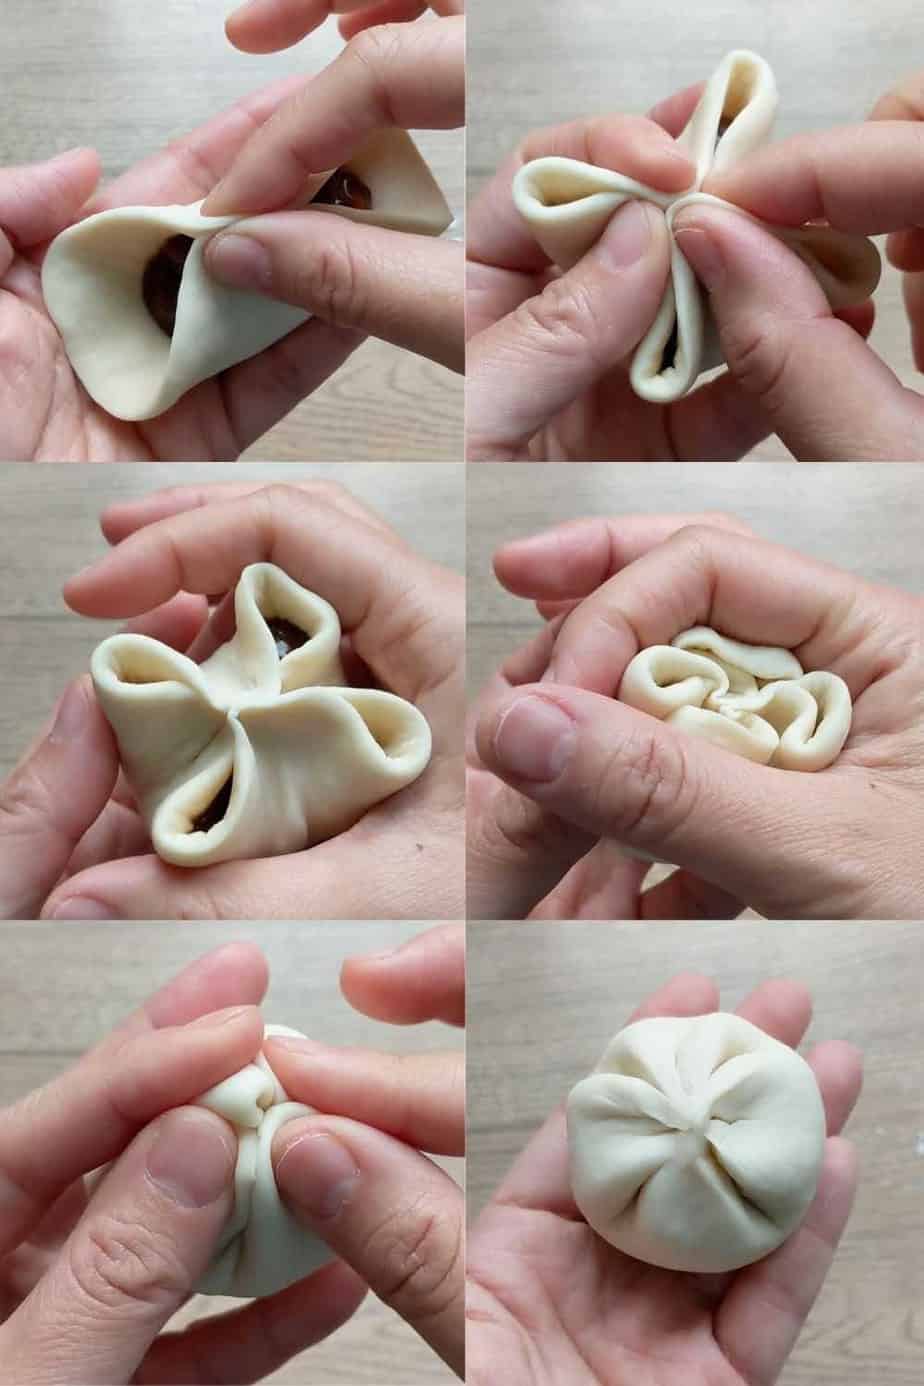
I’m reluctant to include ammonium bicarbonate which is difficult to get and not very useful in the kitchen. But I’d still like to imitate the “authentic look”. Through trial and error, I found a special folding technique that ensures a filling-revealing look after steaming. It’s hard to describe how it works, so have a look at the images or check out the tutorial video in the recipe card below.
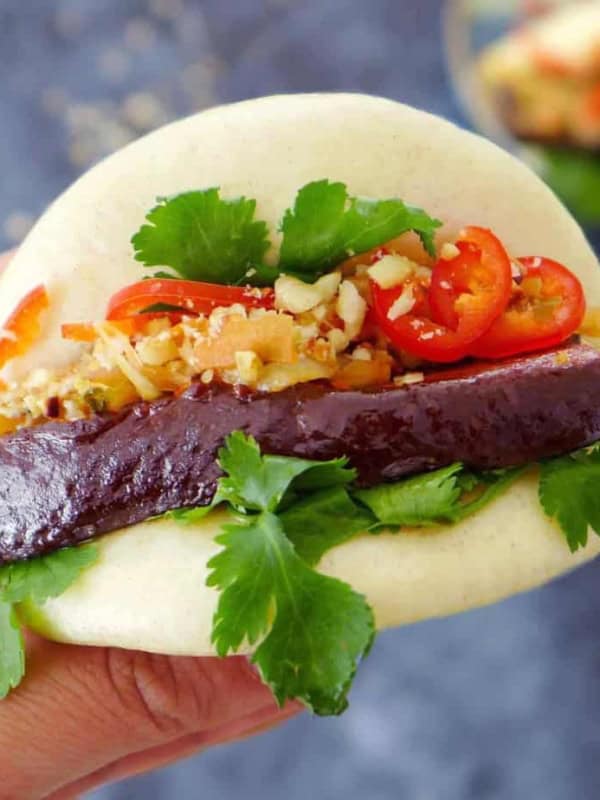
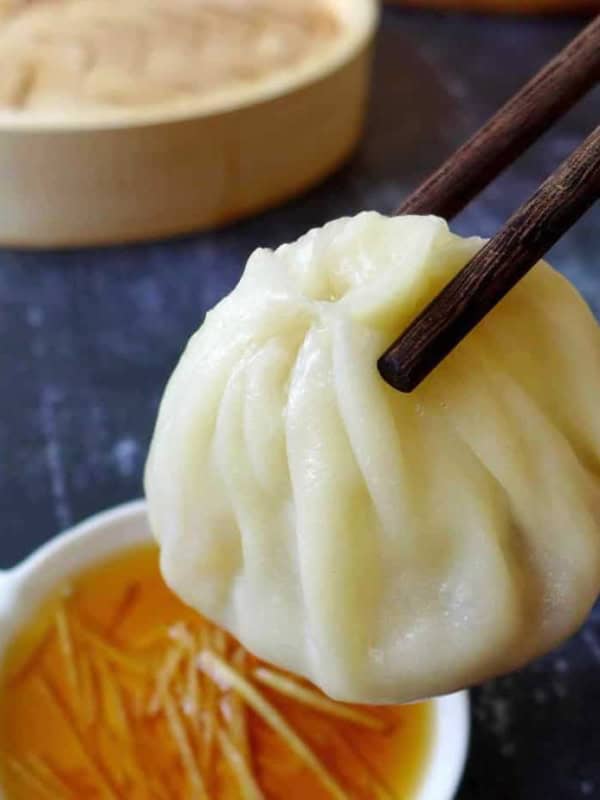
🛎 TIP: If you prefer, please feel free to pleat your bao the traditional way as I show in recipes for Steamed Pork Bao, Baked Lamb Bao and Soup Dumplings.
Rest

After each bao is assembled, place them into steamer baskets to proof. It’s essential that you place a lining underneath the bao to avoid sticking. It can be steamer basket parchment paper, silicone steamer liner, or hand-cut parchment paper for individual bao. Alternatively, brush a thin layer of oil if using metal or plastic steamer.
The proofing takes about 30 mins. Depending on the room temperature, you may need to adjust it a little. The general rule is that the warmer it is the shorter time it requires. On winter days, I place the baskets near a radiator to speed it up.
🛎 TIPS: To judge if your bao are ready to be steamed, look out for these signs:
- They become bigger (but they won’t be doubled) and feel lighter when placed on the hand.
- They look fuller and plump. You might find some have already opened up a little on the top.
Steam
The last step of the cooking process is very simple. Bring water to a full boil in a wok/pot. Then place in the steamer baskets. Cover with a lid. Leave to steam over medium-high heat for 10 mins (It’s important that you do not open the lid to peek during steaming).
My recipe makes 14 Char Siu Bao. So you probably would need to stack up 2 baskets. Mine are medium-sized bamboo ones (26cm in diameter) which can accommodate 7 bao each.
Tip: If you’re using metal or plastic steamers, I suggest you cover the lid with a piece of cloth to absorb the condensation gathered during steaming. Otherwise, the dropping water could affect the look of your bao.
Store & reheat
To appreciate the best taste and texture of Char Siu Bao, serve them straight out of the baskets while they’re steaming hot. If there are any left, put them in an airtight container/bag and store in the fridge for up to 3 days. Steam for 3 mins to reheat before serving.
Cooked Char Siu Bao freeze very well. To reheat, you can either defrost them in the fridge then steam for 3 mins or steam for 6 mins straight out of the freezer.
Personally, I don’t recommend that you freeze uncooked bao as you won’t get the same fluffy, soft texture after steaming. However, I often make extra filling and store it in the freezer for later use.
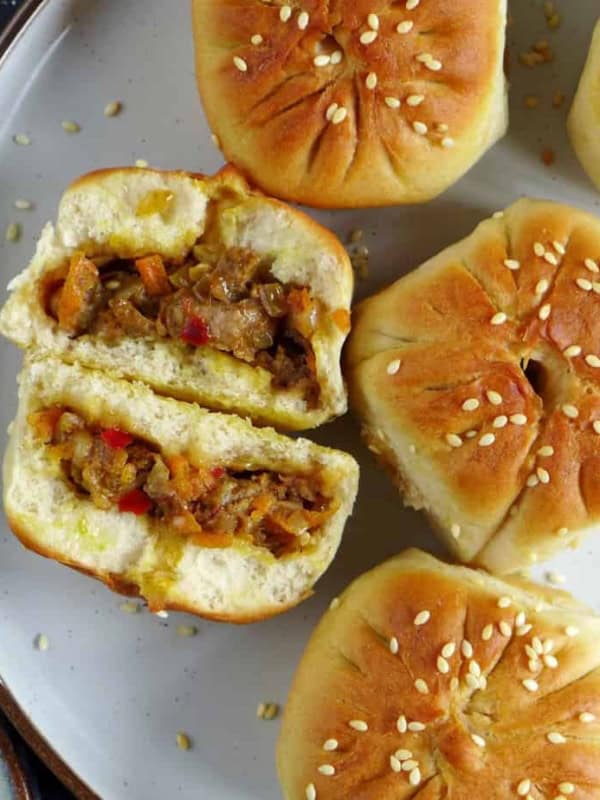
📋 Other savory staples
Looking for other Chinese bread recipes to try? Check out these popular ones:

📋 Recipe
Love this recipe? Please leave a 🌟🌟🌟🌟🌟 rating and a comment. Thank you!

Char Siu Bao (BBQ Pork Buns, 叉烧包)

Video
Ingredients
For the filling
- ½ tablespoon neutral cooking oil
- ½ onion, sliced
- 120 g water
- 2 tablespoon oyster sauce
- 1 tablespoon Char Siu sauce, see note 1
- 1 teaspoon dark soy sauce
- 2 tablespoon tapioca starch (or corn starch), mix with 3 tbsp water
- 130 g Char Siu (Chinese BBQ pork), see note 2
For the dough
- 350 g bao flour/cake flour, or all-purpose flour, see note 3
- 2 tablespoon sugar
- 2 teaspoon baking powder
- 2 teaspoon instant dry yeast, see note 5
- 1½ tablespoon neutral cooking oil
- 180 g lukewarm water, adjust if necessary, see note 4
Instructions
Prepare the filling
- Add oil to a pan. Fry onion until slightly golden.
- Pour in water. Then add oyster sauce, Char Siu sauce and dark soy sauce. Leave it to boil for 30 seconds. Use a slotted spoon to remove the onion.
- Turn the heat to the lowest. Mix the starch water very well then pour in. Stir constantly until the liquid turns into jelly. Transfer to a bowl to cool.
- Coarsely chop Char Siu into small pieces. Add to the jelly. Mix well and set aside.
Make the dough
- IF USING HANDS: Mix flour, sugar, baking powder, yeast and oil in a bowl. Add water gradually while mixing with a pair of chopsticks/spatula. Combine with your hands to form a dough. Rest (covered ) for 10 mins then knead again until very smooth.
- IF USING A STAND MIXER: Add all the ingredients for the dough into the mixing bowl. Knead on low speed for about 8 mins until a smooth dough forms.
Roll the wrappers
- Divide the dough into 14 equal parts. Work on one piece at a time and make sure you cover the rest to prevent it from drying out.
- With a rolling pin, flatten one piece into a disc-like wrapper, 9-10cm in diameter. Ideally, it should be thinner on the edge & thicker in the middle (See the rolling technique in the video below).
Shape the bao
- Place a spoonful of filling (about 20g) in the middle of the wrapper. To ensure a “crack open” effect after steaming, follow the folding technique shown in the video below to seal the bao. Alternatively, pleat the bao using the regular method introduced in my recipe for “Steamed Bao Buns, A Complete Guide”.
Rest the bao
- Repeat to finish all the wrappers and filling. Then place the bao into steamer baskets lined with parchment paper to prevent sticking (Alternatively, brush a thin layer of oil if using a metal/plastic steamer).
- Leave to rest for 30 minutes or so until they become very light & plump (no need to cover).
Steam the bao
- Bring water to a full boil in a wok/pot. Place the steamer baskets in. Steam over medium-high heat for 10 mins. Serve immediately.
Store & reheat
- You can make extra filling for later use and store it in the freezer for up to three months.
- It’s not recommended to store uncooked bao. Instead, cooked bao freeze very well. Consume within three months.
- To reheat: Defrost in the fridge then steam for 3 mins. Alternatively, steam for 6 mins without defrosting.
Notes
Your Recipe Notes
Nutrition
Nutrition information is automatically calculated, so should only be used as an approximation.


This is it. I have been searching high and low for a fluffy, soft bao dough. I have now found it. Thank you so much.
I’m really glad you found the dough you were looking for, and that it worked well for you!
Hi wei! Can I make these without a filling inside??
Yes you can, Kate. It’ll be similar to Mantou, plain steamed buns. Happy steaming!