
An easy & quick way to make Mantou, Chinese steamed buns. My detailed instructions and tutorial video will help you to succeed.
Pin this now to find it later!
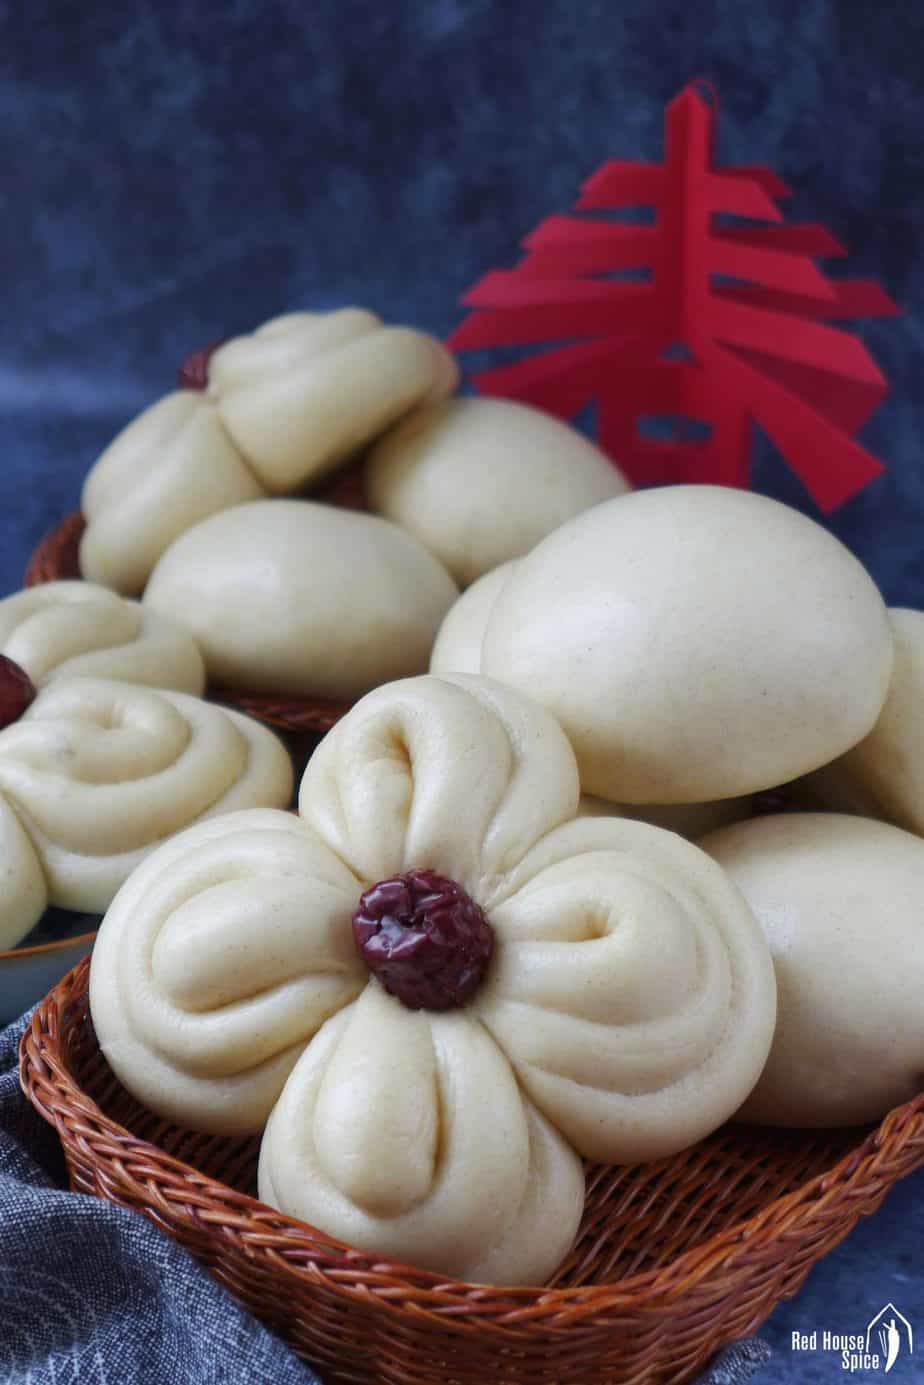
Pin ItAs the Chinese New Year (Spring Festival, 春节) is fast approaching, I’m sharing a nostalgic recipe: Mantou(馒头), Chinese steamed buns.
This was an essential item that my parents used to prepare a few days before the most important festival of the year.
We made dozens of them in a variety of shapes and enjoyed them throughout the entire holiday period.
What is Mantou?
Mántóu (馒头), also known as Mó (馍), refers to plain steamed buns which originated from China. They are usually made of white wheat flour, but other ingredients, such as corn flour, sweet potato, pumpkin, are sometimes added to the dough. As a popular staple, Mantou has a firm position on Chinese families’ dinner table.
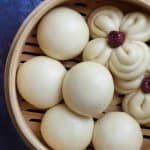
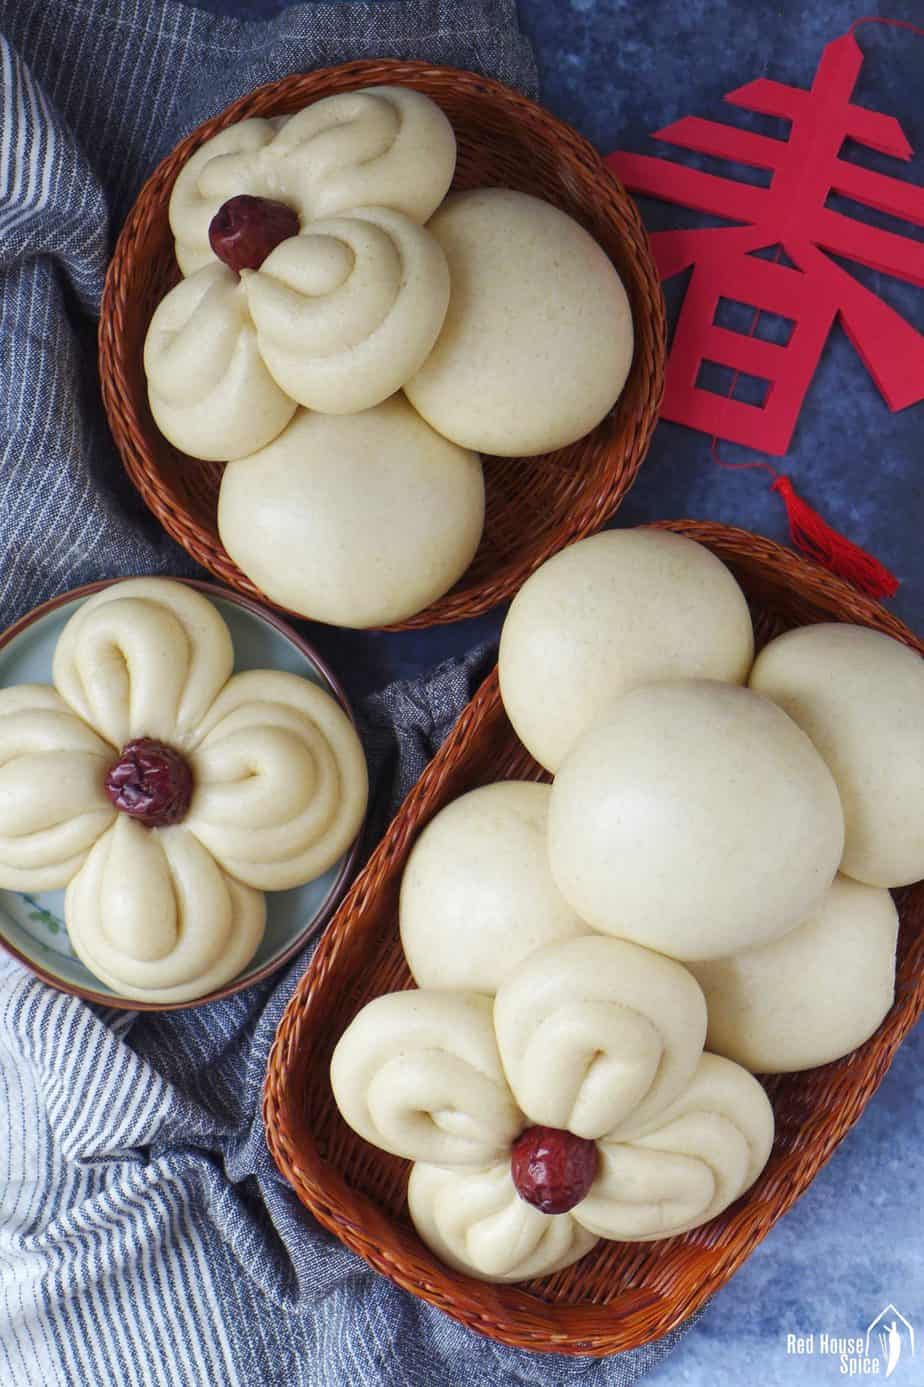
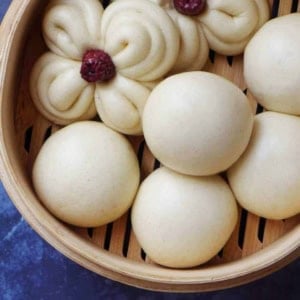
In regions of northern China, Mantou is also a festive food prepared for the New Year. For this occasion, apart from regular round ones, they are made into all kinds of shapes, such as flowers, butterflies, animals, etc., and decorated with dried Chinese dates (Jujube).
Another popular variety of Mantou is Huā Juǎn (花卷, flower rolls), a layered bun seasoned with herbs, spices & oil.

A quick & easy recipe
Different from the traditional method which uses only yeast as a raising agent, my Mantou recipe calls for both yeast and baking powder which make the cooking process easier & quicker.
The yeast-only method makes great Mantou if you follow the double-proofing procedure: Leave the dough to rise until doubled in size. Shape individual buns then leave to rise again before steaming. The total resting time takes 1-2 hours depending on the room temperature (My post “Steamed Bao Buns” applies the traditional approach).
The “Yeast+baking powder” method requires only one proofing process. You can shape the buns right after the dough is formed. Just leave the buns to rise for about 30 minutes before steaming. It’s a better recipe in terms of efficiency and simplicity thus good for busy or novice home cooks.
Make the dough
Ingredients
My recipe makes 6 medium-sized round Mantou, or 4 flower-shaped buns topped with Chinese dates. Here are what you need in hand:
- 250g all-purpose/plain flour
- 1 tsp instant yeast
- 3/4 tsp baking powder
- 1 tbsp sugar, or to taste
- 130g lukewarm water
- 4 Chinese dates, for flower-shaped buns only
The process is pretty simple: mix flour, yeast and baking powder. Add water gradually. Combine then knead into a very smooth dough. It should be medium-firm thus doesn’t stick to hands or the work surface.
Knead by hand
It can be quite demanding to knead the dough to a very smooth texture by hand. To make the process easier, I always give the dough a little rest soon after all the ingredients are roughly combined. Then knead until the dough appears to be evenly smooth.
Use a stand mixer
Making the dough with a stand mixer is straightforward. Knead on low speed for about 8 minutes. Take the dough out and finish off by kneading by hand for 1 minute.
Ways to shape
Now the dough is ready. It’s time to form them into your preferred shape (No need to rest before shaping). Divide the dough into equal sections then work on one section at a time. For this recipe, I made them into two different shapes (Please refer to my tutorial video):
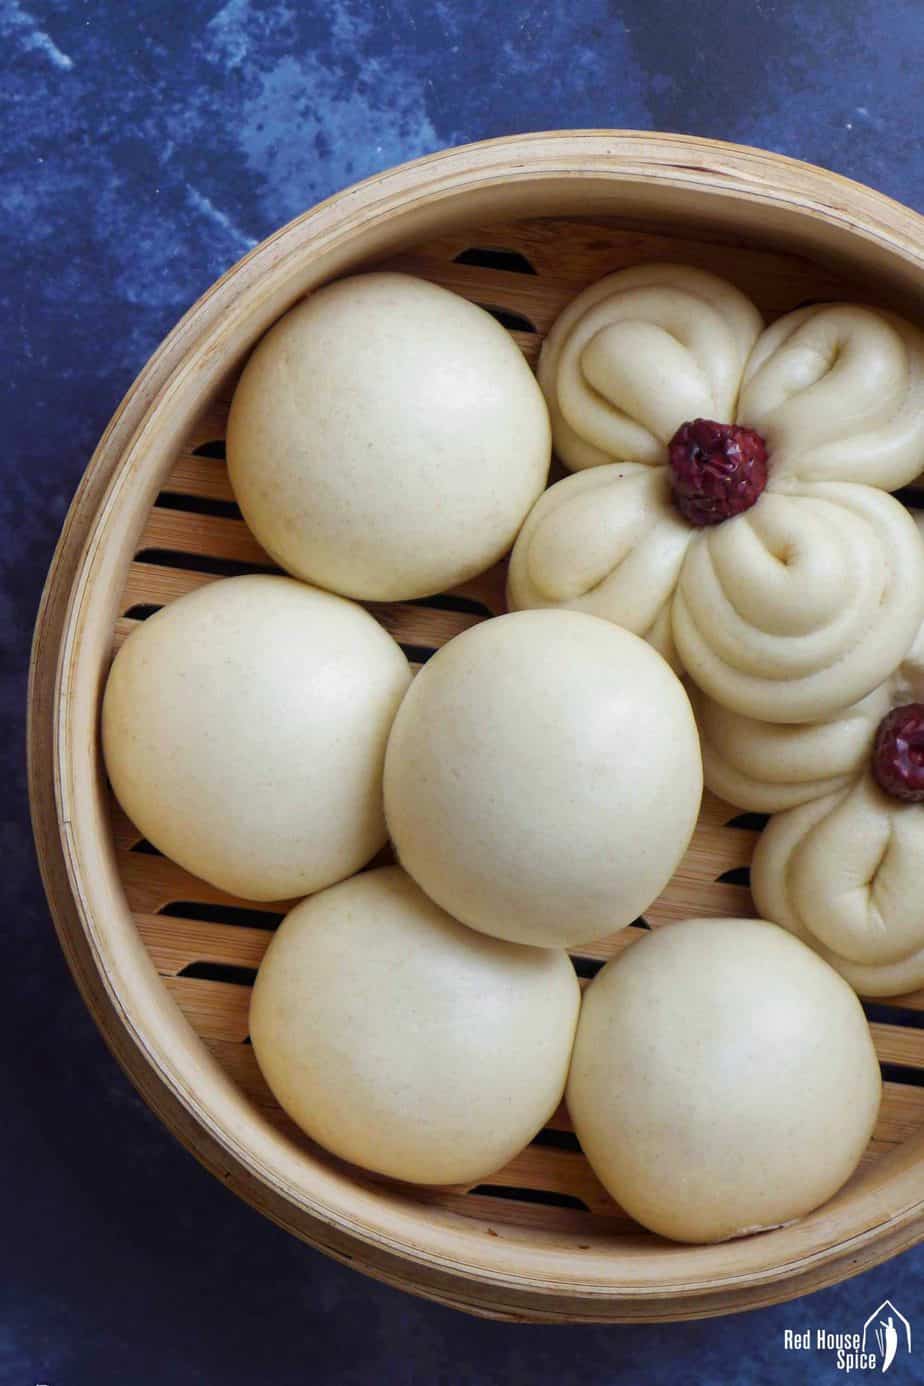
Regular round shape:
- Knead and fold the dough towards the centre of the ball without turning over. This will result in a smooth outer surface as you form the ball.
- Once you have completed this step rotate the ball between your hands to form a slightly raised shape.
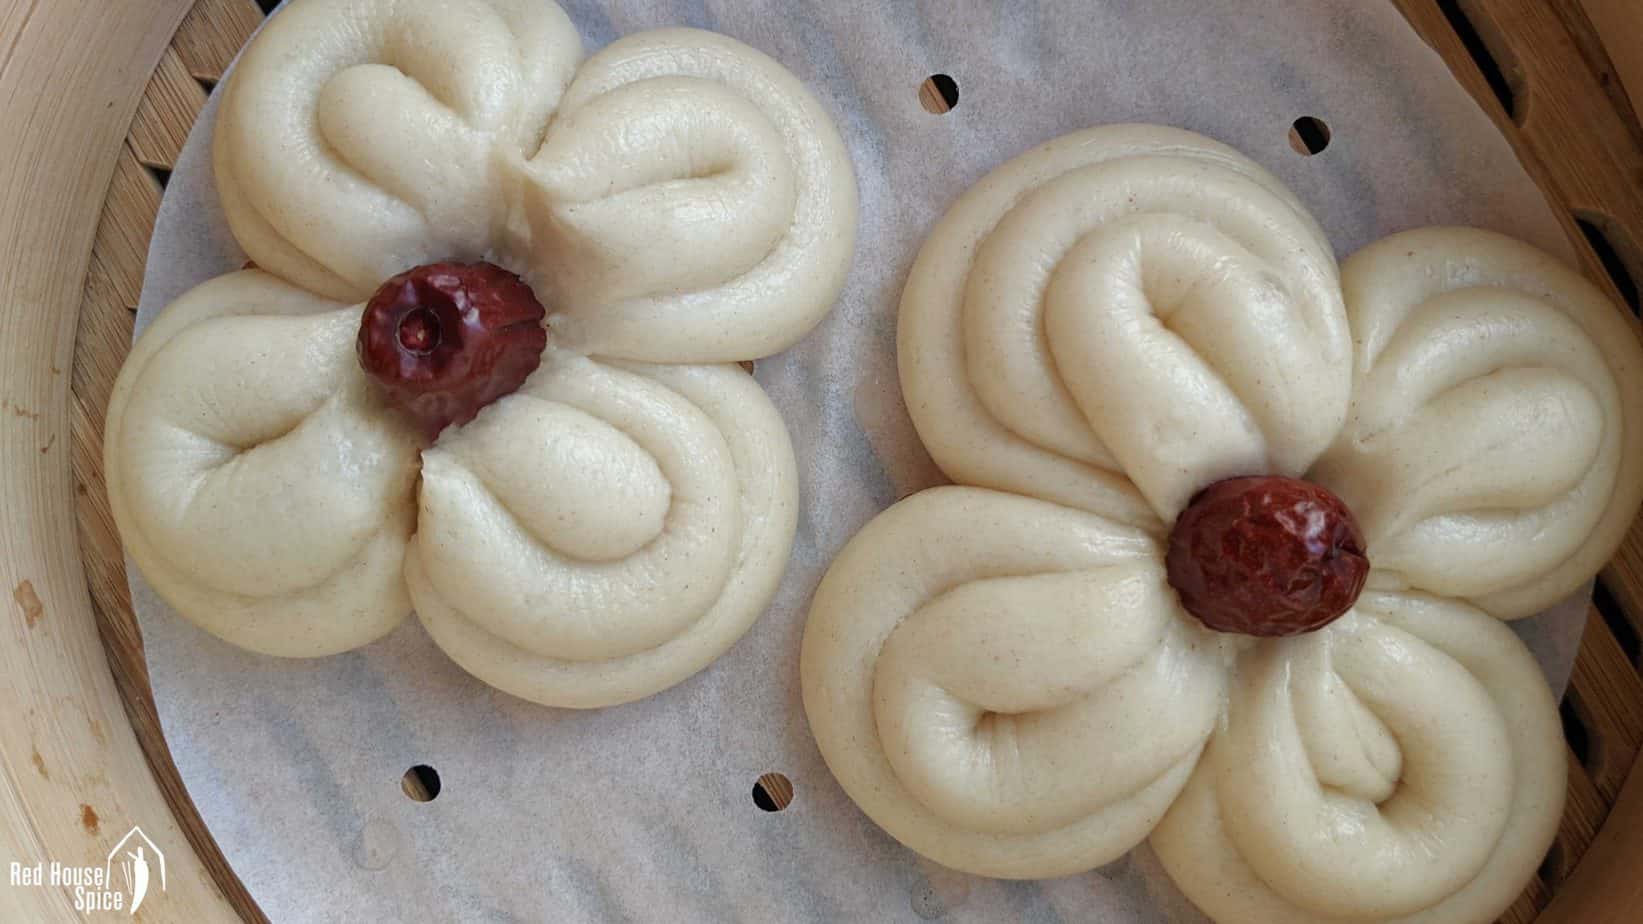
Festive flower shape:
- Roll the dough piece into a long, thin rope. Fold both ends in a “J” shape in opposite directions. Then turn each end towards the centre of the rope until they meet.
- Take a pair of chopsticks placing one either side (in the centre) and squeeze to form a flower shape. Then place a Chinese date in the centre of the flower.
The resting process
My easy Mantou recipe only requires one resting process (unlike the traditional method explained in Steamed Bao Buns). After shaping the buns, place them into the steamer basket to rest. Make sure to leave ample space between each bun as they will be double in size after cooking.
The resting time required varies depending on the room temperature. It takes me 30 minutes in a room at about 25°C/77°F. So if it’s cooler in yours, extend the time a little and vice versa.
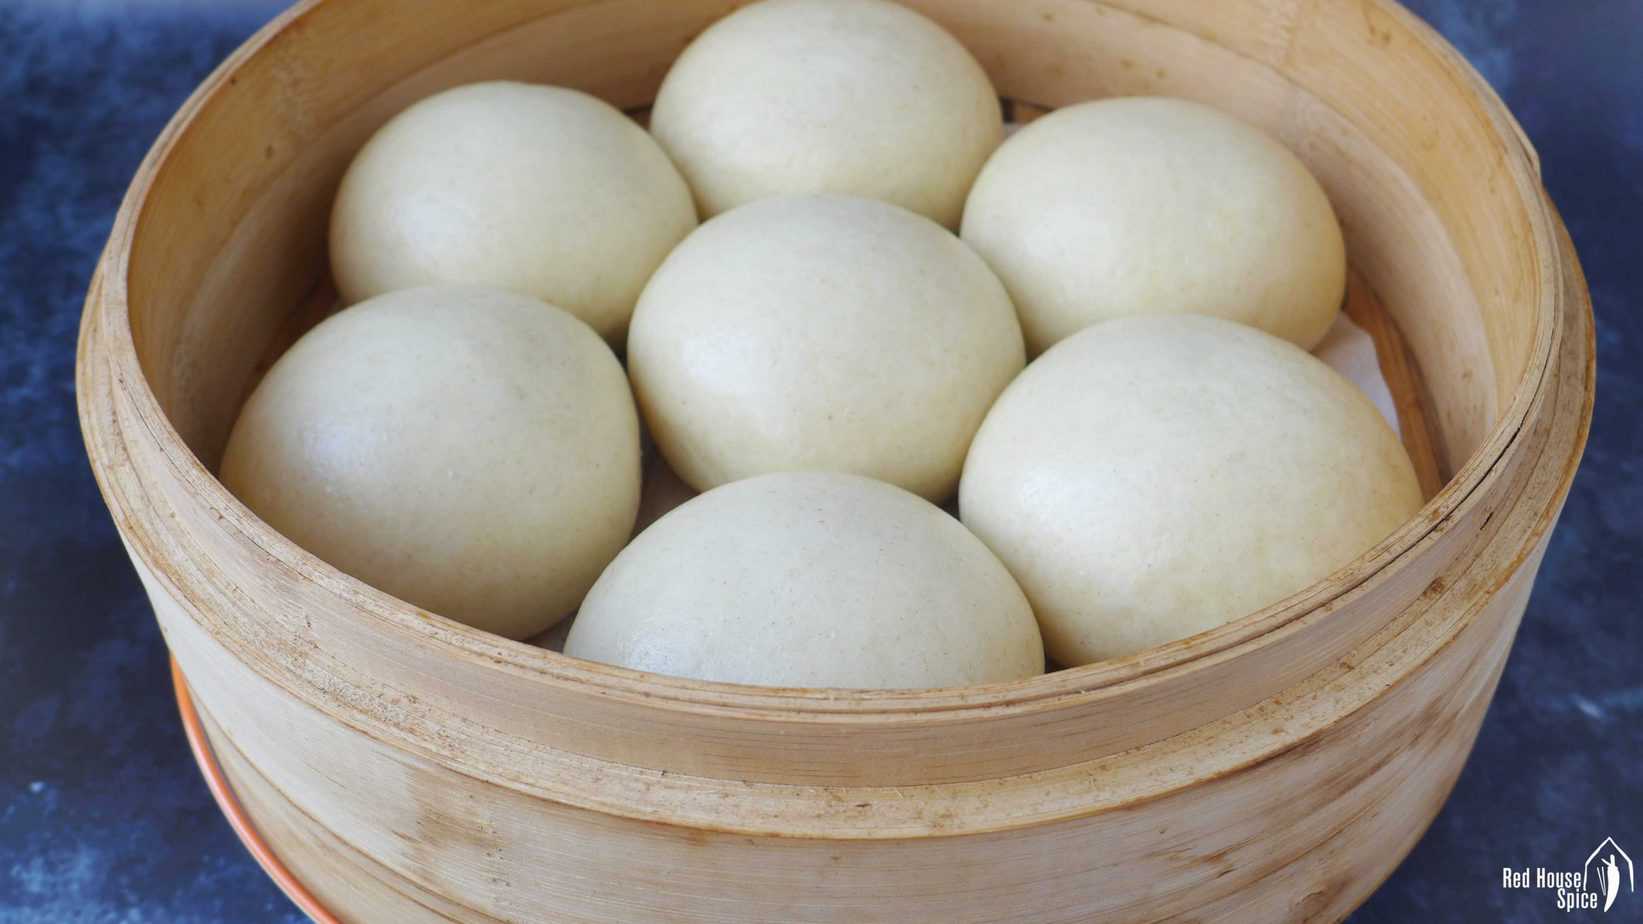
Well-rested buns should be slightly bigger (not doubled in size), very smooth on the surface. When pressed gently, the dough bounces back.
How to steam
Use a bamboo steamer when possible
Bamboo steamers work best when it comes to bun making. As bamboo is a “breathable” material, the steam doesn’t cause condensation. Some people also believe it passes some natural bamboo aroma to the buns.
Wrap the lid if using metal ones
If using a metal steamer, I suggest you wrap its metal/glass lid with a clean tea towel. This way the condensation created during the steaming process will be absorbed by the cloth instead of dripping onto the buns affecting their smooth appearance.
Line the basket or brush oil
To avoid the buns sticking to the steamer, you need to line your basket with steamer parchment paper, like the one I use in my images (They are available in Asian shops or major online shopping platforms). You may cut out circles using regular parchment paper and place them underneath each bun. Make sure they are bigger than the uncooked buns.
Alternatively, you can brush a thin layer of oil on the basket. It’s particularly effective when using metal steamers.
Troubleshoot: avoid bun collapsing
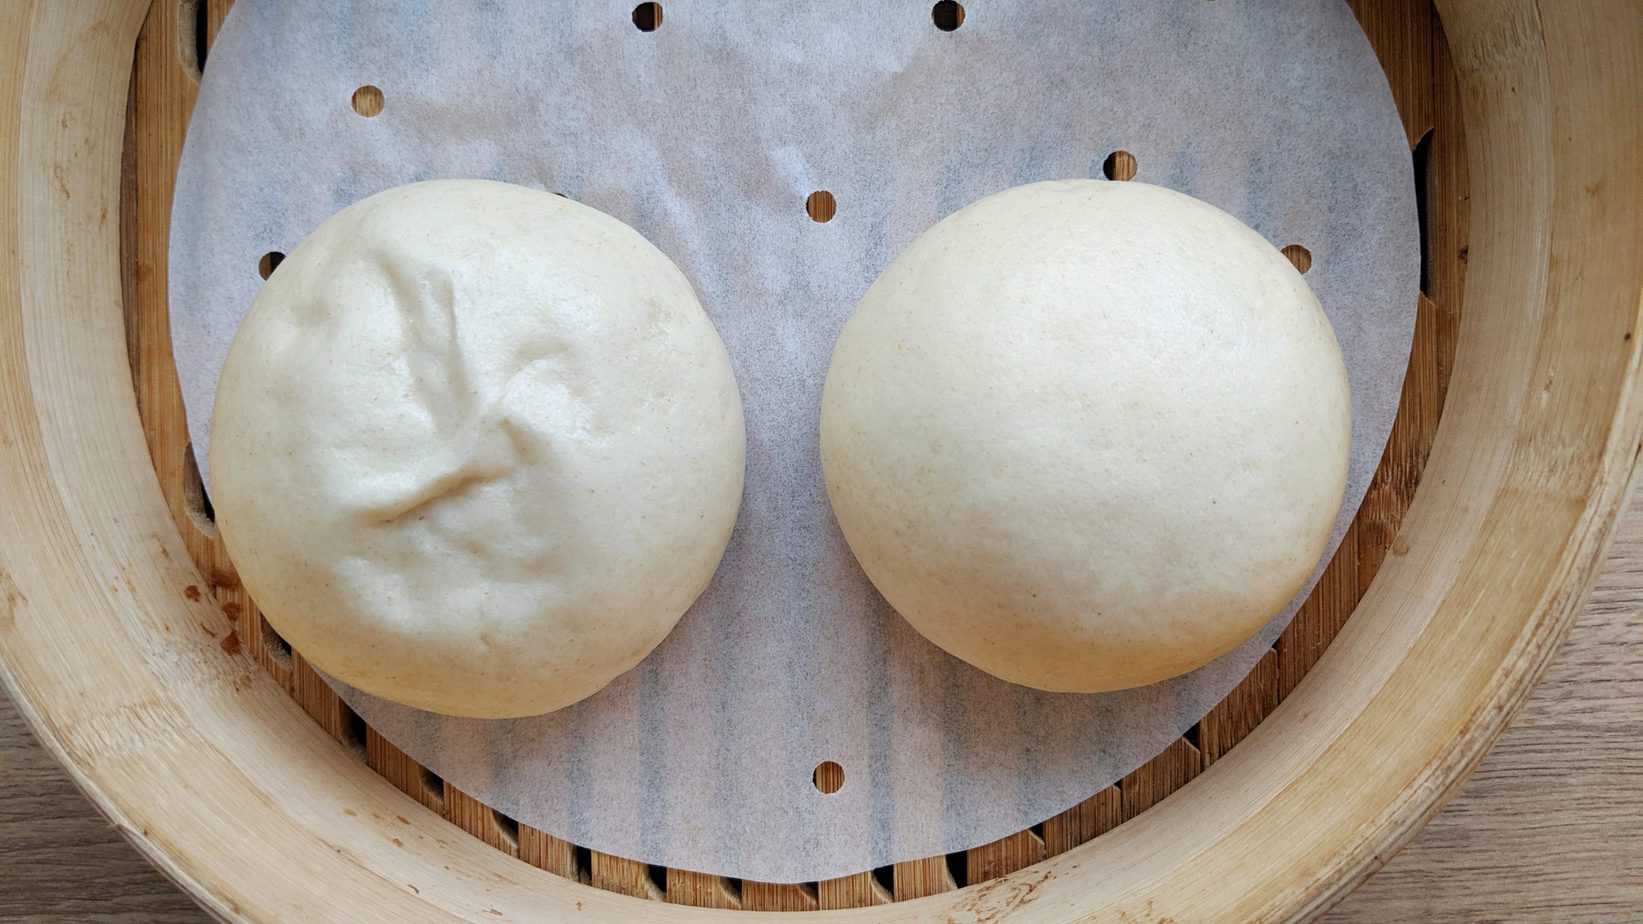
Are you keen to get the smooth, flawless finished look? If so, do not overproof the buns. As shown in the image above, the smooth one on the right was rested for 30 minutes before steaming. The wrinkled one on the left had a 45 minutes rest. While steaming, the excessive air caused by over proofing has created a big air pocket inside the bun. It collapsed once the cooking stopped.
By the way, some steamed bun recipes claim that to avoid the buns collapsing, you should wait for a few minutes before you uncover the steamer. Through numerous tests, I can tell you that this advice has no value. As long as you prepare and rest the dough properly following my recipe, you can immediately remove the lid after turning off the heat (just like how dim sum chefs do).
What to eat with
Mantou is the staple food of many northern Chinese household meals. So just like how you consume steamed rice, families would eat mantou with several savoury dishes, often accompanied by something less solid, such as congee, soups, etc.
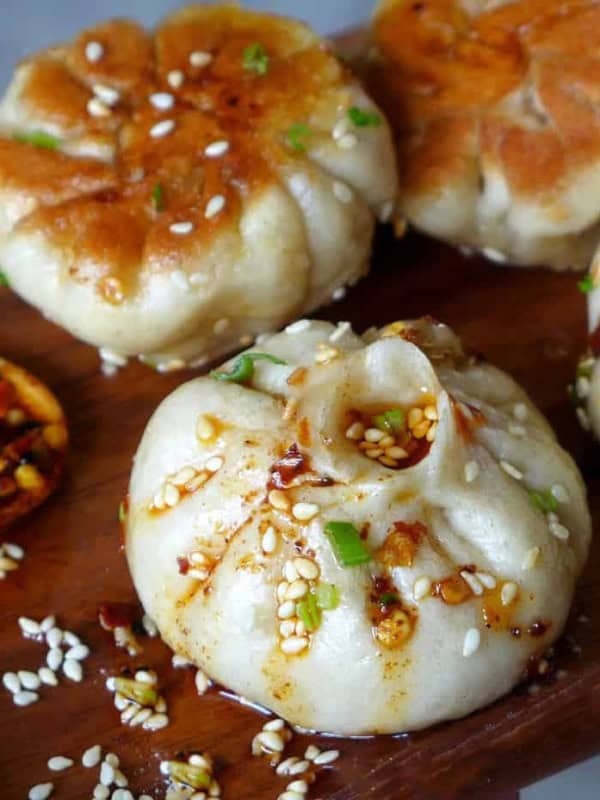
It’s also a common breakfast item. You can spread with some savoury sauce, such as Chinese chili oil, fermented bean curd (Fú Rǔ/腐乳), black bean sauce (豆豉酱), etc. Or serve it like a burger, cut open then slide in a fried egg. Simple but yum!
When eating as a sweet snack, it’s very popular to dip mantou into condensed milk. Honey or jam is a great accompaniment too.
Store and reheat
It’s so handy to have some pre-made Mantou available when you crave them. Once your leftover buns are completely cool, place them in an airtight container/plastic bag. You may keep them in the fridge for up to 4 days or in the freezer for up to 2 months.
Steamed buns tend to go firm and hard when they are cold. To regain their softness and fluffiness, you can simply reheat them in the steamer. It takes about 4 minutes for fridge-kept ones and 6 minutes for frozen ones (no need to defrost).
Other bread recipes
Interested in other types of Chinese bread? Have a look at these recipes:

📋 Recipe
Love this recipe? Please leave a 🌟🌟🌟🌟🌟 rating and a comment. Thank you!
Mantou (馒头), Chinese steamed buns

Video
Ingredients
- 250 g all-purpose, aka plain flour
- 1 teaspoon instant yeast, or dry active yeast
- ¾ teaspoon baking powder
- 1 tablespoon sugar, or to taste
- 130 g lukewarm water, see note 1
- 4 Chinese dates, for flower-shaped buns, optional
Instructions
Prepare the dough
- IF KNEADING BY HAND: Mix flour, yeast, baking powder and sugar. Add water gradually. Mix with chopsticks/spatula until no more loose flour can be seen. Combine and knead briefly into a dough. Leave to rest for 10 minutes (covered). Knead again until very smooth.
- IF KNEADING WITH A STAND MIXER: Mix flour, yeast, baking powder, sugar and water in the bowl. Knead on low speed until a very smooth dough forms (about 8 minutes).
Shape the buns
- IF MAKING ROUND BUNS: Divide the dough into 6 pieces (4 pieces if you prefer bigger buns). Knead and fold the dough piece towards the centre of the ball resulting in a smooth outer surface. Rotate the ball between your hands to form a slightly raised shape (Please refer to the video below).
- IF MAKING FLOWER BUNS: Divide the dough into 4 pieces. Roll one piece into a long, thin rope. Fold both ends in a “J” shape in opposite directions. Turn each end towards the centre of the rope until they meet. Take a pair of chopsticks placing one either side (in the centre) and squeeze to form a flower shape. Place a Chinese date in the centre of the flower.
Rest the buns
- Place the buns in the steamer basket (line with steamer parchment paper or brush a thin layer of oil to avoid sticking). Make sure to leave ample space between each bun.
- Leave to rest for around 30 minutes. Well-rested buns should be slightly bigger (not double the size) and very smooth on the surface. When pressed gently, the dough bounces back (see note 2).
Steam the buns
- Place the steaming basket onto a pot/wok filled with cold water. Start cooking with high heat (see note 3).
- Turn down to medium-low once the water is at a full boil. Count 10 mins from this moment (add 2 mins if your buns are bigger). Serve warm.
Store the buns
- Once completely cooled, place the buns in an airtight container/plastic bag. Keep in the fridge for up to 4 days or in the freezer for up to 2 months.
Reheat the buns
- Steam fridge-kept buns for 5 mins. If frozen, steam for 7 mins (without defrosting).
Notes
Your Recipe Notes
Nutrition
Nutrition information is automatically calculated, so should only be used as an approximation.


Hi, I finally managed to get the mantou perfectly steamed. Yours is the only recipe that got me to believe I can do it. The rest was either too springy or they had the yeasty smell or tasted sour!
Thank you! I will be making them again with filings this time!
That’s wonderful to hear! So happy you find my recipe helpful!
Great recipe for beginners. However, my bun is a bit hard & it collapses after I uncover. Followed your recipe exactly. Except that the proofing of 30 mins should start after completing the 1st bun or the last bun? What should I adjust to make the steamed smooth bun.
But it still tasted great. Thanks for sharing the recipe.
Thank you for trying out my recipe Josephine! It’s possible that your buns weren’t proofed long enough. Count the time from the moment you finish the last bun. If they aren’t very smooth, that’s because you didn’t knead the dough well enough. The next time you can slightly increase the water quantity. It’s easier to knead a softer dough. Hope this helps!
I’m making these for a church function. Can I make these the night before and steam them the next day?
Yes Ben. As I mentioned in the recipe, you can bag up cooked buns once they’re completely cooled and keep in the fridge for up to 4 days or in the freezer for up to 2 months. To reheat, steam fridge-kept ones for 5 mins or 7 mins if frozen (without defrosting).
What would you serve the flower shaped ones with for breakfast? I love the idea of making them in advance and just steaming them in the morning, but I don’t quite know what to pair them with. My boyfriend is absolutely no help whatsoever with figuring out pairings. I’ve never had them before, so I don’t quite know where to start. I’m Swiss/American, so breakfast breads are either coated in nutella or butter and jam.
I want to learn more Chinese meal ideas so I’m not just making my culture’s food, if that makes sense.
Hi Erin! Mantou (including the flower shaped ones) is often paired with Chinese congee (rice porridge) and some savoury appetisers or sauces, such as preserved vegetables, fermented bean curd (Fu Ru/腐乳),black bean sauce, etc. It’s common to enjoy it with condensed milk too. As I mentioned in the post, you may also cut it in halves and put a fried egg in between.
I haven’t tried this yet but really want to. I have a gluten intolerance and can only tolerate sourdough bread do you think it would be possible to use my sourdough starter instead of the yeast?
Hi Shauna! Yes you can use sourdough starter for sure. Happy steaming!
The recipe came out perfect. I kneaded by hand and proofed it for an hour since my house is chilly. It fluffed up and the whole family enjoyed it. Thank you so much!
That’s great to hear Christina!
This is my first attempt on making my own mantou. It went well, very easy and straight-forward and they turned out shiny, plump, and fluffy. I had to add a little bit more water though cause it was too dry and didn’t come out smooth like yours.
Thank you for the tips Wei! I will try filled mantou next time with your recipe!
My pleasure Maria! Next time add a little more water if you’re using flour from the same brand.
Hi Wei, does this method or your traditional (yeast only, double proofing) result in fluffier buns? I’ve been trying a similar single proof method with yeast only and all purpose flour with corn starch and came out dense every time.
Can’t wait to try one of your recipes and method.
Thanks!
Yin
If prepared properly, both methods produce fluffy texture. Baking powder helps to reduce the proofing time, so you wouldn’t need to rest the dough/buns twice. If using yeast-only method, you have to proof twice. Otherwise, you wouldn’t get a good result. So the answer is that they both work very well. But if you aren’t very familiar with working with this type of dough, start with the yeast+baking powder method.
Thanks Wei!! I will give it a try!
Im not sure why i followed your recipe exactly and the buns were a normal colour before steaming, after steaming they have turned an orange/brown colour! what have i done wrong?!
Sorry to hear that Marina! I’ve never encountered similar problem so I’m not quite sure what went wrong. The only possibility I can think of is that you might have mistakenly used baking soda instead of baking powder. The former is an alkaline substance which would make the dough yellow/brown.
Made these tonight, they were a huge hit with my family and especially the kids. They have already requested more tomorrow. I am a novice at any kind of bread making, and following this recipe I had success on my first try, so thank you Wei 🙂
Delighted to hear that Nicola! It’s my great pleasure to share. Enjoy!
I made them again today but filled them with a vegan jackfruit “char siu” filling. Sooo happy with the result.
Hi! I have just tried your recipe and it’s the best one yet! Thank you so much! Just one problem I had was that it tasted more yeasty after a while. Why is that? When it came out of the steamer, it was lovely though. Would love to hear from you. Thanks.
Thank you Hannah for trying out my recipe! I’m not sure why you find it yeasty after a while. I personally haven’t experienced that. Maybe next time you can try reducing the yeast a little bit and leave it to rest for a little longer.
Hi Wei, I love your recipes! Definitely planning to make this one soon. Any suggestions on how to make this whole wheat? I realize it probably wouldn’t be 100% whole wheat flour, but wanted to know your thoughts.
Hi Kai! I would suggest you replace no more than 40% of the all-purpose flour with whole wheat flour. Happy cooking!