


A legendary dish made easy, this Peking duck recipe doesn’t require any special equipment or advanced skill. But it still tastes so satisfying!

Pin this now to find it later!
Pin It“This was the crispiest skinned and juiciest duck I’ve ever had.”
“It tasted exactly, if not better than the restaurant versions.”
Top Tips for Your First Peking Duck
I first shared this recipe in 2022, and it’s since become one of the most popular on Red House Spice, with hundreds of positive reviews. Many of you have generously shared how your duck turned out or asked questions along the way. Those conversations helped me put together these three tips for anyone making Peking duck for the first time:
- Give the skin enough time to dry before roasting.
- Check doneness with a thermometer, since ducks vary in size.
- Rest the roasted duck, uncovered, before carving to ensure juicy meat and crispy skin.
Table of Contents
What is Peking duck
One of the most symbolic dishes of Chinese Cuisine, Peking Duck (北京烤鸭) is a celebrated dish named after Beijing, the capital of China, formerly known in English as Peking.
It’s a dish consisting of several elements: sliced pieces of roast duck with crispy skin and tender meat, thin pancakes, a savoury sauce and some julienned vegetables. These elements are assembled into a roll for consumption.
Every time I travel back to Beijing where I worked for nearly a decade, Peking duck is always my No.1 dish to eat with family and friends. If you’ve tasted it before, you’d understand why it’s regarded as a culinary art.
An easy home version

Unlike most of the dishes I share on this blog, not many home cooks in China would cook Peking duck in their own kitchen. To produce it to a restaurant standard, you’d need to be highly skilled and have professional equipment, such as a pump to blow up the duck skin, a large oven that allows the duck to be cooked vertically, etc.
In response to some readers’ requests, I’ve tested and come up with an easy version of home-style Peking duck. I wouldn’t say it’s as good as what you get from a good restaurant, but it’s definitely more than satisfying as a homemade dish (my biased culinary fans in our Red House said it tasted just as good).
This recipe doesn’t require any special equipment or advanced cooking experience. The steps are explained in detail with extra tips and substitute ideas.
Marinate the duck
Like making Five Spice Chicken or Aromatic Crispy Duck, you’ll need to prepare the duck in advance to achieve the best taste and texture. For this recipe, start the process 1 to 2 days before cooking. Remove any giblets and their packaging from the cavity, then follow the steps below.
STEP 1: Season the duck.

Pat dry the duck with kitchen paper to remove any moisture then rub a good layer of fine salt all over (including the cavity). Leave it to rest for about 1 hour over a wire rack inside a tray.
STEP 2: Tighten the duck skin.

The traditional method involves basting: hold the duck over a pot of boiling water then use a ladle to pour water over the duck. I’d like to introduce an alternative, simpler way: Boil some water in the kettle then gently pour it over the entire duck skin (remember to flip over and do the other side). You can use a deep tray to collect the water, or do it inside a sink.
You’ll see the skin tightens as soon as the hot water touches it. It also looks shinier and smoother. At this stage, you might notice some remaining ends of the feathers appearing. Remove them with a pair of tweezers.
💡Tip: There’s no need to pour water into the cavity, but if any gets in accidentally, drain it out. You don’t need to add more salt after this step.
STEP 3: Coat the skin with syrup.

The key ingredient used in this step is maltose (Mai Ya Tang/麦芽糖), a type of syrup with dense, super sticky consistency that is commonly used in Chinese cuisine. It has a milder sweetness than sugar or honey but gives food a much glossier look. You should be able to find it in most of the Chinese/Asian shops.

You’ll need hot water to soften and dilute maltose and add a small amount of vinegar (any type). Evenly brush one layer over the entire duck skin. Leave to dry in the fridge for 1 hour then brush another layer. Two generous coats are enough. Discard any leftover syrup so the skin has time to dry fully before roasting.
STEP 4: Air dry the duck.
Air dry the duck uncovered in the fridge for 24 to 48 hours. Make sure to place it on a rack set inside a tray to catch any drips. This process reduces the moisture in the skin thus helping to crisp up while roasting. So do not skip it.
Roast the duck
Stuff the duck

Take the duck out of the fridge about an hour before roasting. Stuff the cavity with the following ingredients: apple (any variety, skin-on), scallions, garlic (loose outer skin removed, cloves left together), star anise, cassia cinnamon and bay leaves. This adds more flavourful to the duck.
Seal both openings of the duck with toothpicks or skewers to prevent the stuffing from falling out.
Roast in two stages
For best results, I recommend you use a fan-assisted oven, aka convection oven. Preheat it at 200°C/390°F. If using a conventional oven, increase the temperature to 220°C/425°F.

Place the duck, the breast side facing up, on the middle rack of the oven. This allows the heat to travel in all directions and ensure an even browning. Remember to put a large tray on a lower shelf beneath the duck to collect any dripping fat while cooking. Leave to roast for 15 minutes.
In the second stage of roasting, reduce the oven temperature to 180°C/350°F (or 200°C/390°F if using a conventional oven). To prevent burning, cover the tip of the wings and the end of the legs with aluminium foil. Continue cooking for another 60 minutes or so.

Important notes:
- The cooking time required differs depending on the size of the duck and the performance of the oven. I used a 2.5 kg (5.5lb) duck for this recipe. Please feel free to adjust if necessary.
- The best way to check the doneness is to use an instant-read meat thermometer. Check several spots, particularly the thickest part of the breast and the innermost parts of the thigh and wing, keeping the probe away from bones. If the temperature reaches 74°C/165°F, the duck is fully cooked.
- If the inside part isn’t cooked yet but the skin has gained the desired colour, turn off the fan of the oven and loosely cover the top of the duck with aluminium foil. Continue cooking for a little longer. This prevents over-browning.
- Make sure your kitchen is well ventilated when you open the oven door as there will be smoke coming out.
Carve the duck
Don’t rush to carve the duck. Let it rest, uncovered, for 15 minutes so it loses less juice when you carve it and the skin stays crisp (no steam is trapped).
- Place the rested duck on a cutting board and use a sharp knife to carve.
- Carve the duck into thin slices, keeping the skin and meat intact whenever possible.
- Trim off any remaining meat around the bones to serve alongside the slices.
- Save the carcass to make a soup (see instructions below) and discard the stuffing.
How to serve
Now let’s talk about the four classic items which are served with Peking duck. They are thin pancakes, sweet bean sauce, julienned scallions and cucumber.

The pancakes
The thin pancakes used for wrapping Peking duck are called Chun Bing (春饼) in Chinese which means spring pancakes. They are also known as Peking duck pancakes or Mandarin pancakes in English. You can find them in Chinese stores (usually in the frozen food section). Defrost in the fridge then steam for a few minutes to warm up before serving.

Homemade Duck Pancakes
Learn how to make them with an efficient method.
🛎 Substitutes: Although not traditional options, you can replace duck pancakes with Gua Bao (steamed bao buns) or ready-made Chinese Spring Roll wrappers (steam to heat for serving).
The sauce
Another quintessential accompaniment for Peking duck is Tian Mian Jiang/甜面酱 known as sweet bean sauce, sweet flour sauce, or sweet wheat sauce in English. It’s a classic condiment used in Northern Chinese cooking and particularly popular in Beijing cuisine.

It’s a dark brown, smooth sauce with a thick consistency and a savoury but slightly sweet taste. Although many brands found in Chinese stores label this sauce as “sweet bean sauce”, it is in fact primarily made from fermented wheat flour (be aware some versions may contain a small amount of beans).
For Peking duck, you could use this sauce straight out of the jar/package. However, it tastes much better if cooked with a little oil and sugar (like the restaurant version). Simply use some duck fat rendered from the roasting process. Mix with sweet bean sauce and a little sugar and simmer over low heat until little bubbles appear.
🛎 Substitutes: If you have trouble sourcing sweet bean sauce, replace it with hoisin sauce (海鲜酱), yellow soybean sauce (黄豆酱), or plum sauce (苏梅酱).
The vegetables
Lastly, prepare some julienned cucumber and scallions (aka spring onion, green onion). These two classic ingredients can be replaced by pickled radish, blanched bean sprouts, lettuce leaves, or julienned apple, etc.
How to wrap
Now you’ve got all the elements of a Peking duck meal. Bring everything to the table separately so everyone can assemble their pancakes just before eating.

- Lay a piece of pancake on the plate or the palm of your hand. Spread some sauce over then add a few pieces of sliced duck, scallions and cucumber.
- Fold the bottom part up, then fold the left and right sides towards the centre to form a cylinder leaving the top part open.
- Give it a generous bite. I’m sure you’ll be proud of your made-from-scratch creation!
Leftover carcass
In Peking duck restaurants, waiters usually ask the diners what is their preferred way to cook the duck carcass after the meat has been sliced off. Among a few options, duck carcass soup (鸭架汤) is the most popular choice. In fact, many people would take the carcass home to make the soup later.
Simply simmer the carcass (broken into smaller pieces) in water for 30 mins or so. Add some sliced napa cabbage or winter melon to balance the taste. To make it more substantial, you can also put in some tofu pieces. Add salt and white pepper to season.
A duck breast version
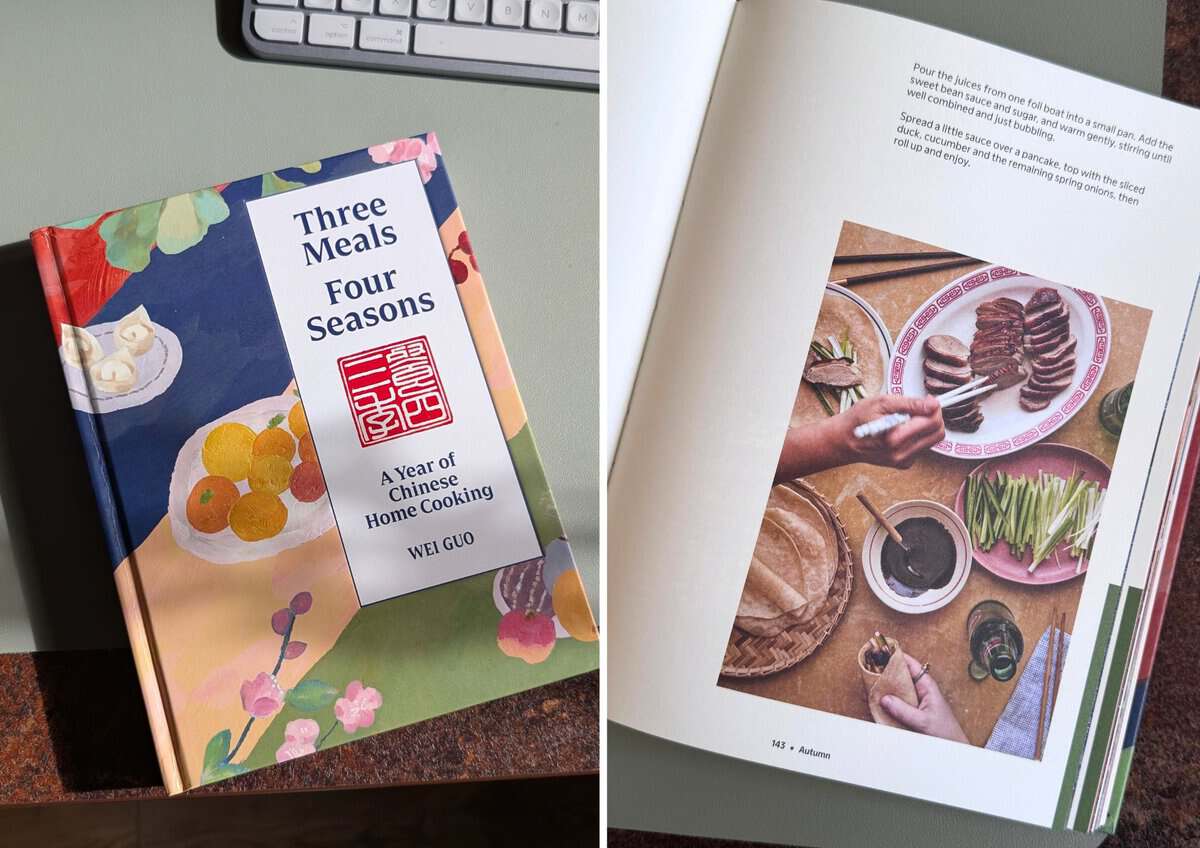
In my cookbook Three Meals Four Seasons, I introduce a duck breast version. It’s even easier to make.
FAQs
A: Here are some possible reasons: the skin wasn’t dry enough before roasting; the oven temperature was too low; airflow around the duck was limited; or the duck was covered after roasting or left too long before serving.
A: I usually discard it, but some readers have added it to the carcass soup or blended it into a sauce. If you’d like to try either idea, I suggest removing the whole spices and any garlic skins first. Also, if making a sauce, heat it until piping hot thoroughly.
A: Yes. Thaw it completely in the fridge before starting, and follow the package’s instructions for how soon to cook it after thawing when planning the drying time.
A: For the best texture, I recommend roasting it on the day. If you need to cook it a day ahead, let it cool then refrigerate it within two hours. Reheat it whole in the oven until piping hot throughout before carving. The meat may be drier, and the skin may not regain its crispness.
A: I recommend steaming leftover duck until piping hot to keep the meat moist. The skin will soften, but the duck will still taste delicious.
📋 Recipe card
Love this recipe? Please leave a 🌟🌟🌟🌟🌟 rating and a comment. Thank you!

Peking Duck, An Easy Home Version (北京烤鸭)

Before You Start
Ingredients
- 1 duck, about 2.5kg/5.5lb
- 2 tablespoon fine salt
For the syrup
- 2 tablespoon maltose, see note 1
- 120 ml hot water, about ½ cup
- 1 teaspoon vinegar, see note 2
For the stuffing
- 2 stalks scallions
- 1 head garlic
- 2 apples, quartered
- 4 star anise
- 4 bay leaves
- 2 pieces cassia cinnamon
For the sauce
- 3 tablespoon sweet bean sauce (Tian Mian Jiang/甜面酱), see note 3
- 1 teaspoon sugar
You also need
- Peking duck pancakes, homemade or shop-bought, 18-24 pieces depending on the size
- Scallions, julienned
- Cucumber, peeled and seeds removed, cut into sticks
Instructions
Prepare the duck
- Pat dry the duck with kitchen paper then rub the salt over the skin and the cavity. Put the duck over a wire rack with a tray underneath to collect any drips. Leave to rest on the counter for 1 hour.
- Bring about 1½ litres of water (about 6 cups) to a boil, then gently pour it over the entire duck skin (remember to flip over and do the other side). You can use a deep tray to collect the water, or do it inside a sink. If there are feather ends on the skin, remove them with a tweezer.
- In a bowl, mix maltose with hot water and vinegar until completely dissolved. Brush a layer of the mixture over the duck skin. Leave to rest in the fridge for 1 hour then brush another layer. Two generous coats are enough, so discard any leftover syrup.
- Keep the duck refrigerated uncovered (over the rack and inside a tray) for 24 to 48 hours.
Roast the duck
- One hour before roasting, take the duck out of the fridge. Put all the stuffing ingredients (scallions, garlic, apples, star anise, cassia cinnamon and bay leaves) into the cavity. Use toothpicks or skewers to seal both openings of the cavity.
- Preheat a fan-assisted oven, aka convection oven, at 200°C/390°F (or 220°C/425°F if using a conventional oven). Put the duck over the middle rack of the oven with the breast side facing up. Place a roasting tray on a lower shelf underneath to collect any dripping fat during roasting. Leave to cook for 15 minutes.
- Then lower the temperature to 180°C/350°F (or 200°C/390°F if using a conventional oven). Use aluminium foil to cover the tip of the wings and the end of the legs. Continue cooking for a further 60 minutes or so (see note 4)
- With an instant-read thermometer, check the thickest parts of the breast and inner thigh, avoiding bone. Each reading should reach at least 74°C/165°F.
Serve the duck
- Take the duck out of the oven and leave it to rest uncovered on the counter for 15 minutes.
- While waiting, prepare the sauce. Add ½ tbsp of duck fat collected during roasting to a pan. Add sweet bean sauce and sugar. Mix and simmer over low heat until tiny bubbles appear. Transfer to a small serving dish. Whisk to fully incorporate the sauce and oil.
- Steam the pancakes for 3 minutes to warm up if they’re cold.
- Remove and discard the stuffing, then carve the duck into slices.
- When eating, spread a little sauce over a pancake, put the duck, scallions and cucumber in the middle. Wrap up into a cylinder and enjoy.
Cook a soup (optional)
- After most of the meat has been removed from the duck, boil the carcass in water to make a soup with Napa cabbage or winter melon. Simply add salt and white pepper to season.
Notes
Your Recipe Notes
Nutrition information is automatically calculated, so should only be used as an approximation.












Thanks for sharing this recipe, made it and no longer need to buy store version!
So happy to hear that. Thanks for trying my recipe Daniel!
I’ve made roast duck using this recipe 4 times now, and it always turns out perfect. Thank you so much for sharing it with us!
Thank you so much Kaoya! I’m really glad the recipe has worked well for you each time.
Great recipe, but definitely a bit of work. We basted the duck daily for 72 hours (only because there was enough basting sauce left and we had to put the dinner off a night later than planned) and we made the pancakes. To be honest, the pancakes were the most difficult part, but worth it. And if you aren’t using a non-stick pan, I would suggest lightly brushing some neutral oil on the pan to prevent any sticking. I would definitely make this again, but it’s definitely a celebratory meal and not a weeknight dinner.
Thank you for sharing this Jeanne! It really is a labor of love, and you’re absolutely right that it’s best saved for special occasions. I’m glad you felt the effort was worth it.
I used this recipe for my New Year’s dinner. I used honey instead of Mai Ya Tang and I decided to cook the duck in a smoker (low and slow, at 180 F for over 12 hours, with the wings and drumsticks covered from the start). The wings got a bit dry, but the rest of the bird was superb! The aroma of anise and cinnamon spread thoroughly throughout. My guests couldn’t have enough of it!
Thank you for sharing this, Paris. What a creative approach. Smoking the duck low and slow sounds wonderful, and I can imagine how beautiful the star anise and cinnamon aroma must have been. I’m glad that your guests enjoyed it so much.
I have to tell you, your recipe was easy to follow. I ended up substituting a couple items. Like honey and hoisin.
But it turned out wonderfully delicious. My husband said we have to have Peking duck a couple times a year. I matched it with shrimp lomein and ham fried rice. Yummy. Thank you.
Thank you for the feedback! I’m so glad it turned out well for you, even with the substitutions. Sounds like you put together a wonderful meal.
A good friend of ours gave us a duck for Christmas (a raw one). There are no restaurants that serve roast duck in our area. So this will be my first try using your recipe. I am preparing it for New Years meal. I will comment after. Really excited to try this. Thank you.
I’m glad the recipe will be part of your New Year’s meal, and I hope it turns out beautifully. Looking forward to hearing how it goes.
4.5 stars because: 1. The skin hasn’t turned up as crispy as I’d expected. Could be my oven. 2. Also I coated the skin layers several times during refrigerating period since there were plenty leftover coating liquid. 3. I blended the stuffing to use as sauce instead of making the actual sauce. Works out brilliant. Thank you for the recipe.
Thank you for sharing this, Jess! These are really helpful tips, and blending the stuffing into a sauce sounds like a great idea. Glad you enjoyed the recipe.
We made this for our Christmas dinner and it turned out great! We cooked the breast until 145, then let it rest and the breast meat was perfect! I would have never thought of convection roasting a duck directly on the oven rack and that’s a game changer. I made the mistake of tenting the duck while it rested so I lost my crispy skin but that was user error. I bookmarked this recipe and will certainly make it again. Thank you!
Thank you for sharing this, Brandon! I’m really glad it worked well for your Christmas dinner.
This was a phenomenal recipe. I sourced the maltose and it was worth it. The way the duck was laid out I accidentally cooked it upside down 😂😂 but it was still so crispy I was able to fix it in the carving stage
So happy to hear this, Luke! Yes, maltose really does make a difference. Thanks for trying my recipe!
What do you do with the stuffing when cooked thankyou
Hi Raymond! I usually discard the stuffing. I’d love to hear if you have any creative ideas in mind. Happy roasting!