

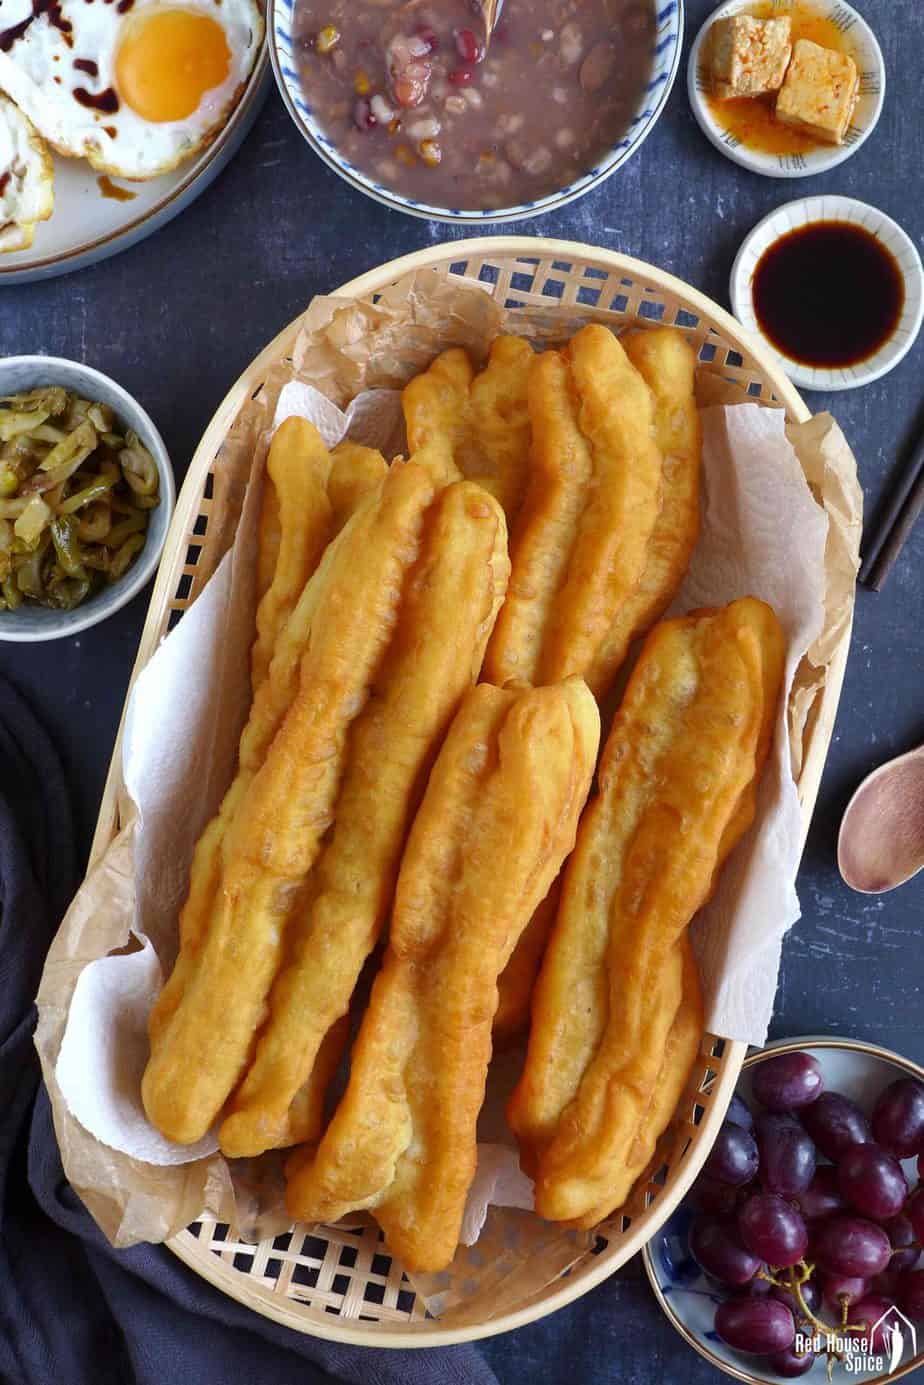
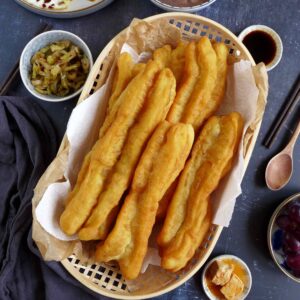
A comforting breakfast staple loved by many, Chinese doughnut sticks (Youtiao) are light, airy and pleasantly chewy. Follow my recipe to make it at home without fail.
Pin this now to find it later!
Pin ItNote: This is a revised version of my post published in 2018. It provides more detailed instructions and tips.
Table of Contents
What are Chinese doughnut sticks
“What do Chinese families have for breakfast?” This is a question that I’ve been asked many times and I often find it difficult to answer. There are just too many varieties! However, if I had to choose one particular dish, Chinese doughnut sticks (Youtiao, 油条) would be the one synonymous with breakfast across the country.
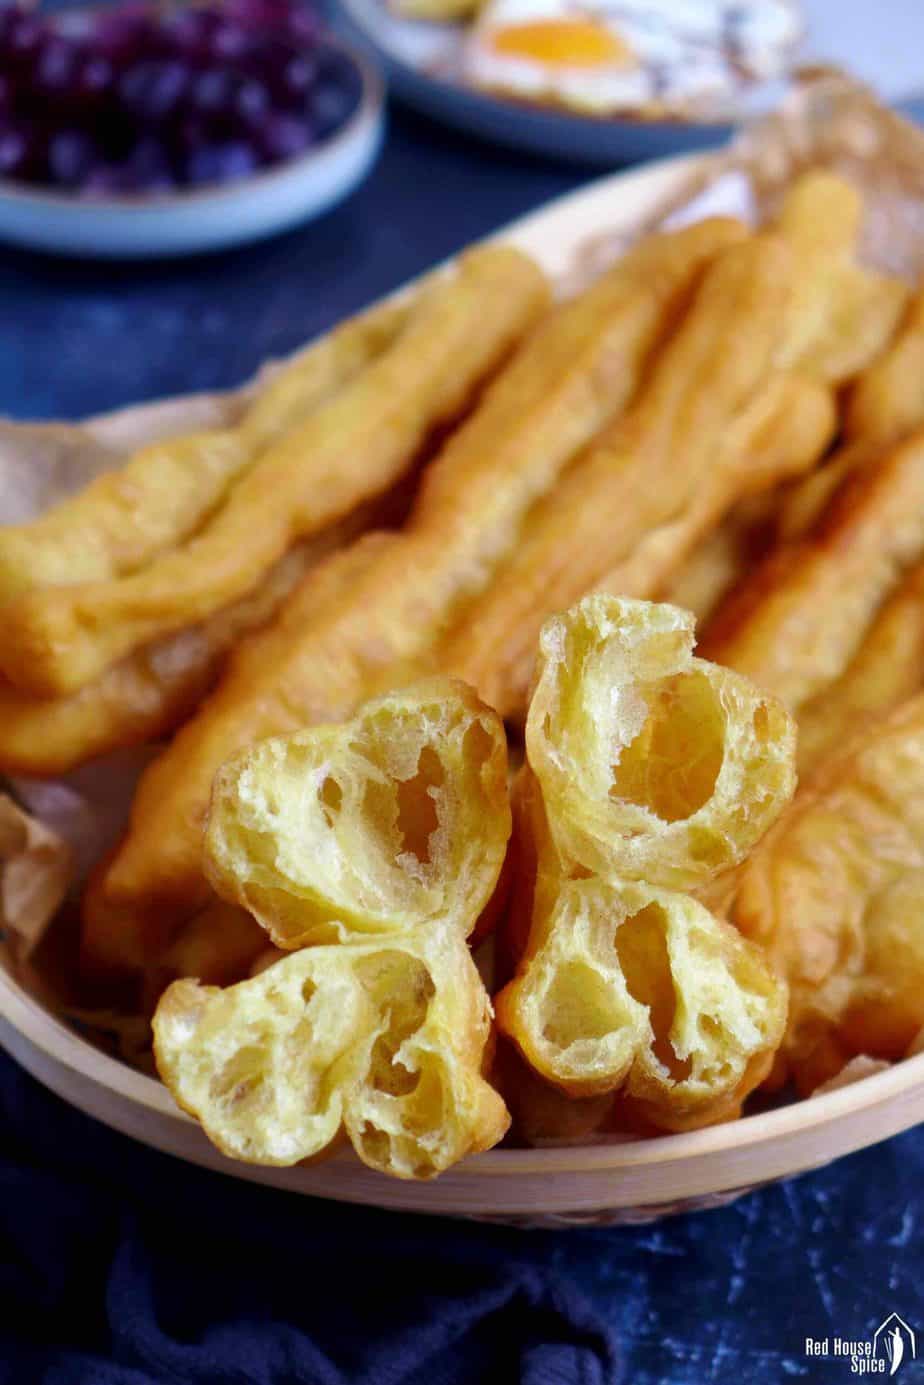
Essentially, it’s deep-fried, leavened dough that has a slightly salty, alkaline flavour and an airy, fluffy texture, In English, a variety of words are used to name it, such as Chinese cruller, Chinese oil stick, Chinese donut, Chinese fried dough stick, Chinese churro, etc.
As a child, I always loved watching the street vendors frying up doughnut sticks. It’s fascinating to see thin strips of dough magically expand to chunky sticks in just a few seconds.
Making doughnut sticks isn’t a popular home cooking practice in China because 1) It’s time-consuming. 2) It requires good attention to detail to get it right.
But don’t let these statements stop you from trying, especially if you’re like me who has no chance to buy it but still crave it for an occasional treat. It’s truly a labour of love. When I had the first bite of my homemade one, I knew that it was worth all the effort!
Top tips for success
Well-cooked doughnut sticks should be light, airy and slightly chewy. To achieve the desired texture, I suggest you follow the recipe “to the letter”. Before I explain each step in detail, allow me to summarise a few things that you need to pay attention to:
- Use a kitchen scale to measure ingredients as it’s so much more accurate this way than using cups.
- This recipe makes a high-hydration dough (very soft) which contributes to a light and airy texture. It might be a little messy to handle but try not to alter the flour-water ratio.
- The dough needs to be rested for at least 2 hours. If kept in the fridge overnight, you must allow it to come back to room temperature before deep-frying.
- Oil temperature control is very important so using a kitchen thermometer greatly increases your chance of success.
Ingredients
To find the dough formula that creates the most light and airy doughnut sticks, I’ve done extensive tests on the ingredient choices and ratios. Eventually, I settled down with this list (For making 10-12 sticks):
- 400g all-purpose flour/plain flour
- 2 tsp baking powder
- ¼ tsp baking soda, optional
- ½ tsp salt
- 2 eggs, lightly beaten, plus water combined to 250g
- 2 tbsp neutral cooking oil, plus a little for coating
Here are a few notes you might find helpful:
- Baking soda isn’t compulsory for this recipe. It helps to brown the sticks during deep frying. Also, it adds a little alkaline taste which is part of the flavour profile. Do not increase its quantity though as this leads to a soapy taste.
- You may use eggs of any size as long as the combined weight of eggs and water reaches 250g.
- Melted butter or coconut oil can be substitute for regular cooking oil.
Cooking procedure
Step 1: Make the dough
Due to its high-hydration nature, this dough is a little tricky to prepare. But don’t be discouraged, here are a few tips to help you out.
- If using a stand mixer: combine and knead all the ingredients on low speed for about 8 minutes. Rub a little oil on your hands to remove it from the bowl.
- If preparing manually: use a silicon spatular to mix and combine all the ingredients into a rough-looking dough. Cover and rest for 15 mins. Coat your hands with some oil. Use your fist to press the dough. Then use your fingers to fold it from the side towards the centre. Repeat the movement until the dough becomes smooth.
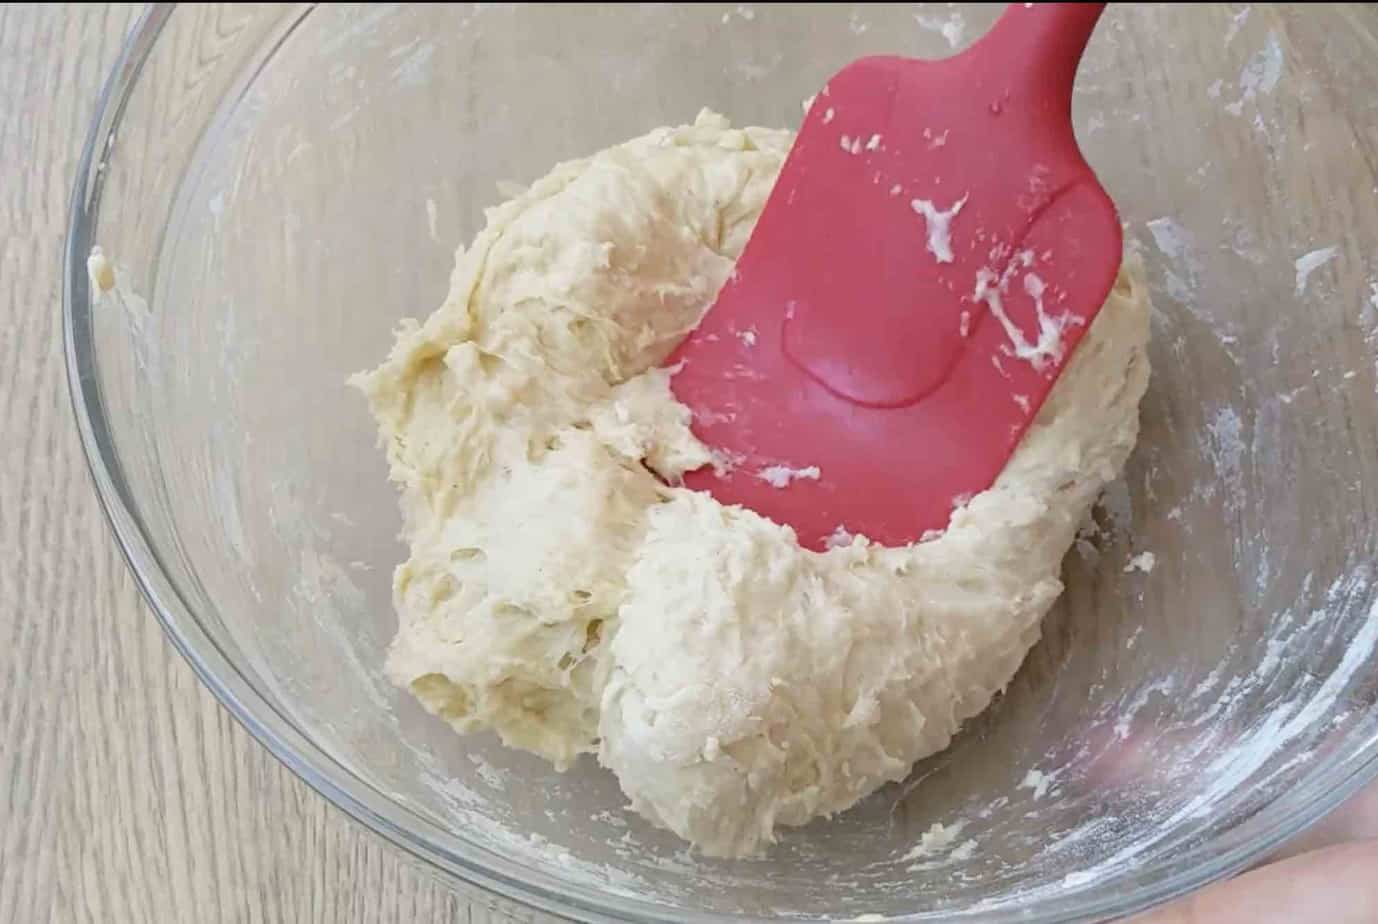
🛎 Tip: For best result, it’s important that all the ingredients are well combined and the dough is kneaded to an even and smooth texture. A little oil helps to prevent sticking and the more you knead, the less sticky it’ll become.
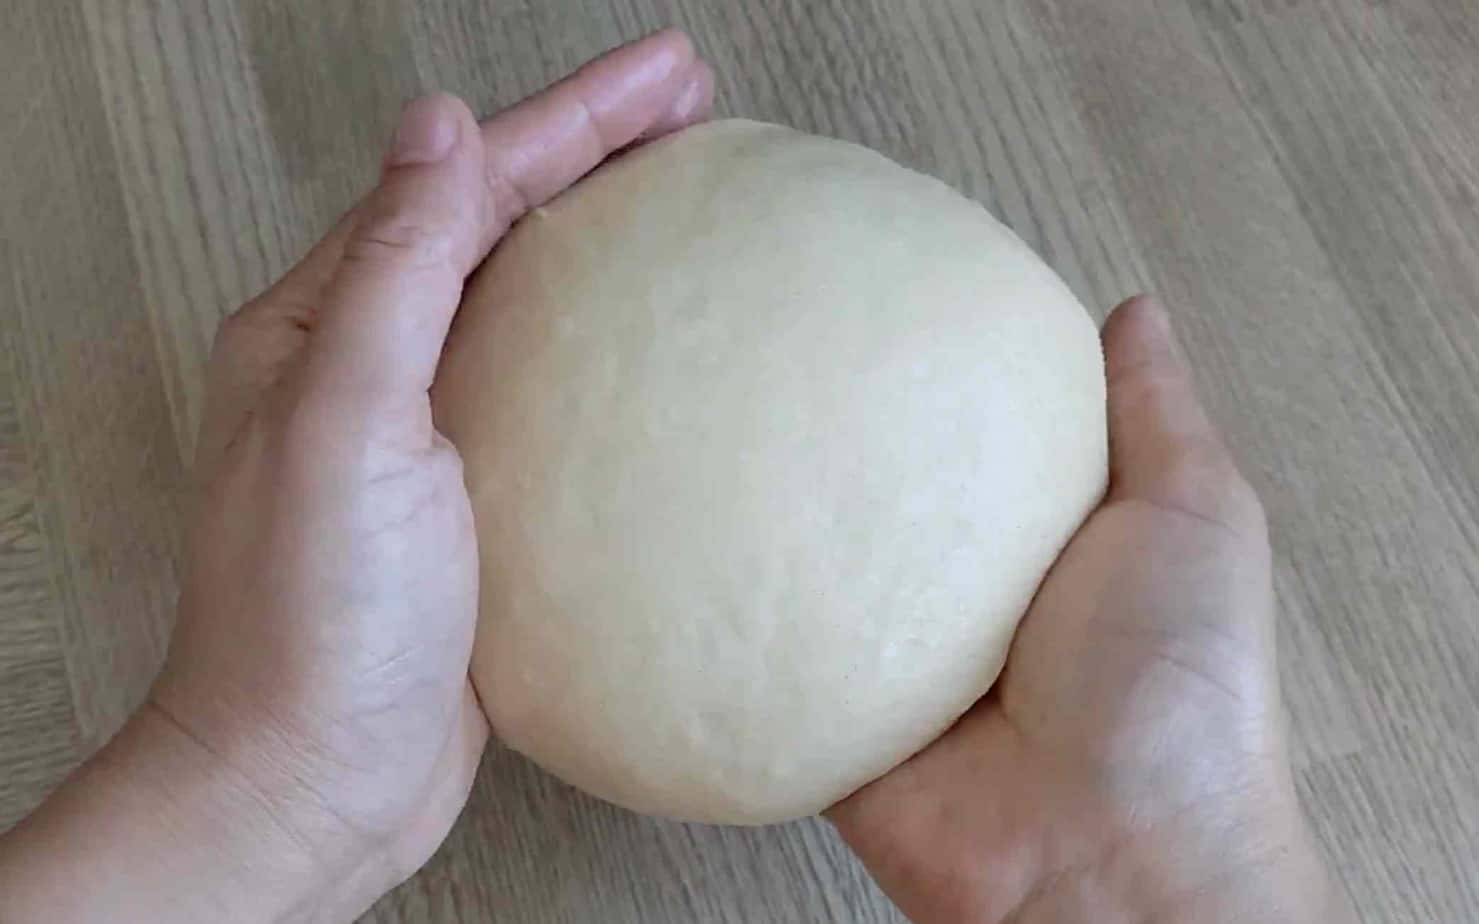
Step 2: Rest the dough
Divide the dough into two pieces. Then shape them in your hands (use a little oil if it sticks) into two smooth balls. Coat them thoroughly with oil. Cover with cling film to rest.
You may either let the dough rest for 2-4 hours at room temperature or in the fridge overnight (since it’s a breakfast item, you might want to cook it in the morning). If you choose the latter, remember to bring the dough back to room temperature before frying (leave in a warm place for at least 1 hour). Otherwise, it won’t puff up as desired.
Step 3: Shape the dough
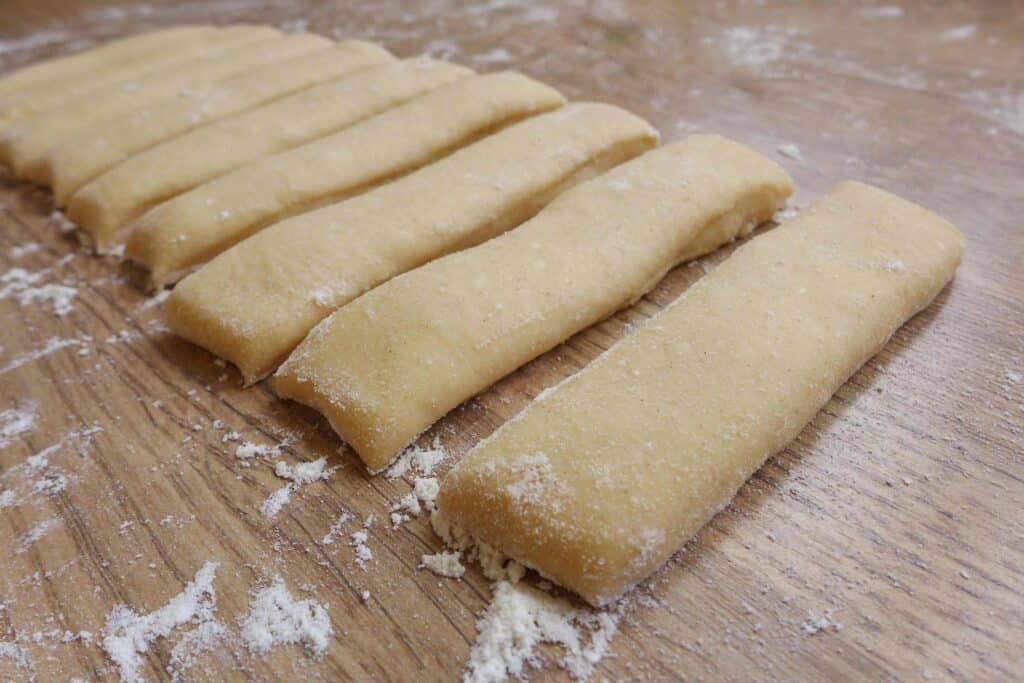
Now your dough pieces should be very soft and flexible. Gently transfer them (do not knead again) onto a surface dusted with flour. Use your hand to shape them into two rectangles (about 10×25 cm/4×10 inch each).

Lightly dust the top of the dough with flour. Then cut each rectangle crosswise into 10 equal strips (use a long, sharp knife to make it neat).
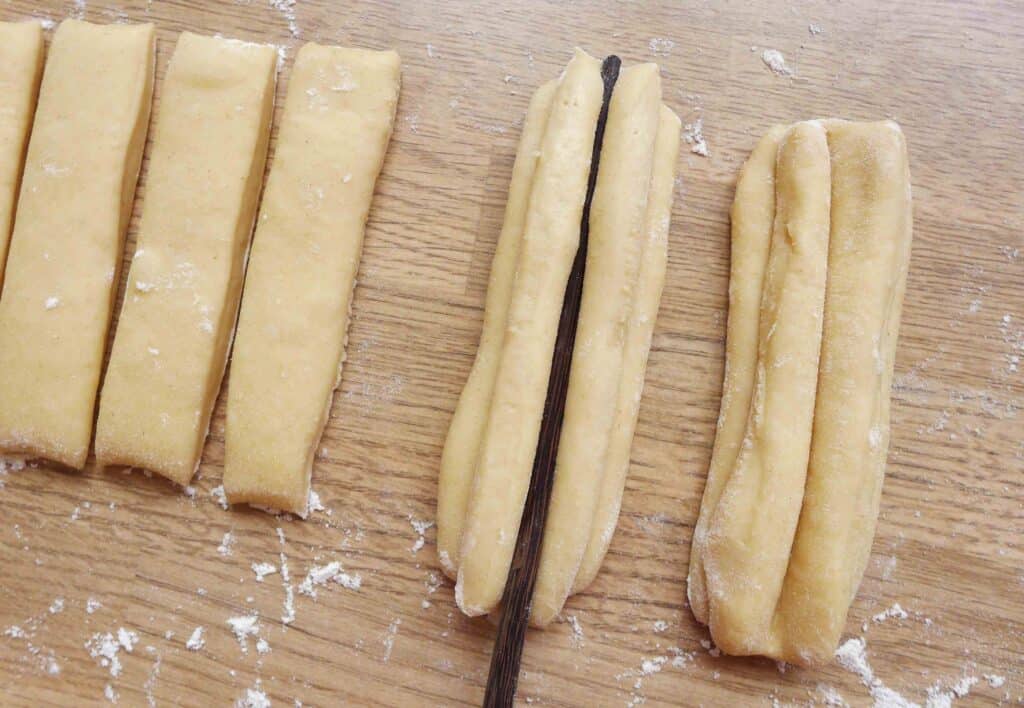
Lay one strip of dough on top of another. Press the centre with a chopstick lengthways to stick them together. Repeat the procedure with the rest of the dough pieces.
🛎 Tip: I use a 30cm/12in wok for deep-frying. If your cookware is smaller, reduce the length of the dough strips (it should measure around one-third of the diameter of your cookware).
Step 4: Deep fry
Start heating up the deep-frying oil while you’re shaping the dough as it takes a while to reach the desired temperature.
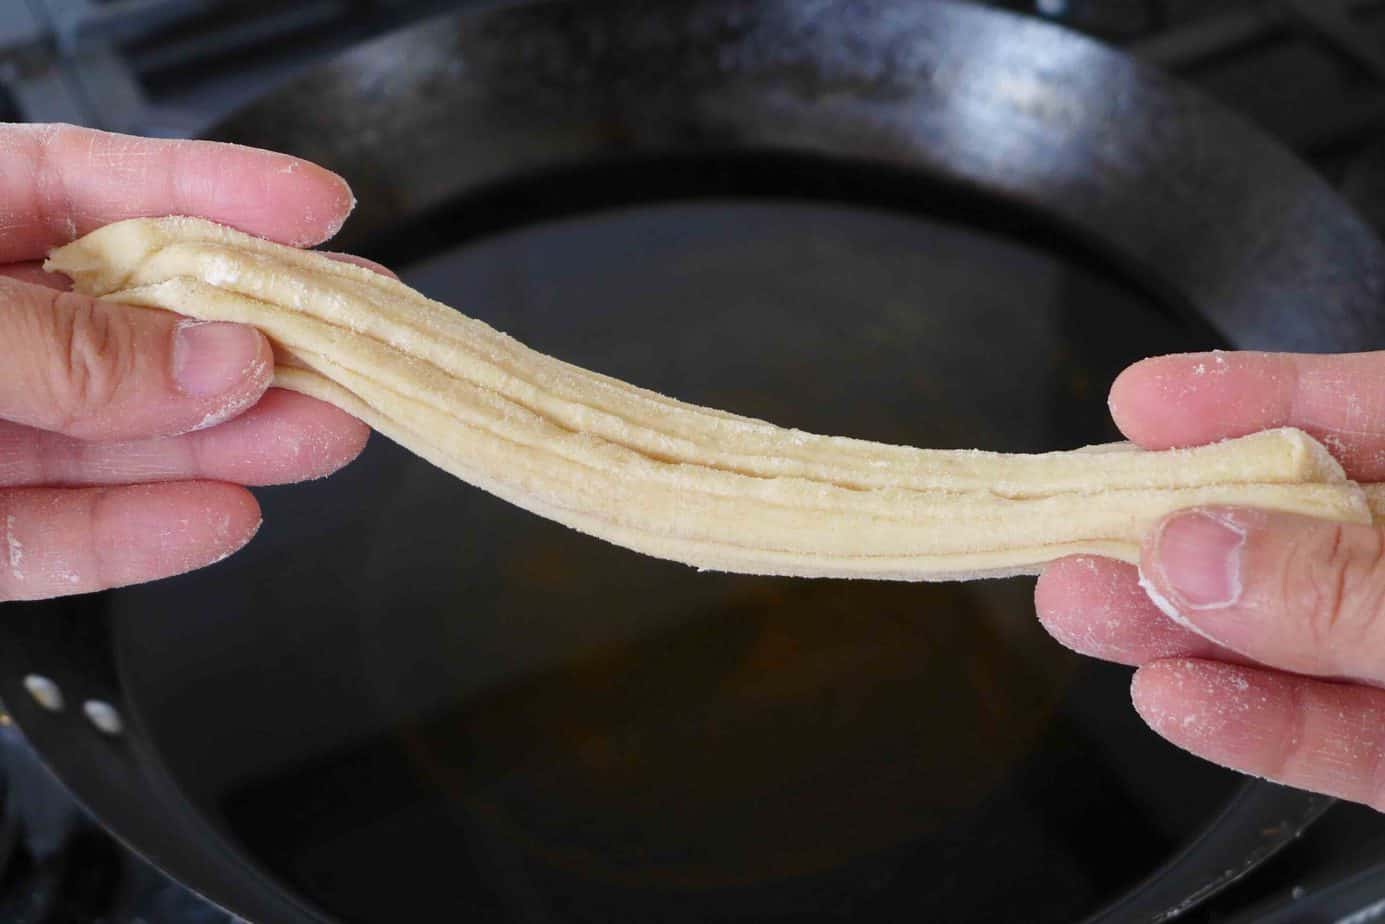
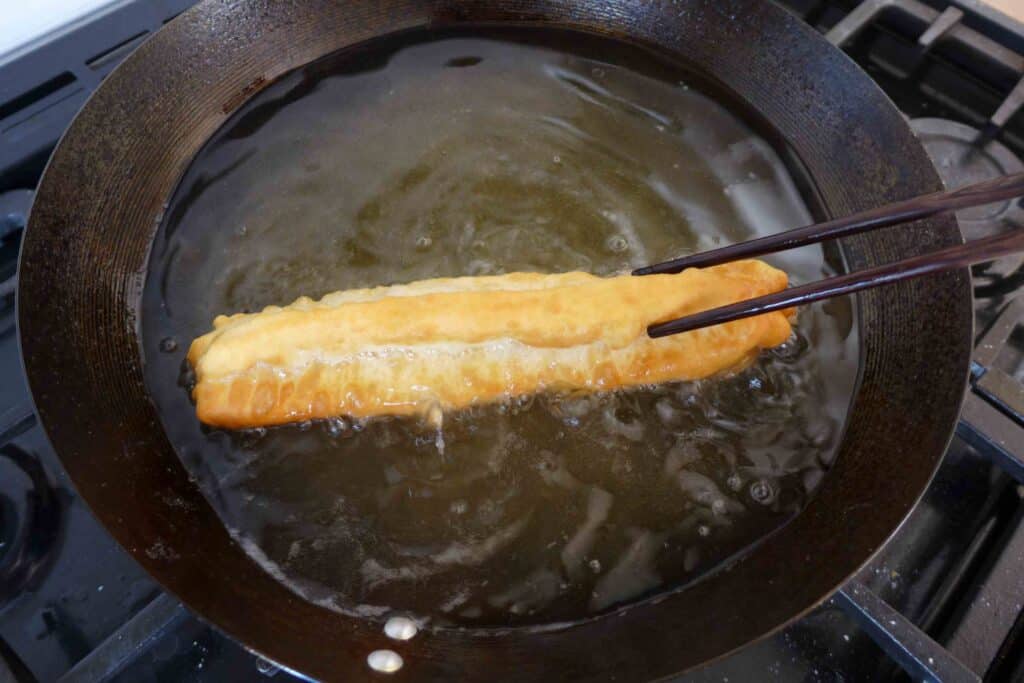
Once the oil reaches 190°C/374°F, turn the heat down to low. Gently stretch the dough then carefully lower it into the oil (be careful not to splash).
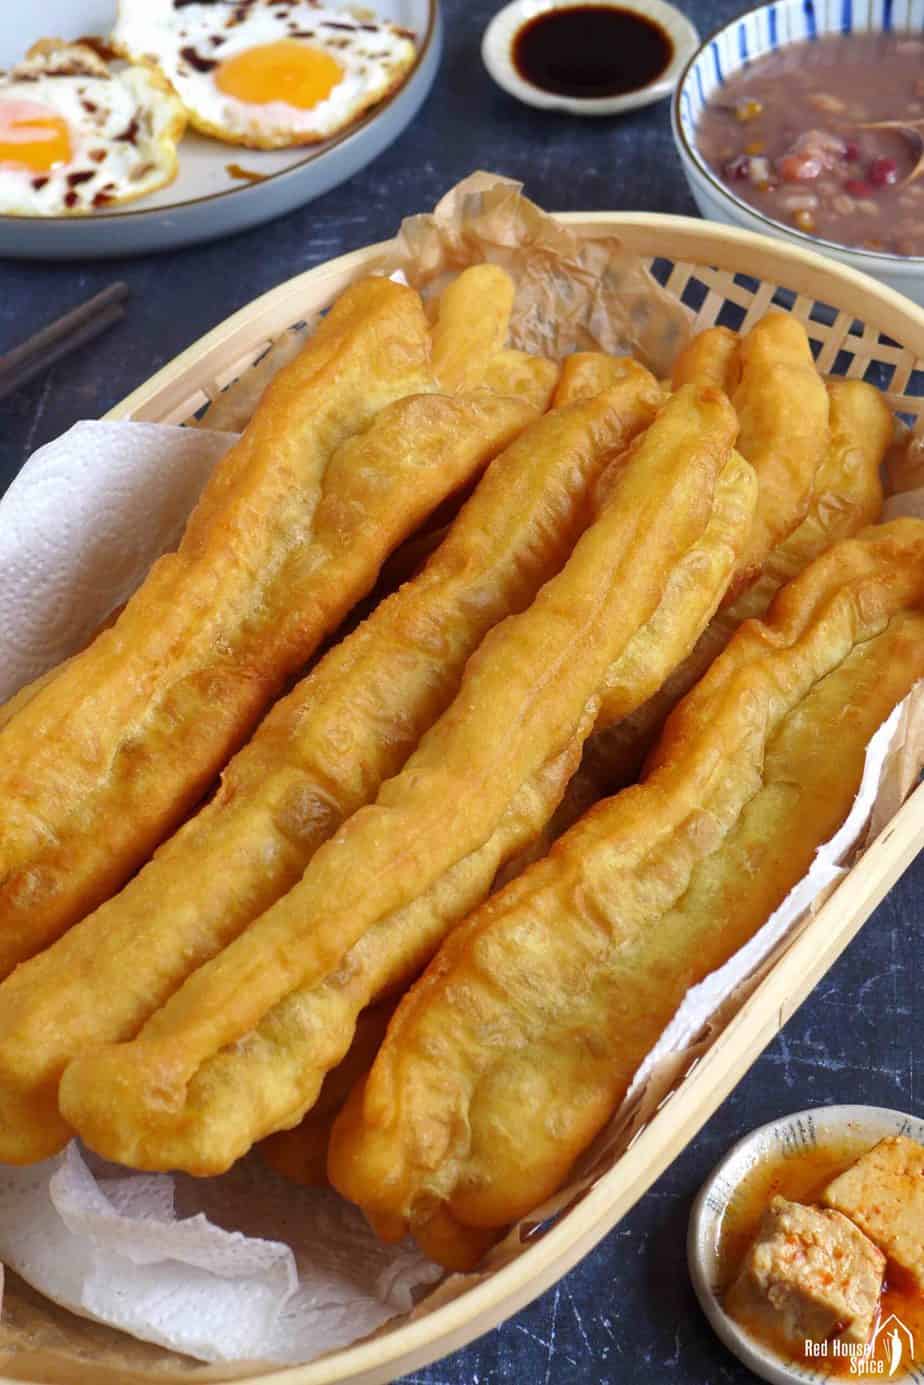
The dough will come up to the surface within a few seconds. Roll it around continuously with a pair of chopsticks. Once it stops expanding and becomes evenly golden, transfer to a plate lined with kitchen paper (to soak up excess oil).
Repeat the procedure to cook the rest of the dough. You may cook two sticks at the same time, but do not fry more at once since this will decrease the oil temperature too much.
🛎 Tip: Doughnut sticks fry well when the oil temperature is between 190°C/374°F and 200°C/392°F. At a lower temperature, the dough will come out dense and oily, whereas at a higher temperature it might have the middle part undercooked while the outside is already brown enough.
Note: I’ve been asked if air-frying can be an alternative way to cook Chinese doughnut sticks. Unfortunately, the answer is no. However, you may use an air-fryer to reheat leftover ones.
What to serve with
Chinese doughnut stick tastes wonderful on its own. You may also dip it into soy milk, a little soy sauce, or condensed milk if you fancy something sweet. I personally like eating it with a little fermented bean curd (Fu Ru/腐乳). Jian Bing and Fan Tuan, another two classic breakfasts, uses doughnut stick as filling.
Other breakfast recipes
Looking for more classic Chinese breakfast dishes? Here are a few examples:

- Chicken & Mushroom Congee (鸡肉粥)
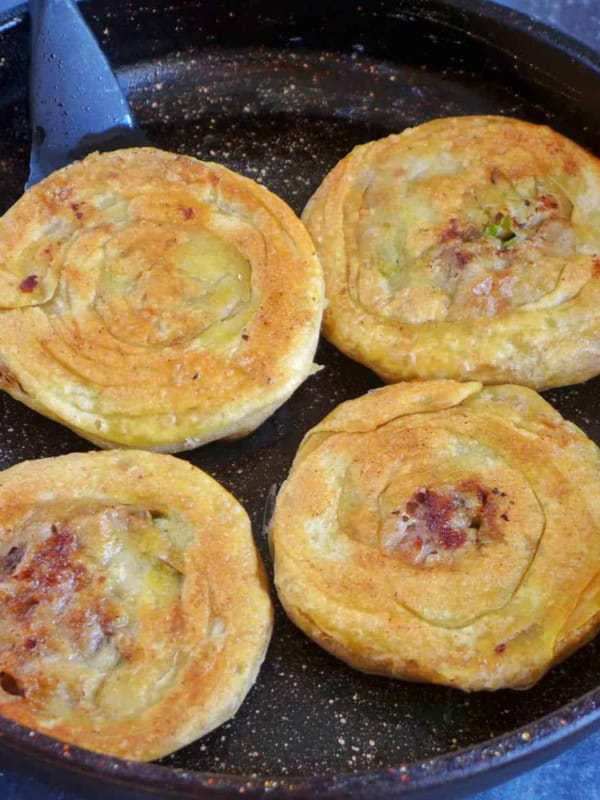
- Crispy Stuffed Flatbread (锅盔)
- Steamed Flower Rolls (花卷)
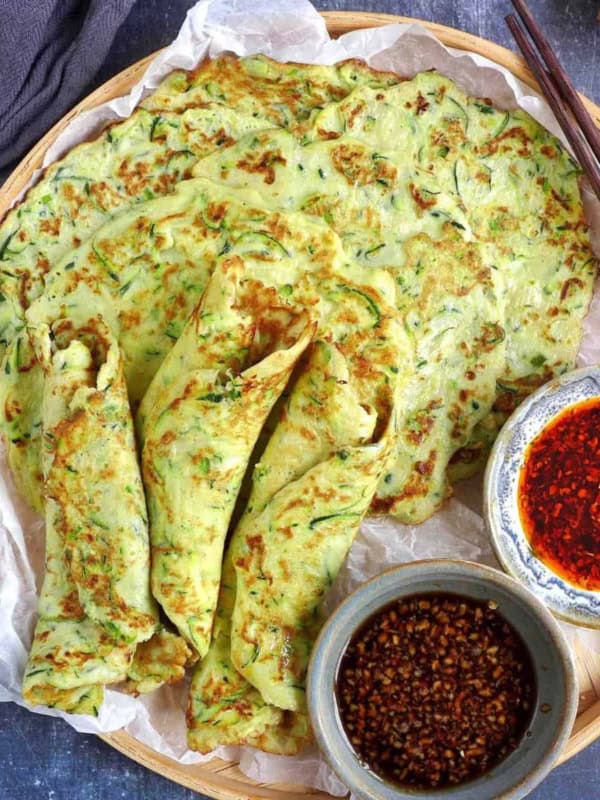
- Scallion Pancakes (葱油饼)
- Jian Bian, Chinese Crepe (煎饼)
- Steamed Eggs (蒸蛋羹)
📋 Recipe
Love this recipe? Please leave a 🌟🌟🌟🌟🌟 rating and a comment. Thank you!
Chinese Doughnut Sticks (Youtiao, 油条)

Ingredients
For the dough
- 400 g all-purpose flour/plain flour
- 2 teaspoon baking powder
- ¼ teaspoon baking soda, optional, see note 1
- ½ teaspoon salt
- 2 eggs, lightly beaten, plus water combined to 250g, see note 2
- 2 tablespoon neutral cooking oil, plus some for coating
You also need:
- Flour for dusting
- Oil for deep-frying, see note 3
Instructions
Make the dough
- With a stand mixer: Add flour, baking powder, baking soda (if using), salt, the egg water mixture and oil into the bowl. Mix and knead on low speed for about 8 minutes. Rub a little oil on your hands (to prevent sticking) and remove the dough.
- Manually: use a silicon spatular to mix and combine all the ingredients into a rough-looking dough. Cover and rest for 15 mins. Coat your hands with oil (to prevent sticking). Use your fist to press the dough. Then use fingers to fold the dough from the side towards the centre. Repeat the movement until the dough becomes smooth (at this stage it should be soft but not sticky).
Rest the dough
- Divide the dough into two equal portions. Shape each one into a smooth ball. Coat with oil then cover with cling film.
- Rest the dough for 2-4 hours at room temperature. Or, keep it in the fridge overnight. The next morning, wait for at least 1 hour until it comes back to room temperature.
Shape the sticks
- Before handling the dough, start heating up the oil for deep frying.
- Transfer the dough pieces onto the work surface (or a chopping board) dusted with flour. Use your hands to flatten each piece into a rectangle shape (about 10×25 cm/4×10 inch). Remember not to knead it again but handle it gently.
- Lightly dust the dough with flour to prevent sticking. Then cut each piece into 10 equal strips.
- Lay one strip on top of another. Press the centre with a chopstick lengthways to stick them together. Repeat the procedure with the rest of the dough pieces (dust with flour where necessary).
Fry the sticks
- Once the oil reaches 190°C/374°F (see note 4), turn the heat down to low. Gently stretch the dough then carefully lower it into the oil (be careful not to splash).
- When it comes up to the surface, roll it around continuously with a pair of chopsticks. Once the dough stops expanding and is evenly golden, transfer it to a plate lined with kitchen paper (to soak up excess oil).
- Repeat the procedure to cook the rest of the dough. You may cook two sticks at the same time, but do not fry more at once since this will decrease the oil temperature too much.
Store & reheat
- Doughnut sticks taste best when warm. You may store leftovers in an airtight bag in the fridge for up to three days or in the freezer for 2 months.
- Reheat the chilled ones in a frying pan (without oil) over low heat until warm. Flip several times to heat evenly.
- For frozen ones, you may heat it up in the oven (preheated at 180°C/ 356°F) for 5 mins without defrosting. Or defrost first then warm up in a frying pan.
Notes
Your Recipe Notes
Nutrition
Nutrition information is automatically calculated, so should only be used as an approximation.


These turned out great and were so easy to make! I made them same day after resting the dough x 6 hours at room temp. The dough was wonderfully soft and supple. I don’t live near any shop that makes these so being able to make them at home is awesome. Thanks for sharing your recipe!
You’re welcome Lily! Delighted to know my recipe has satisfied your craving.
Approximately How long would you knead the dough? 20 minutes?
Hi Donald! There is no set time on kneading. As long as the dough becomes smooth, you are ready to shape it.
can i put the dough in the fridge for more than 2 days to rest?
Hi Ruth! No, you can’t leave the dough for too long as baking powder and baking soda will lose their effectiveness.
Hi Allan! You need to remove the cling film right before you cut the dough into strips. Happy cooking!
Thank you!
Hi Ainz! I’ve mentioned in the recipe instructions that you should start frying when the temperature reaches 180°C / 356°F. Happy cooking!
Thank you for the recipe I tried 2 other recipes from 2 different blogs and they don’t work. Something wrong with their hydration ratio. Your recipe is the only one with correct hydration. I made it a month ago and everyone at home loves them.
That’s great to hear!
Thank you for the recipe. I can’t get baking powder. Can I use self raising flour for this recipe instead? I do have baking soda but not baking powder.
Self-raising flour contains plain flour, baking powder & a little salt. So I think you can use it for this recipe (although I haven’t tested this way). The result might be a little different as the flour baking powder ratio is different from my recipe (different brands have different ratios too). Hope this helps!
Thank you so much, Wei.
I’m from Singapore, and we can find油条 in many places, at very low price.
But we are trying to eat home cooked food, for healthier choices of ingredients.
After seeing your reply, I bought some organic unbleached self raising flour to replace the flour, baking soda and baking powder. And I tried to make it vegan, without egg.
The rest, I followed your instructions. And I am so pleased that my first attempt at making 油条 is very successful.
Thank you once again for sharing.
That’s wonderful to hear! Yes, it’s fine to alter the ingredients a little as long as you understand the key factors that contribute to a good result. So happy that you’ve enjoyed it!
You may replace the baking powder with 1.5 tsp of dried yeast for my recipe. Use lukewarm milk (or water) to make the dough. Rest until it doubles in size. Then shape and fry the doughnut stick as usual. Hope this helps. Stay safe!
Hello, I do not have baking powder and will use yeast as you mentioned. However, what did you mean by lukewarm water to make the dough? The recipe has milk but not water. Thank you in advance.
Hi Adriana! You can use either lukewarm milk or lukewarm water. They are interchageable. Happy frying!
Sorry, it was a typo. What I mean is the flour milk ratio (corrected in my recipe). However, I didn’t say the ratio depends on the humidity in the room. I said: it depends on the brand of your flour and how you measure it. Hope this helps.
Oh my god. This makes me soooooooo happy! I would love to make my own 油条。I can’t wait!
I totally understand your excitement. Have a good time making them!