
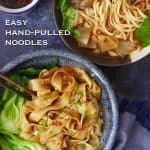
A complete guide to Chinese hand-pulled noodles. Techniques explained in detail and two shapes introduced. Following this recipe, everyone can make them with ease!
Pin this now to find it later!
Pin ItTable of Contents
What are hand-pulled noodles
Hand-pulled noodles, known as Lā Miàn/拉面, Lā Tiáo Zi/拉条子 or Chě Miàn/扯面, is a recipe that I’ve been meaning to share for a long time. Growing up in Gansu province, China where it’s a common dish in restaurants and households, I learned the technique through observing my parents’ cooking. I enjoy the pleasure of both making and eating them.
As its name suggests, hand-pulled noodles are formed by pulling wheat flour dough by hand into long, elastic strips. Compared to hand-cut and machine-made noodles, they usually have a more silky, springy and chewy texture. They are always served super fresh as the pulling and cooking process happens at the same time.
These fresh noodles contain three basic ingredients: wheat flour, salt and water. In some cases, an alkaline agent is added to the dough to make the noodles more springy.
Professional version vs easy version
The professional version
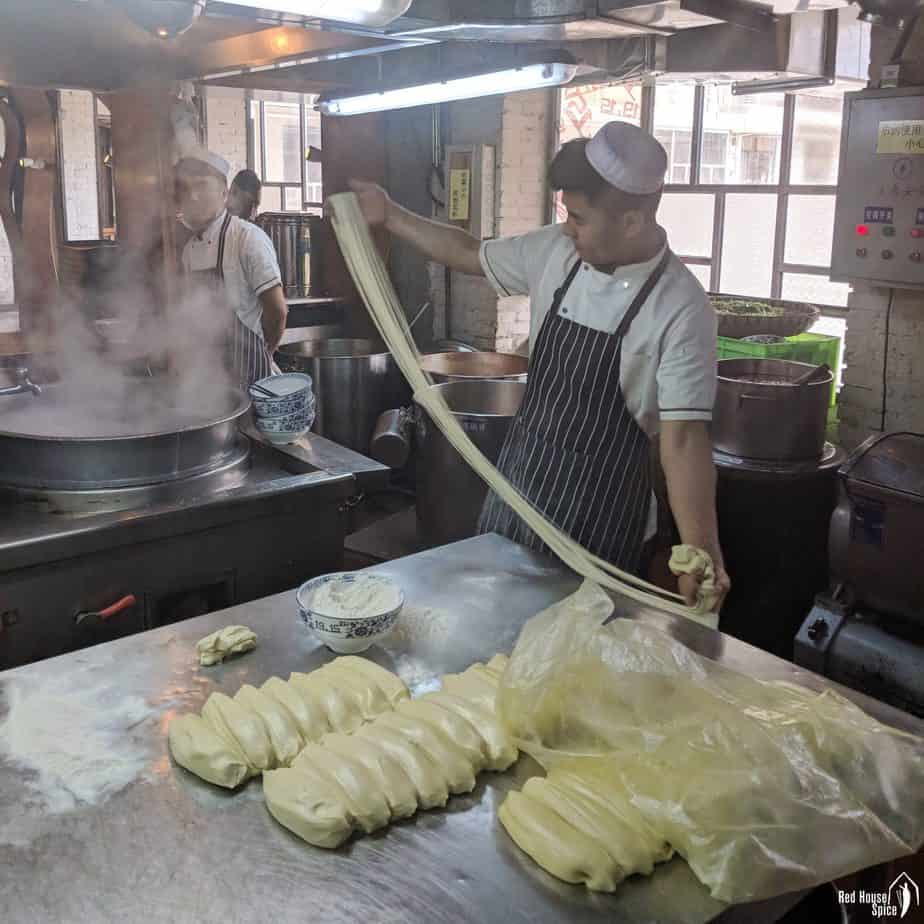
▲ A young chef pulling noodles at Lanzhou 1915 beef noodle soup restaurant.
One serving of noodles are pulled from one single piece of dough by folding multiple times. Lanzhou Beef Noodle Soup/兰州牛肉面 (aka Lanzhou Lā Miàn, 兰州拉面), the classic dish of my hometown, showcases this amazing culinary art of noodle making. The use of an alkaline agent (Péng Huī/蓬灰 in this case) makes the dough super flexible and stretchy.
If you haven’t seen how they are made, I suggest you take a look at a noodle pulling video I took on one of my Culinary Tours of China. My tour participants were very lucky to have the chance to visit the back kitchen and communicate with the chefs. On my next tours, we will go one step further to put our hands on the dough and learn from professional noodle masters.
The easy home version
My recipe introduces another type of hand-pulled noodles: the dough is firstly cut into strips then pulled one by one into long noodles. The popular Xi’an Biang Biang Noodles are made this way.
Compared to the professional method, this technique is much easier to master. Although simple to make, I’d like to explain in detail every aspect of this dish. I hope my complete guide will help you, including kitchen novices, to have a fail-proof experience learning this cooking skill.
The basic workflow
Before we get down to the detailed explanations, let me first outline the procedures for making hand-pulled noodles.
- Make a smooth, fairly firm dough using flour, salt & water.
- Divide then flatten the dough. Coat with oil then leave to rest.
- Bring a pot of water to boil. Cut the dough pieces into strips.
- Pull the strips into long noodles one at a time. Drop into the water.
- Cook for 1-2 minutes then dish out.
How to make the perfect dough
The dough for hand-pulled noodles involves three basic ingredients: wheat flour, water and a little salt. The finished dough should be soft, smooth and elastic thus can be easily pulled into the desired shapes without breaking. Paying attention to the following rules, everyone can make perfect dough with ease.
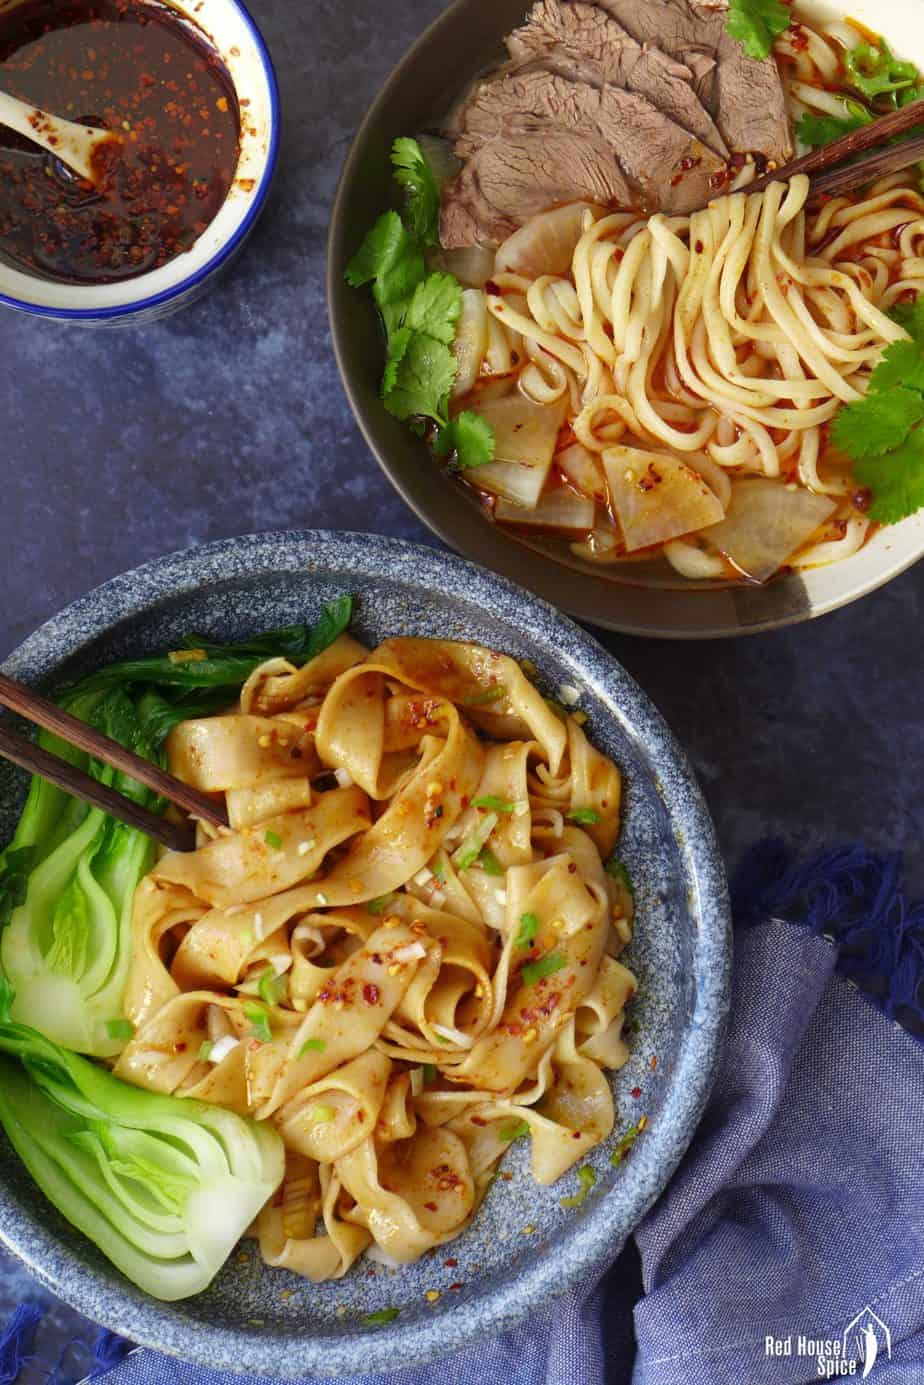
▲ Lanzhou beef noodle soup using my easy version of hand-pulled noodles.
Use all-purpose flour with medium gluten
Flour with a medium level of gluten works the best for hand-pulled noodles. That is to say that the protein content should be 10-11g per 100g flour. All-purpose flour (aka plain white flour) sold in the US and the UK falls into this range.
However, the gluten level of all-purpose flour varies among countries. Check the nutrition label on the package to learn the protein content.
Flour high in gluten (above 13g protein per 100g flour), such as very strong bread flour, can be used for this recipe but it’s harder to work on. Due to its strong, super elastic gluten, the dough tends to shrink back and breaks more easily when pulled.
NB: Wholemeal flour/gluten-free flour is not suitable for making hand-pulled noodles.
▲ Flat, wide noodles pulled the easy way.
The flour-water ratio is 2:1 by weight
To ensure a fail-proof experience, I recommend you measure flour by weight as it’s much more accurate than measuring with a cup.
The flour-water ratio is 2:1 by weight. In my recipe, I add 125g/ml water to 250g flour to make a dough for 2 servings.
You might need to slightly adjust the water volume as flour of different brands absorbs water differently. The initial dough (before resting) should be smooth but quite firm. You wouldn’t need to dust the work surface with flour when kneading/rolling.
Add a little salt to the dough
Just like my parents always do, I add a little salt to the dough for hand-pulled noodles. This is to make cooked noodles more “Jīn Dào, 筋道” meaning “Al Dente”.
In “On Food and Cooking”, scientist Harold Mcgee explains the purpose of adding salt to noodles: “It tightens the gluten network and stabilizes the starch granules, keeping them intact even as they absorb water and swell.”
Coat the dough with oil thoroughly
After the dough has been formed, you need to do the following before leaving it to rest:
- Cut the dough into sections. If you are making 2 servings, then cut it into two pieces.
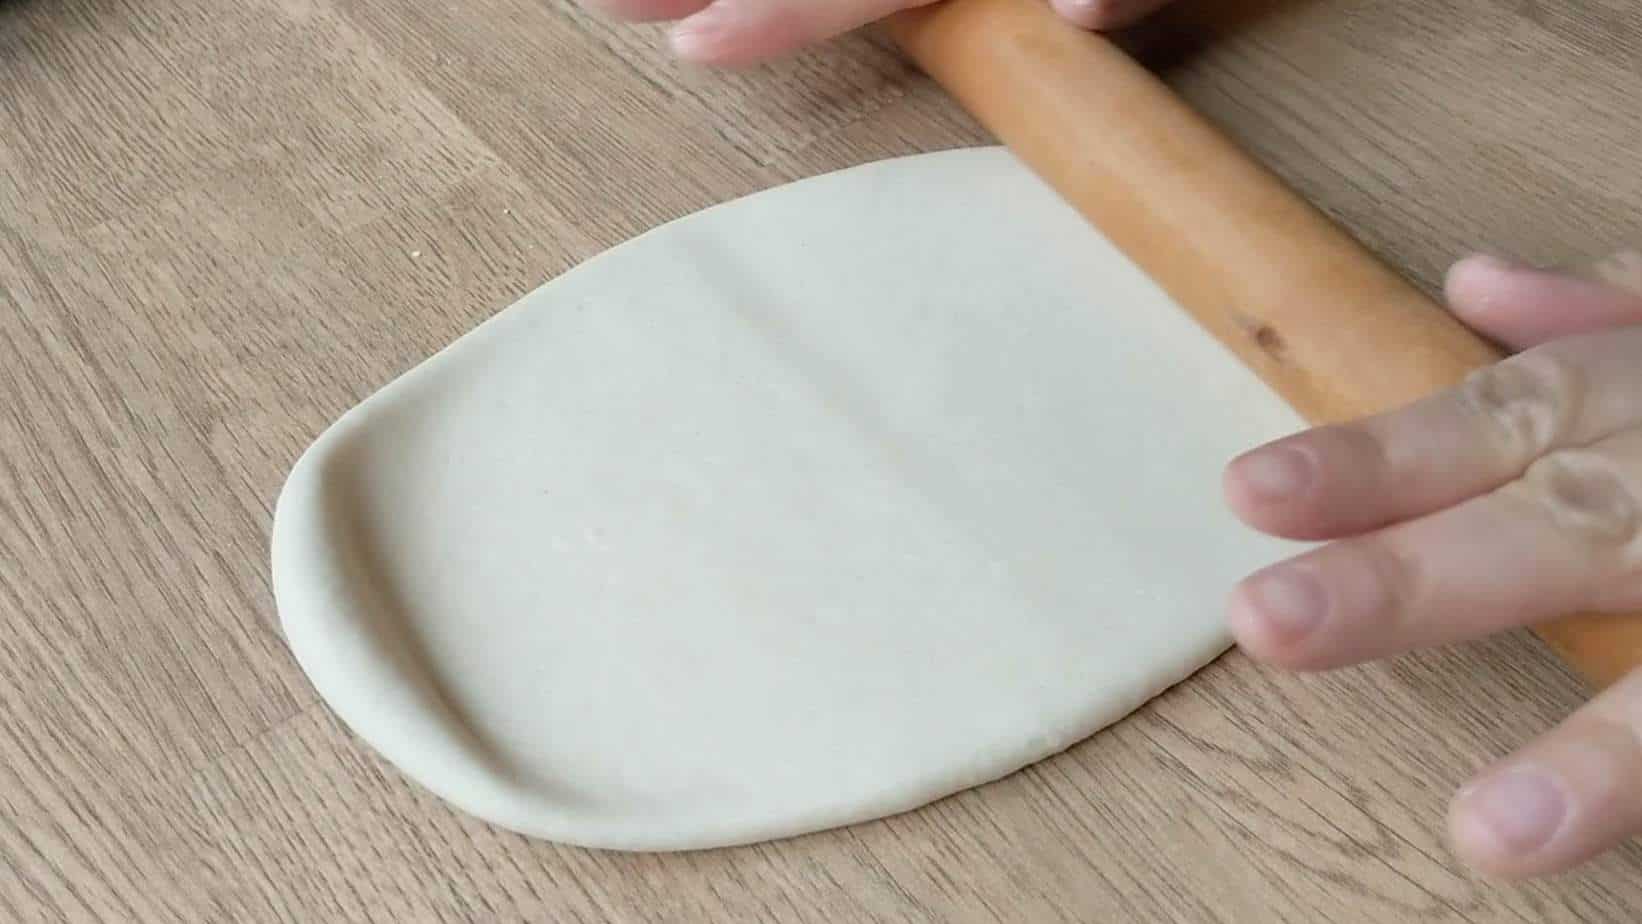
- With a rolling pin, flatten each piece to about 1/2 cm in thickness.
- Coat each piece with cooking oil thoroughly (both sides). Place them one on top of another in a tray. Cover with clingfilm.
Coating with oil is a crucial procedure. It prevents the dough pieces from sticking to each other. It also helps the final noodles to gain a smooth, silky look.
Some people coat the dough with flour instead. This also works but the cooked noodles tend to have a rougher appearance and a stickier texture on the surface.
Allow enough time to rest the dough
When it comes to dough preparation, resting is very important and can not be skipped. As I mentioned above, the initially formed dough is quite firm. Over time, the elasticity of the dough relaxes. It becomes softer and more malleable. This process makes noodle pulling so much easier!
I recommend you rest the flattened dough pieces for at least 1.5 hours. If you prepare the dough in advance and pull it the next day, you can store it in the fridge. But, remember to allow it to come back to room temperature before you start working on it.
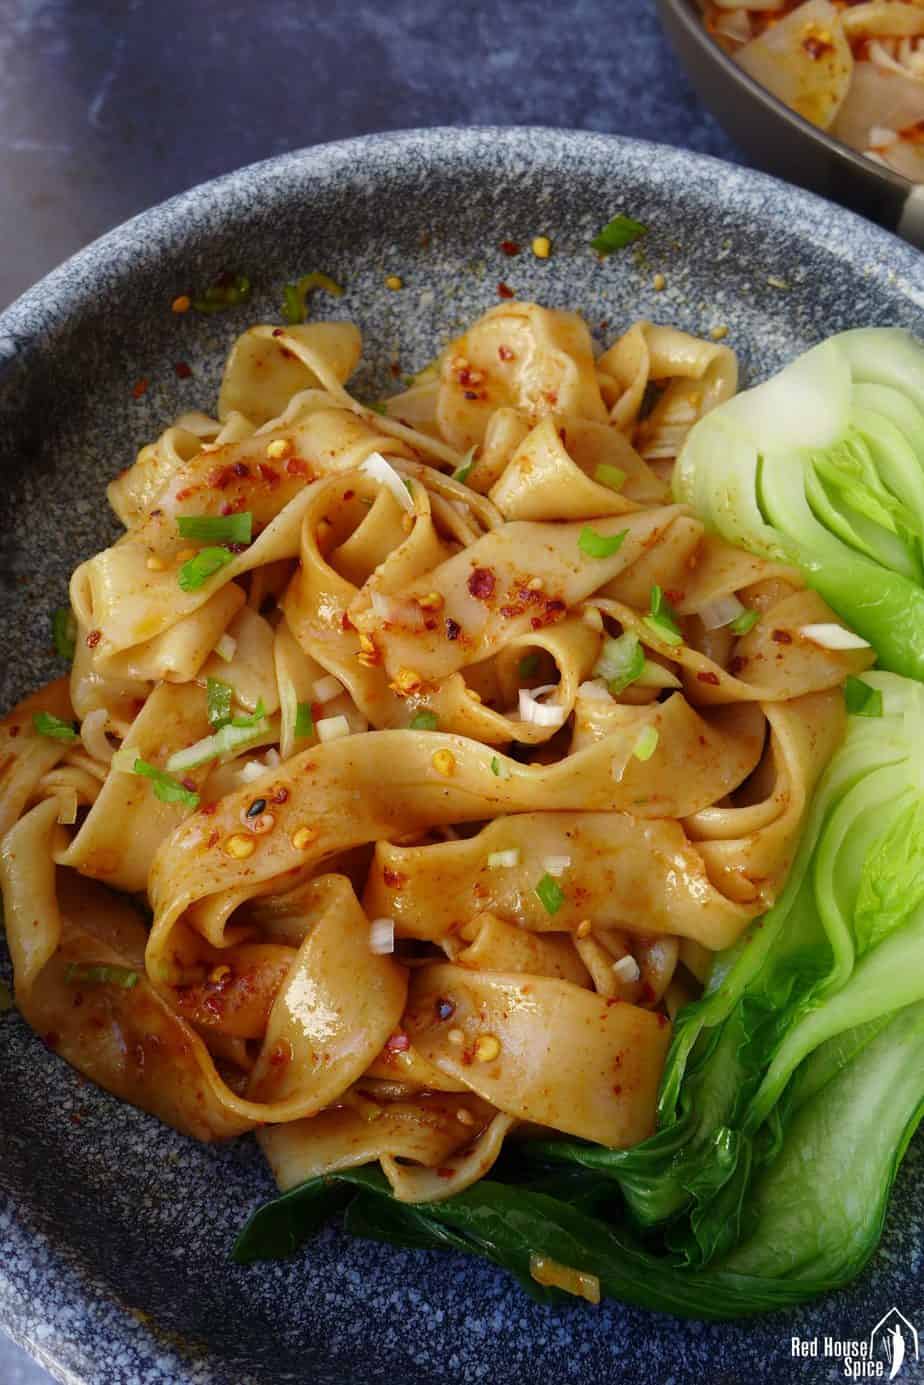
▲ Biang Biang Noodles made with my easy hand-pulled method
How to pull the noodles
Here comes the most exciting part (probably the most intimidating too): Pull the noodles with your hands. Unlike the master chefs in Lanzhou beef noodle restaurants, Chinese home cooks, like my parents, pull their noodles one strip at a time. My foolproof recipe uses the same method.
First of all, you need to cut the flattened dough pieces into strips. Be gentle when you transfer them onto the work surface as they’ve become very soft after resting. Try to retain their shape and do not pinch or pull (yet!).
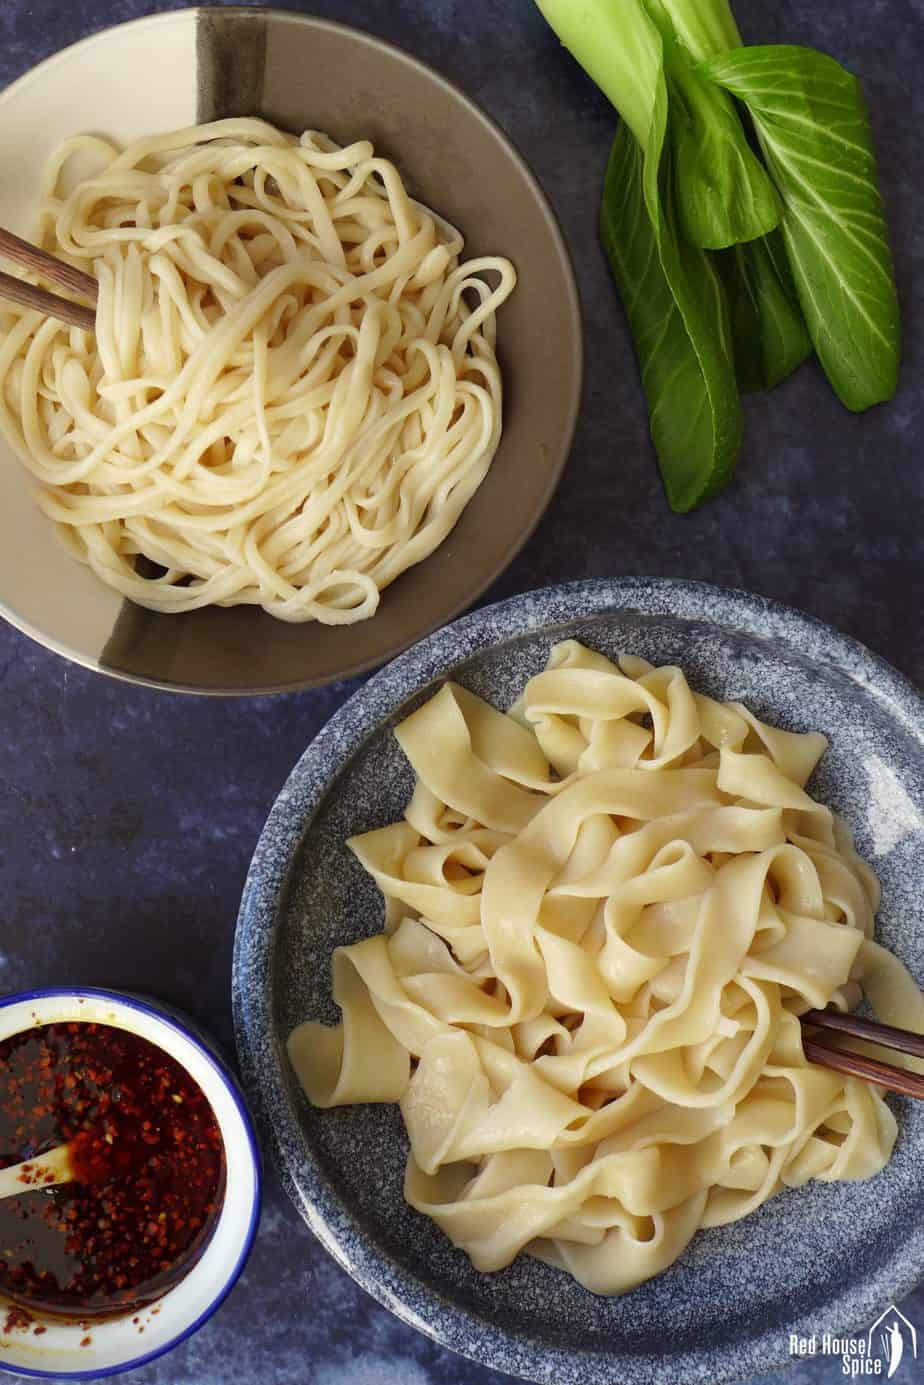
Round or flat? Choose the noodle size
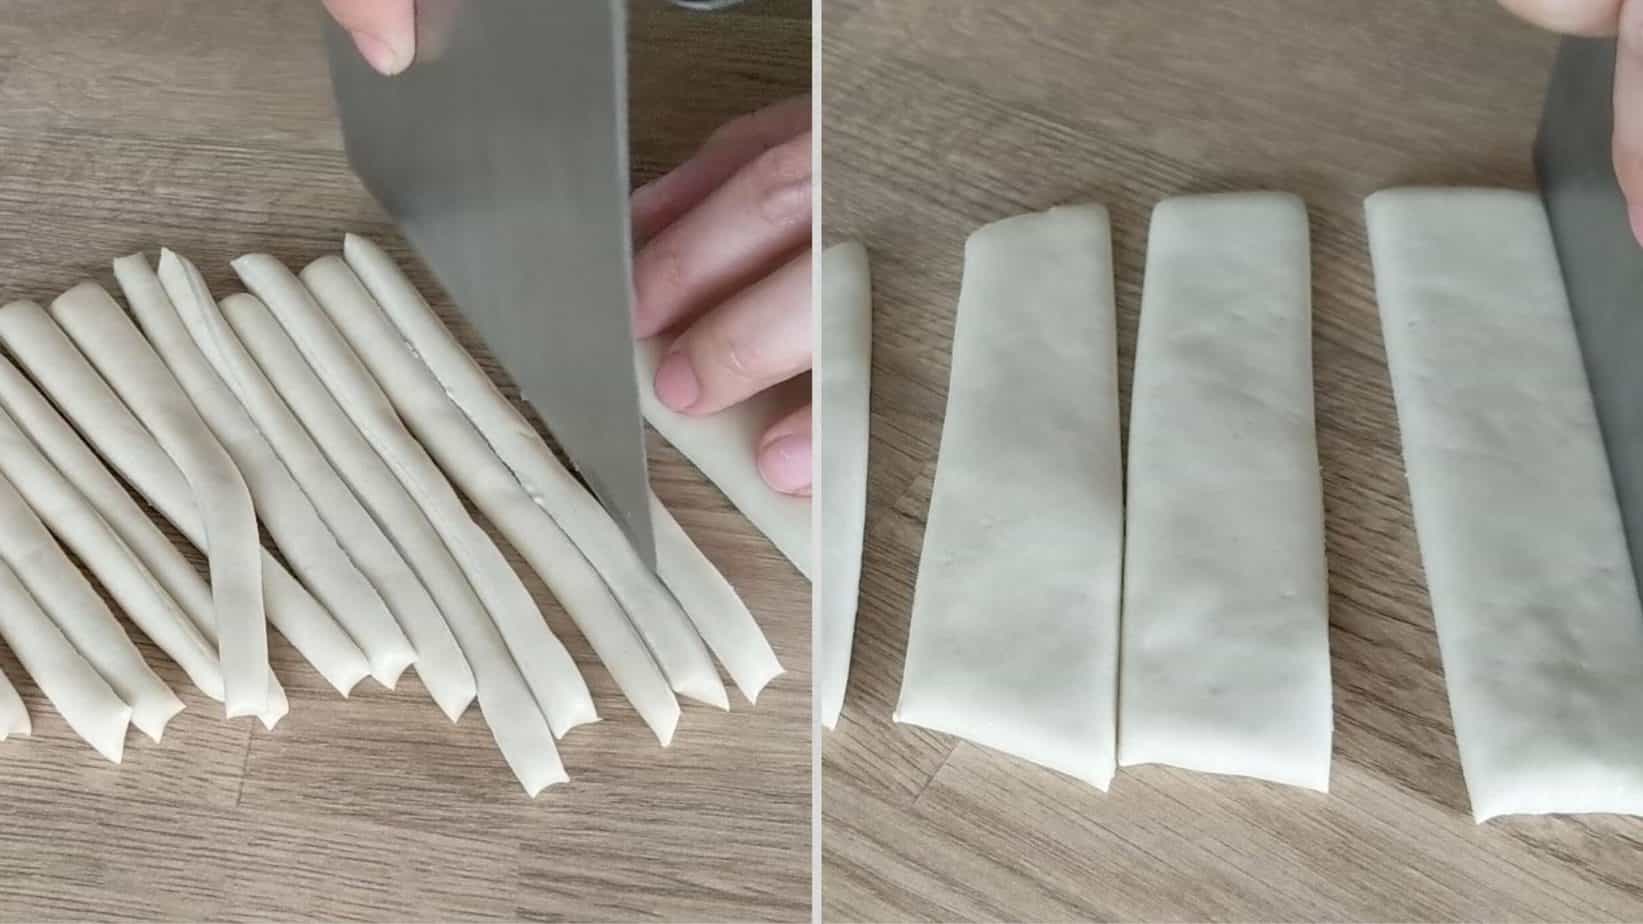
Do you have a preference for the shape of the noodles? Round, thin ones or flat wide ones? I love both. So my recipe includes two ways of shaping the noodles. Give both a try to see what works and tastes better for you.
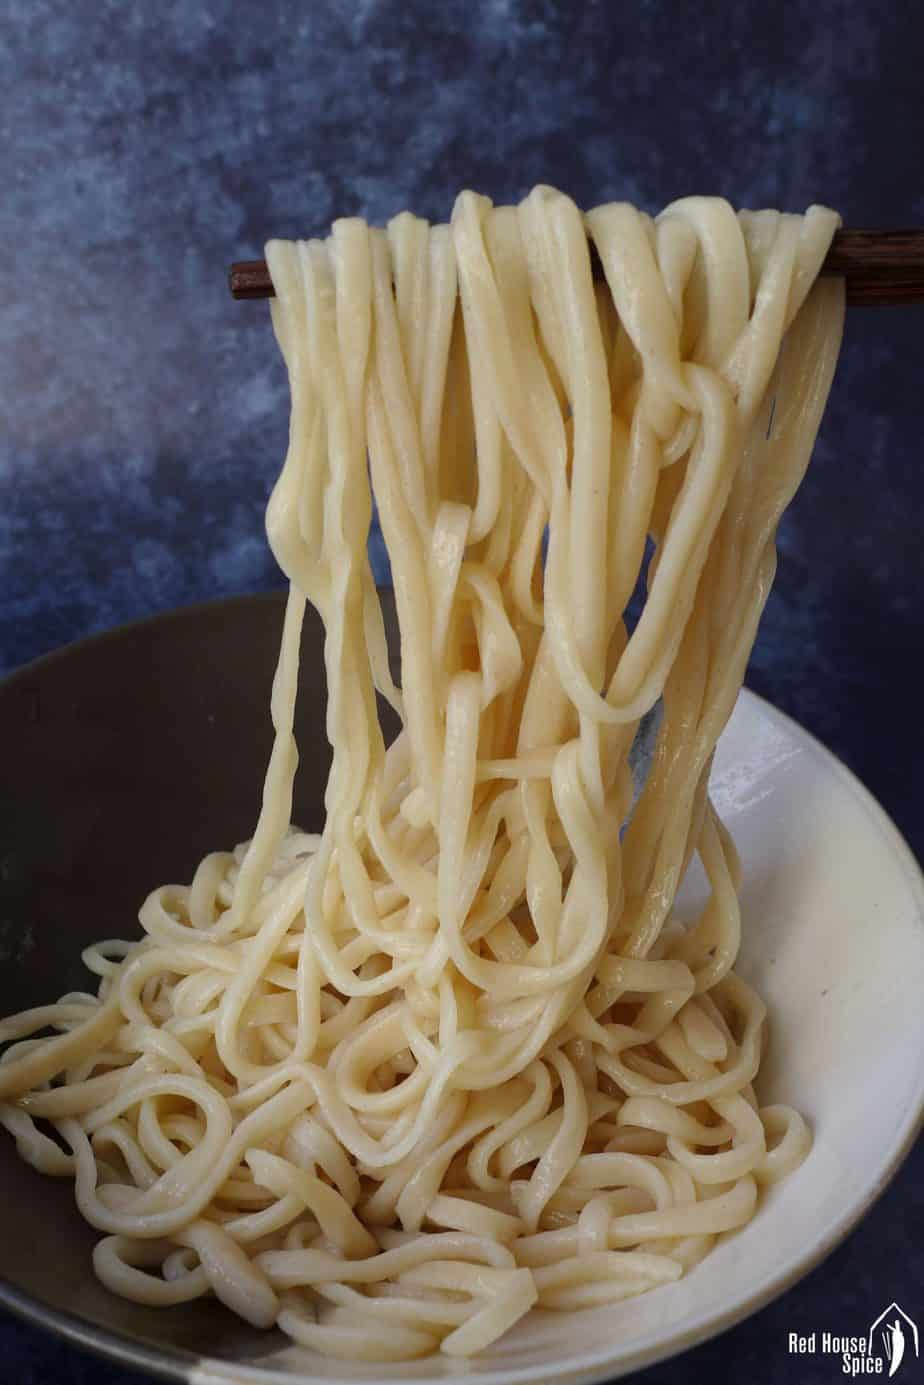
- Round, thin noodles: Cut the flatten dough into thin strips, about 1 cm wide.
- Flat, wide noodles: Cut the flatten dough into wide strips, about 3 cm wide.
Noodle pulling technique
- Pick up one strip of dough by holding each end gently.
- Pull towards opposite directions. The movement should be smooth and consistent..
- As your arms move apart, bounce the noodle against the worktop to help it stretch further. Fold the noodle and repeat the movement.
Please check out my tutorial video (above in the post & below in the recipe card)to see exactly how I do it.
An alternative method
If you find the technique above difficult to master, try the alternative method: Over a pot of boiling water, hold one end of a strip of dough and pull the other end towards the water. Drop the pulled part into the water and continue pulling the remaining part (Please refer to the video).
How to cook the noodles
Compared to other types of noodles, the dough for hand-pulled noodles has a very high water content thus it’s very soft, easy to stick and can be cooked through fairly quickly. When cooking them, you need to take this characteristic into account. Here are some general rules to follow:
Cook one serving at a time
Pulling and cooking happen at the same time. Drop one pulled noodle straight into the boiling water then work on the next one. Stop when you finish all the dough strips for one serving.
Do not overcook
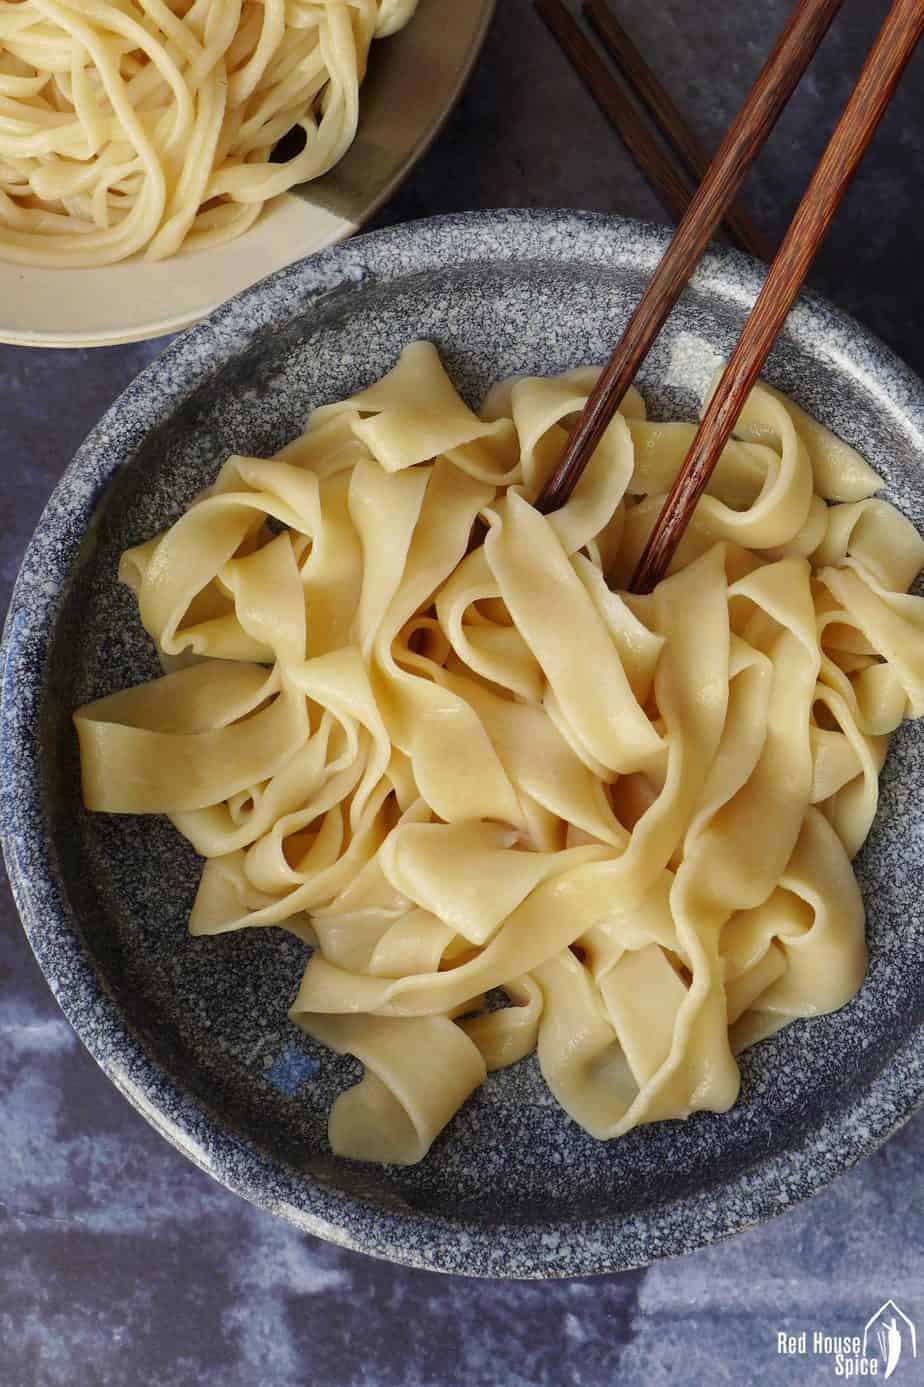
It takes quite a short time to cook hand-pulled noodles. If making round, narrow ones, leave to cook for 1 minute. If making flat, wide ones, leave to cook for 2 minutes. Do not overcook. Perfectly cooked noodles should be smooth, silky in appearance and quite chewy in texture.
Serving ideas
Now let’s talk about how to serve your beautifully made noodles. Here are some inspirations:
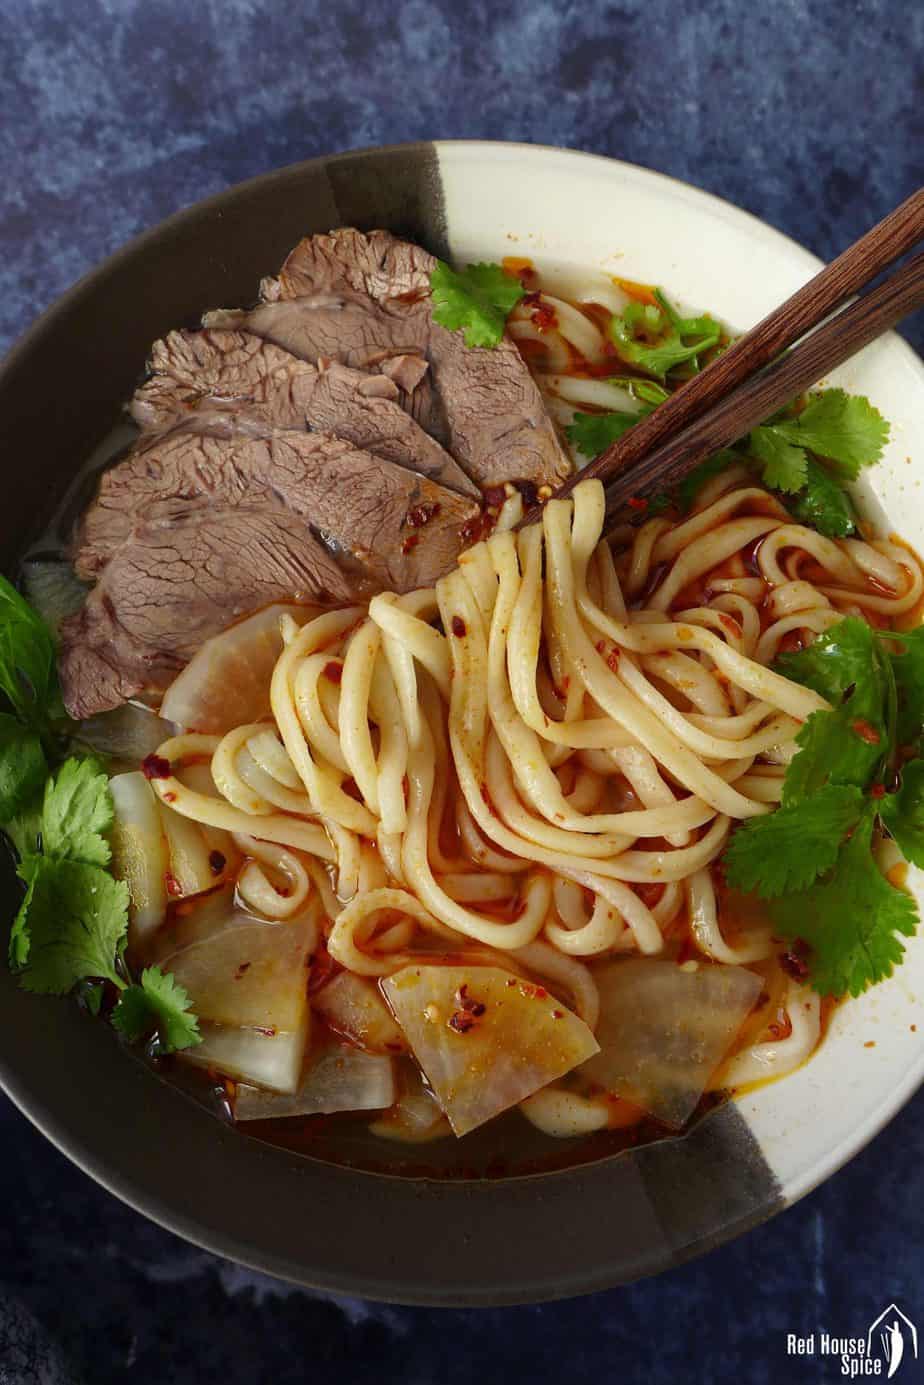
- Add delicious broth/soup along with cooked meat, blanched vegetables, etc. For example, the classic Lanzhou Beef Noodle Soup; Sichuan Style Spicy Beef Noodles Soup; Chicken Meatball Noodles Soup
- Mix with saucy toppings, such as the Beijing signature noodle dish Zha Jiang Mian; Classic street foods: Dan Dan Noodles, Chongqing Noodles
- Spicy them up with a scrumptious dressing. For example, Xi’an’s popular dish Biang Biang Noodles, Classic Shanghai delicacy Scallion Oil Noodles
- Mix with stir-fry dishes of your choice. Try the following: Tomato & Egg Stir-fry; Black Pepper Beef; Sichuan Shredded Pork with Garlic Sauce
Other homemade noodles
Looking for other ways to make noodles from scratch? Check these recipes:
- Ramen Noodles (Alkaline Noodles)
- Hand-rolled Noodles
- Hand-Torn Noodles
- Scissor-cut Noodles
- Cold Skin Noodles (Liang Pi)
- Steamed Rice Noodle Rolls (Cheung Fun)
- Sweet Water Noodles (Tian Shui Mian)
📋 Recipe card
Love this recipe? Please leave a 🌟🌟🌟🌟🌟 rating and a comment. Thank you!

Hand-pulled noodles (La Mian), a foolproof recipe

Video
Ingredients
- 250 g all-purpose flour, about 2 cups (see note 1)
- 1/4 teaspoon salt
- 125 ml water, 1/2 cup + 1 tsp
- cooking oil, for coating the dough
Instructions
Prepare the dough
- IF KNEADING BY HAND: Mix flour and salt. Add water gradually. Mix with chopsticks/spatula until no more loose flour can be seen. Combine and knead briefly into a dough. Leave to rest for 10-15 minutes (covered). Knead again for about 2 minutes until very smooth.
- IF KNEADING WITH A STAND MIXER: Add flour, salt and water into the mixing bowl. Knead on low speed until a very smooth dough forms.
Coat & rest the dough
- Divide the dough into two equal parts. With a rolling pin, flatten each piece into a rectangle shape (about 1/2 cm thick).
- Thoroughly coat each piece with oil then place them on a tray. Cover with cling film then leave to rest for 1.5 hours.
Cut the dough
- Bring a large pot of water to a full boil. While waiting, cut the dough.
- Place one piece of dough on a chopping board. Widthways, cut it into strips: about 1 cm wide if making round, thin noodles; about 3 cm wide if making flat, wide noodles.
Pull the noodles (see note 3 for alternative method)
- Pick up one strip of dough by holding each end gently. Pull towards opposite directions. The movement should be smooth and consistent.
- As your arms move apart, bounce the noodle against the worktop to help it stretch further.
- Fold the noodle and repeat the movement (Please refer to the video below).
Cook the noodles
- Drop the pulled noodle into boiling water. Repeat the procedure to pull other strips cut from the first piece of dough.
- Cook 1 minute for the thin noodles or 2 minutes for the wide noodles (While waiting, cut the second piece of dough into strips.). Transfer the noodles to a serving bowl using a pair of chopsticks.
- Repeat to pull and cook the second bowl of noodles.
Serve the noodles
- To avoid the noodles sticking to each other, serve immediately.
- You may add a broth or mix the noodles with toppings/dressings. Please see note 4 for recipe links.
Store & Reheat
- If not serving straight away, you need to briefly rinse the noodles with cold water then add a few drops of sesame oil and stir well. Keep in the fridge for up to 2 days.
- To reheat: Bring a pot of water to a full boil. Add the noodles and cook for no more than 30 seconds.
Notes
Your Recipe Notes
Nutrition
Nutrition information is automatically calculated, so should only be used as an approximation.


Thank you! I made the noodles and they turned out wonderfully. They will be a regular at our house. I’ve shared the post with others too.
That’s wonderful Don!
Thanks for another fantastic recipe! It was definitely intimidating when I first started pulling but it was easy to get the hang of it. I let the dough rest a little over an hour after mixing in the kitchen aid. The noodles came out really nice and chewy…a little more rustic than the pictures but I’m happy with the first attempt! Will definitely make again.
Well done Evelyn for the first attempt! Wonderful to know you’ve enjoyed my recipe!
I always wanted to make hand pulled noodle at home, and with your recipe and guidance, I finally able to make one successfully yesterday. One of my cooking bucket list ticked at last. This method was so easy, yet the end product was amazing. The noodle was so smooth, silky, slightly chewy and delicious. The making process was so therapeutic, and the part where my dough pulled so easily was so satisfying. I ended up only cooked half of the dough yesterday and put another half in the fridge for my lunch today, and it seems just fine sitting in the fridge overnight. Thank you so much for sharing this recipe ❤
You’re welcome Alissa! So happy to hear you’ve enjoyed the whole experience. You message has put a big smile on my face. Thank you for sharing your thoughts!
This is the most fun I’ve had with my 6 year old in the kitchen! Although messy, great bonding.
This is one of my favorite blogs. I come here a lot, a fact I’m positive google knows. Yet when I search “red spice house”, the actual result I want (and the one google KNOWS I want) is like 3 or 4 pages in! Gee guys, I think you aren’t paying google enough to not bury you, they bury you with literal crap too! I don’t want a recipe that Mary Sue made to taste like the Chinese restaurant down the road!
My advice is to ALWAYS start on page 4 of your search results. The results before that are the ones that paid google to put them there.
There are some great, authentic recipe blogs from around the world, go and find them 😀
So happy to hear that you and your 6-year-old have enjoyed making this dish! Thank you so much Chloe for your support!
Ever since seeing this on a cooking show I’ve wanted to make these noodles! I’m beyond thrilled as is my family! I may never make “regular” rolled noodles again! I did weigh out the ingredients, but still had to add a bit of water (cooking in ohio, US). I did the pull and bounce on the counter technique…. And only had a few problems with the ends breaking off. Wonderful, wonderful recipe!!!!
Happy to hear that Marlene! Yes, the flour water ratio may vary a little depending on the brand of the flour. Glad you’ve made appropriate adjustment and you were happy with the result.
In many of the videos of pulling the noodles, there’s a big ball of unpulled dough left in the hand after the noodles are shaped. Can that remaining dough be combined and re-pulled? And how much time do you have between finishing the pulling and getting the noodles into the water? Since these noodles only take 1-2 minutes to cook I’d like to pull them all and then put them in the water. Can they survive in a bowl for a few minutes before cooking?
Hi Kalia! Here are answers to your questions:
1. For my easy version of hand-pulled noodles, you’ll finish all the dough prepared and won’t have a ball of dough left in your hand. The technique you talked about is for the professional version which involves pulling all the noodles at once (I’ve explained it in my post).
2. Pulling noodles and cooking noodles takes place simultaneously. That is to say, you pull one noodle then drop it into the water straightaway. Repeat the process until you finish all the dough. I don’t recommend you put all the pulled noodles into a bowl then drop them into the water all at once. These noodles have a high water content thus they stick and deform very easily.
Hope this helps!
First time with one of your recipes and Wow! So simple even my 5 year old was able to make her own portion of noodles. Served it with your Stirfry tomato and egg, clean bowls all round.
That’s wonderful to hear! My children love pulling their own noodles too. Tomato egg stir-fry and noodles make a very tasty and comforting meal.
Made it again this morning with the 2 year old this time. Truly foolproof, thank you for sharing!
She/He could be one of the youngest noodle masters in the world! Well done 💜
Just made this recipe for dinner today.
Thank you for providing a brilliant video and easy to understand instructions.
The noodles were delicious despite the fact that they were not uniform. Even the information you give, re ratio of number of people to how many grams, is excellent.
THANK YOU. THANK YOU. THANK YOU.
Would you happen to have an easy recipe for a sauce (no sugar and low sodium) which uses ingredients which are easily found in supermarkets?
You’re welcome Julie! Try Biang Biang Noodles. The seasoning is very simple yet delectable. Chinese Tomato & Egg Stir-fry make a great topping for noodles too.
Hi Wei, the recipe looks fabulous! Is it possible to make these noodles with spelt flour as well?
Hi Razia! I happen to have some white spelt flour so I’ve given it a try after seeing your comment. Yes, it works. You would need a little more water for the dough as it has a higher gluten content. And I suggest you rest the dough a bit longer too. Happy pulling!
oh you are the best for trying it out…Thanks a ton!! Can’t wait to make them 🙂 🙂 Happy Hump day!
Hi, can I use this for hotpot? If yes, can I just drop them into the soup base to boil? Thanks!
Yes you can! Prepare everything as instructed. Pull it then drop into the hotpot broth. Happy cooking!