
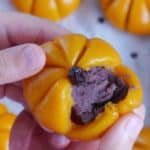
Soft, gooey, sweet & nutty, pumpkin mochi with red bean paste shows you a delectable and fun way to enjoy autumn produce. This recipe includes make-from-scratch instructions, and short-cut options as well.
Pin this now to find it later!
Pin ItIngredients & Equipment
Ingredients:
- Butternut squash, pie pumpkin or any other orange-fleshed squash (sweet potato works too)
- Glutinous rice flour to be mixed with squash/pumpkin puree
- Raw or cooked adzuki beans (aka red beans/红豆) for the filling
- Sugar. I like the combination of white sugar and dark brown sugar
- For the fat, you may choose from butter, lard or coconut oil
Equipment:
- A food processor (or a high-speed blender). You can also make these cakes manually. The end texture won’t be as smooth but the taste will be the same.
- A steamer. You could also steam using a wok (with a lid), a small bowl and a flat plate (I’ll talk about how to in the cooking section below).
How to make the dough
The dough pumpkin mochi cake is made of cooked squash/pumpkin puree, glutinous rice four, a little sugar and oil. Compare to regular wheat flour-based dough for Chinese noodles, dumplings and buns, it’s very easy to form and to adjust if necessary. The finished dough should be soft, smooth and very forgiving.
Steam and puree the squash
To achieve a bright colour for the dough, I use butternut squash for its orange flesh. Pie pumpkin (aka sugar pumpkin) works too but the colour of the dough would come out a bit lighter. Alternatively, use canned pumpkin puree and skip this step.
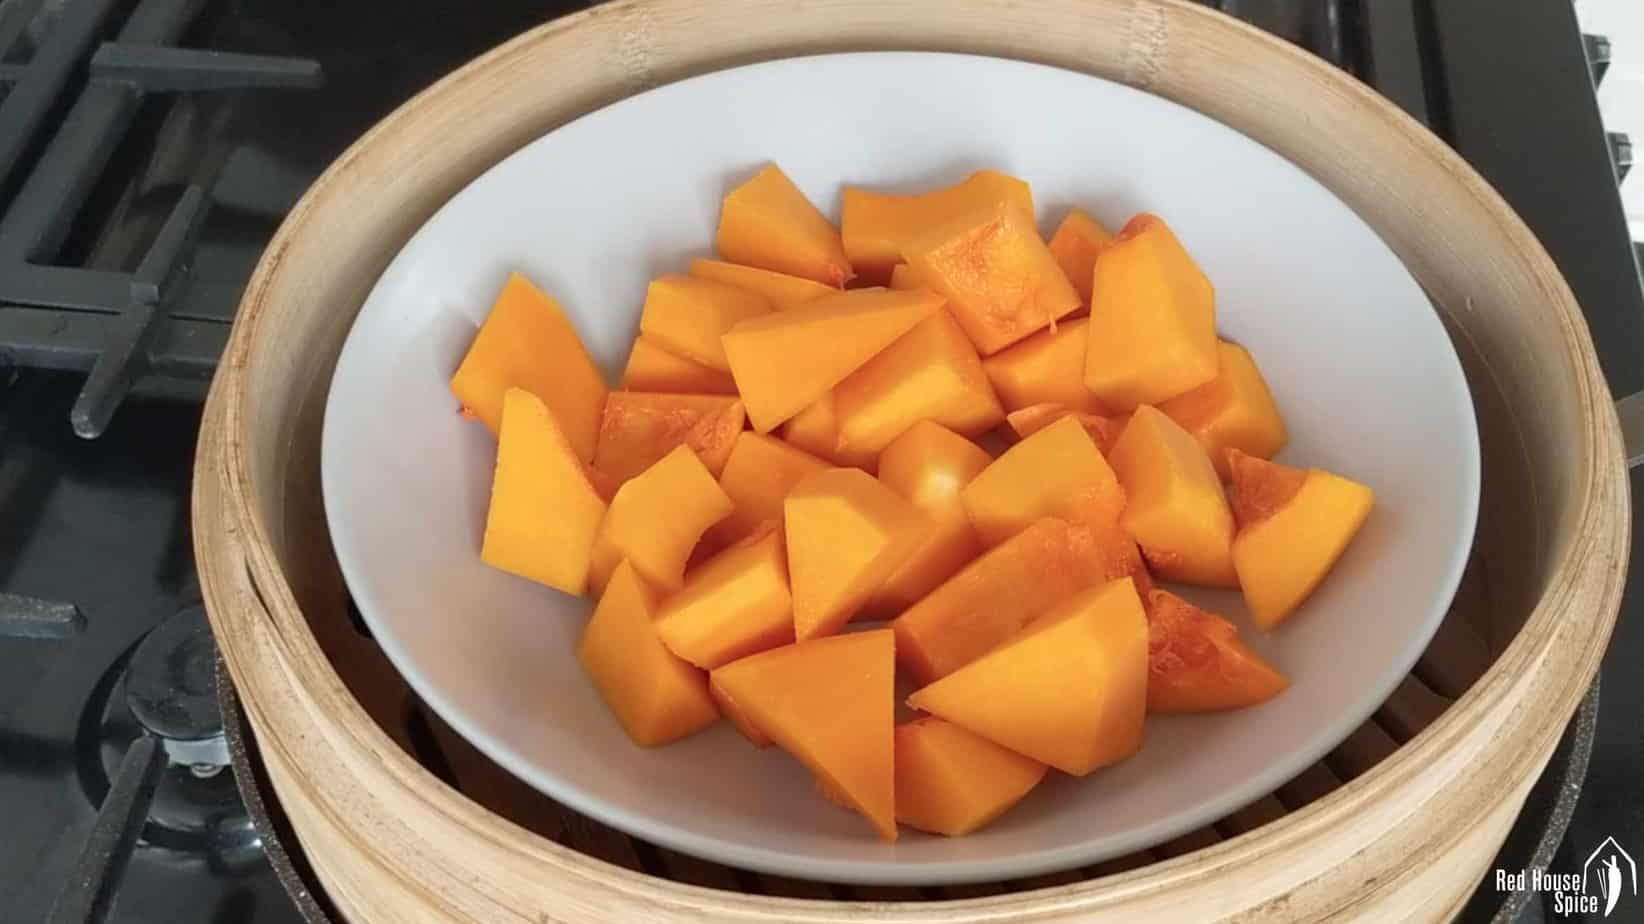
I find that steaming is the most efficient way to cook butternut squash. Use a vegetable peeler to remove the skin. Halve it and remove the seeds. Then cut it into chunks. The smaller the pieces are, the faster they’ll be cooked through.
It took me about 15 mins to steam for these chunks shown in the image above. Use a fork to test if they are done (They don’t need to be very soft). Transfer the cooked squash to a food processor. Add a little sugar and oil then blend it to a fine puree.
Add glutinous rice flour
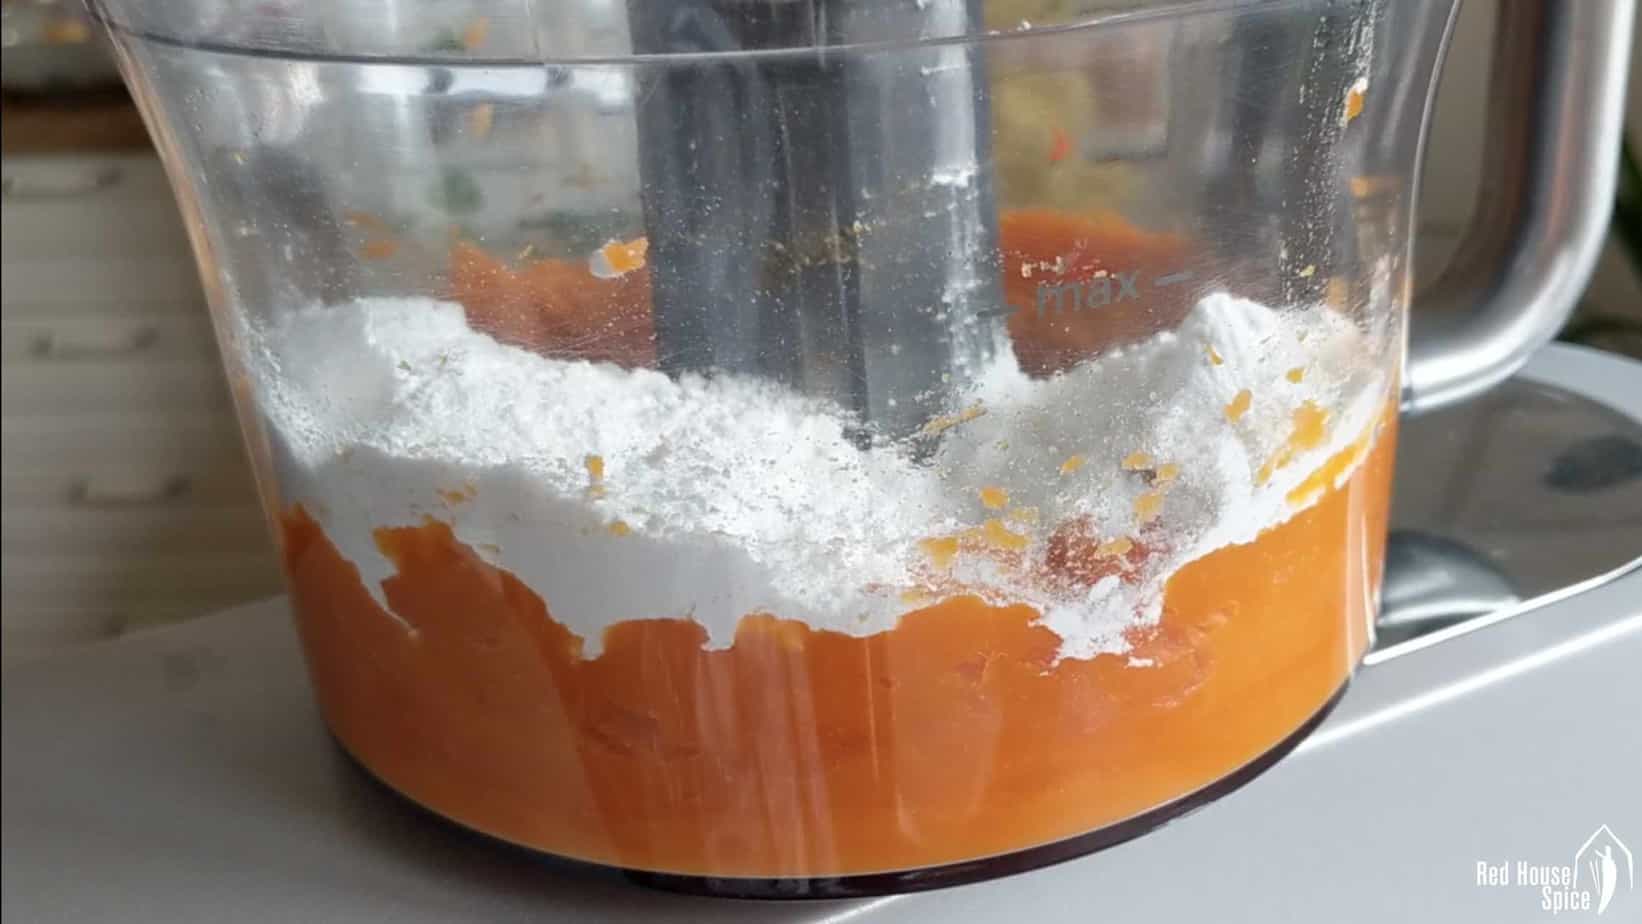
Now it’s time to add glutinous rice flour (aka sweet rice flour) to the squash puree. Known as Nuo Mi Fen/糯米粉 in Chinese, it’s finely ground white powder made of glutinous rice (aka sticky rice, sweet rice). Despite its misleading name, it’s completely gluten-free. Combining with squash puree (no extra water needed), it creates a forgiving dough that tastes soft and gooey after steaming.
The quantity of glutinous rice flour suggested in my recipe is adjustable. Please feel free to use it as a guide. Depending on the water content of the squash (considering evaporation during the process), you may need to use less or more flour to achieve the desired consistency of the dough.
So add it to the puree in batches. Run the food processor on medium speed. Scrap down the mixture with a spatula when necessary. The finished dough should be very soft but not sticky. The tutorial video in the recipe card below shows you what kind of consistency you’re looking for.
Transfer the dough to a work surface and knead for 1 minute to make it smoother (dust with a little flour if it sticks). Unlike wheat flour-based dough, it doesn’t need to be rested thus can be used straight away.
Remember to cover the unused dough to prevent it from drying out (You can leave it in the fridge for up to 2 days). But don’t worry if it feels too dry. Simply wet your hands with water and knead the extra moisture into the dough. Once you try working on it, you’ll see how easy it is to adjust.
Can I make the dough by hand?
Yes, you surely can! In this case, cook the butternut squash a little longer. Use a potato masher or a fork to press it into a mash, then add glutinous rice flour in batches.
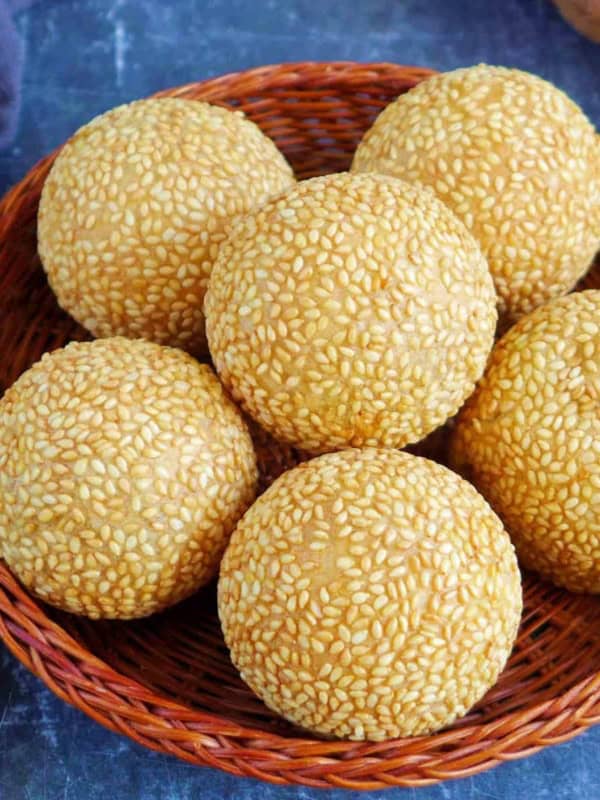
Combine and knead with hands to form a dough. I use the same manual method to make Sweet Potato Sesame Balls. It’s not at all difficult. The cooked dough may look less smooth and perfect. But the taste will be the same.
How to make red bean paste
Red bean paste, a sweet paste made of adzuki beans (red beans/红豆), is no doubt one of the most loved fillings for Chinese treats. You can find it in many classic dishes, such as Sesame Balls, Red Bean Buns, Mooncakes, Sticky Rice Dumplings, Glutinous Rice Balls, etc. I find it a perfect choice for today’s pumpkin mochi cake.
You can get ready-made red bean paste in some Chinese shops but I highly recommend you make some yourself if time permits. The taste and texture are just so much better. Another benefit is that you can adjust the sweetness to suit your own taste (the commercial version is often far too sweet for my liking).
It takes four steps to make red bean paste from scratch:
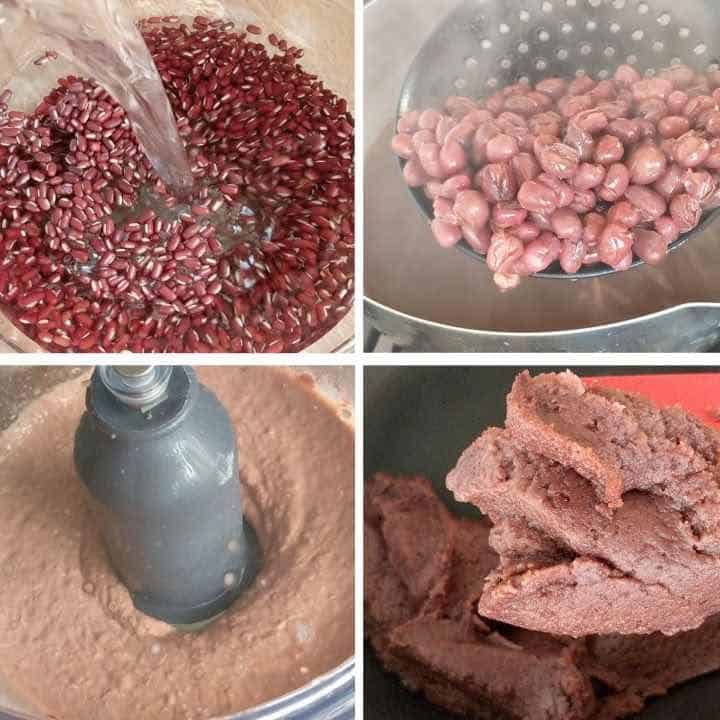
- Soak adzuki beans overnight.
- Cook the beans in water until they become soft (You may skip this step if you can find cooked adzuki beans in cans).
- Puree cooked beans (drained) in a food processor with sugar and butter (or lard/coconut oil). Don’t hesitate to alter the ratio of sugar and butter based on your preference. I personally like the paste a little powdery. If you like it creamier, add more fat.
- Heat up the puree in a pan to reduce the moisture in the bean paste thus firm it up (The colour of the paste will get darker too). It took me about 6 mins. Check out the desired consistency in the tutorial video below.
If you don’t have a food processor, follow the method I introduced in my post on How to Make Red Bean Paste manually. The final texture won’t be as fine but the taste won’t be affected.
Can I use other fillings instead?
Absolutely! You can use any of the following fillings:
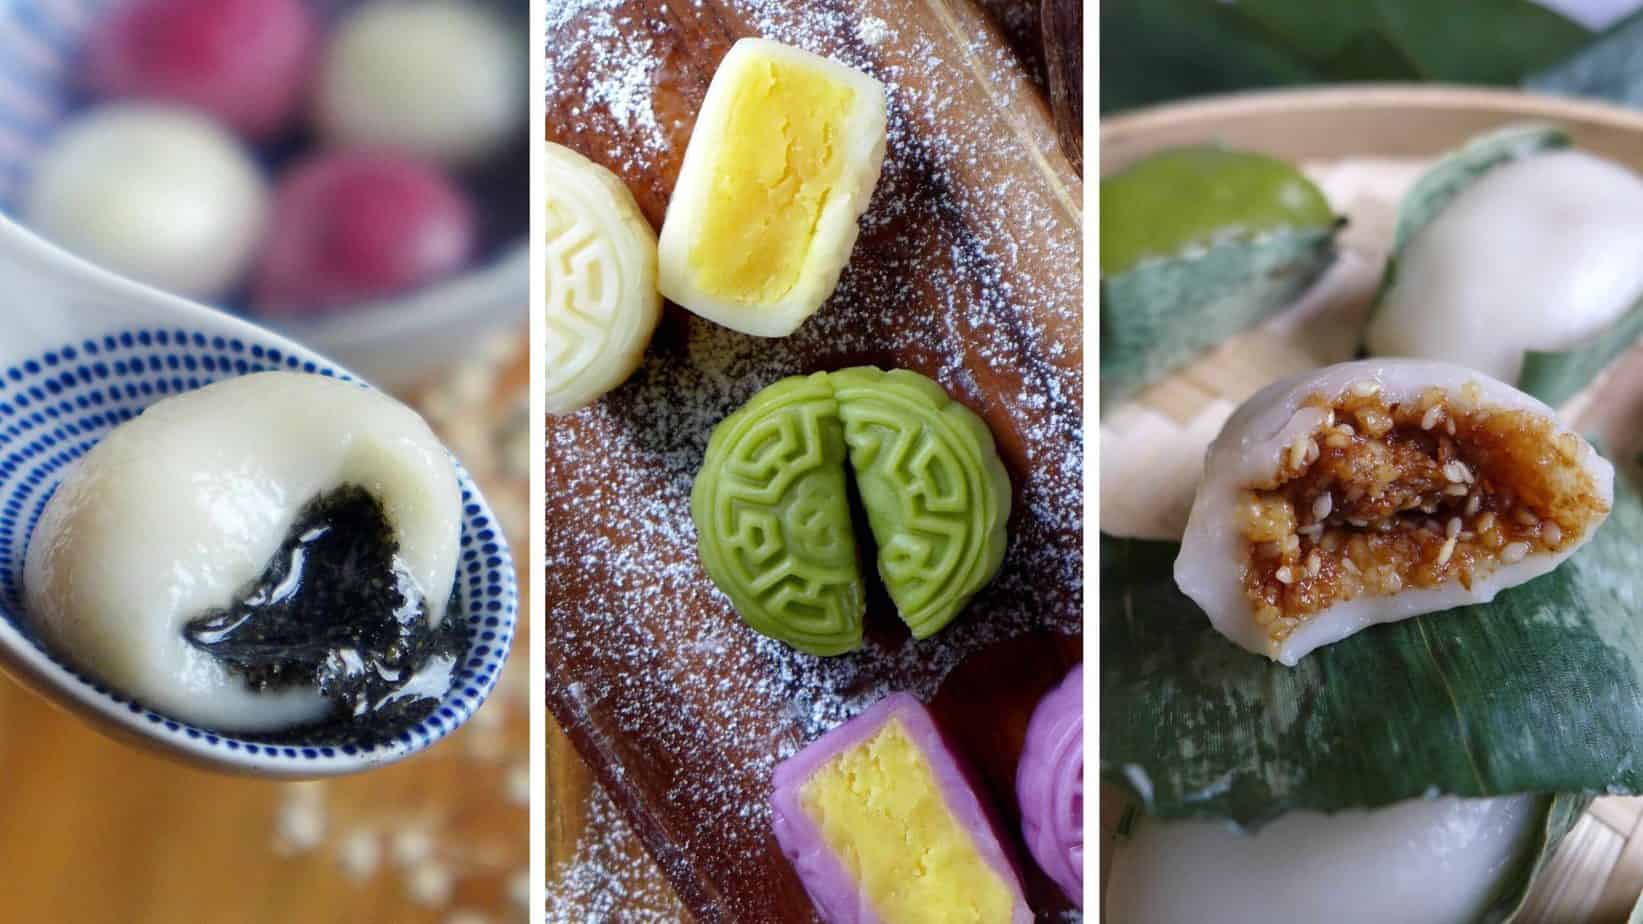
- Black sesame paste or peanut paste that I shared in the post on Tang Yuan (Glutinous Rice Balls)
- Chinese custard filling that I used for Snow Skin Mooncakes
- Walnut & sesame filling with which I stuffed Sichuan Leaf-wrapped Sticky Rice Cakes
How to shape sticky rice pumpkin cake
Here comes the most fun part of today’s recipe: Wrap the red bean paste with coloured dough, then shape it into a cute pumpkin. It may look sophisticated (and very realistic!) but the method is very simple. Here is how I make it step-by-step (You might find the tutorial video in the recipe card below helpful):

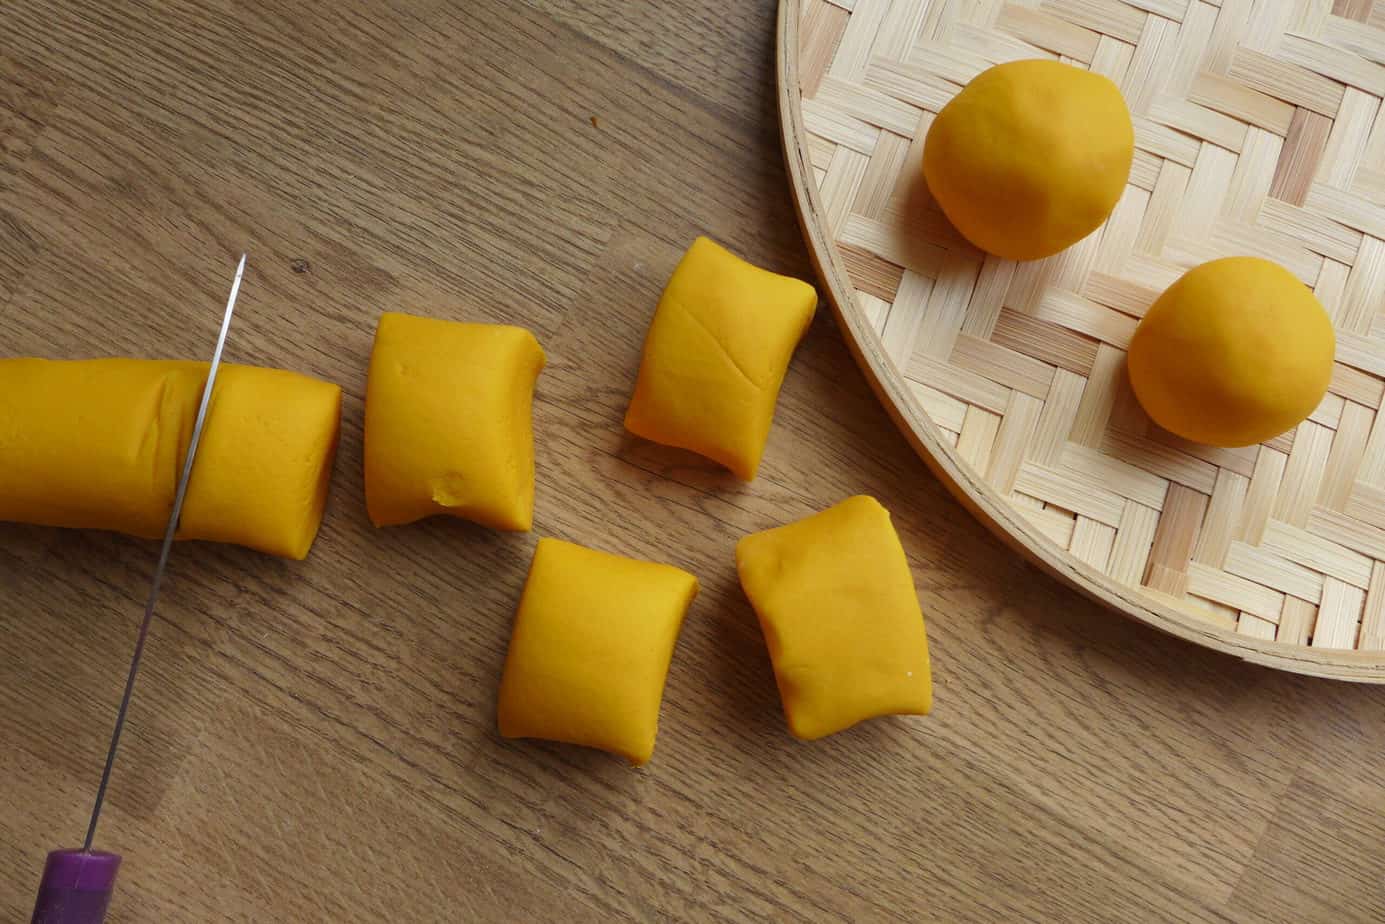
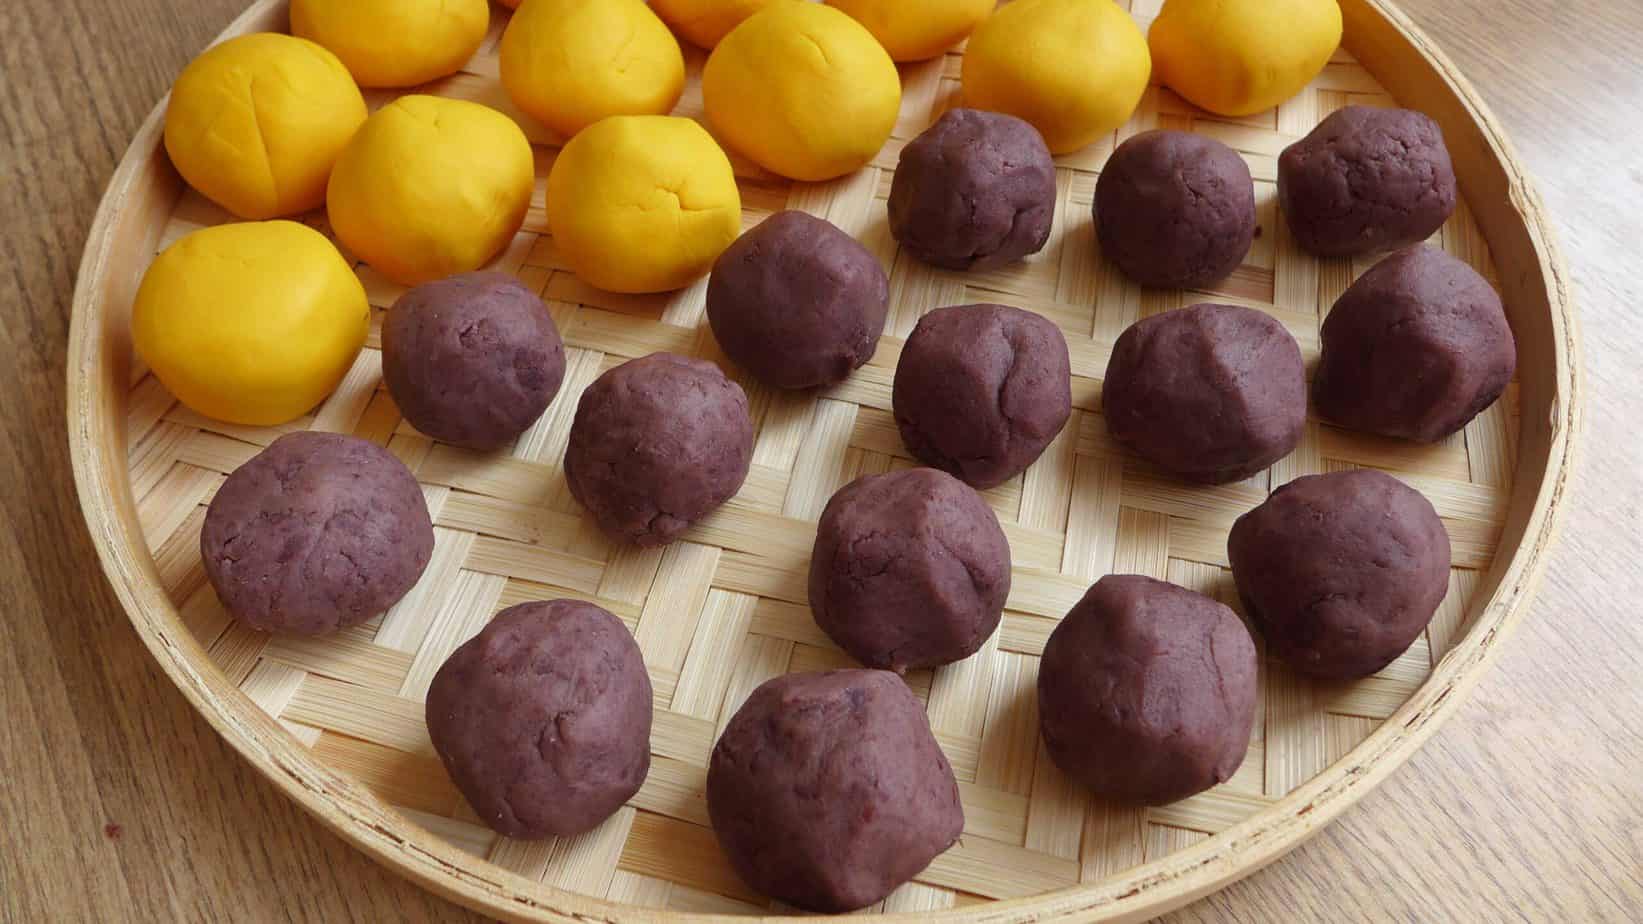
- First, divide the dough into equal pieces. Then roll each into a ball with the palm of your hands. Repeat the same procedure to make 16 balls with the red bean paste.
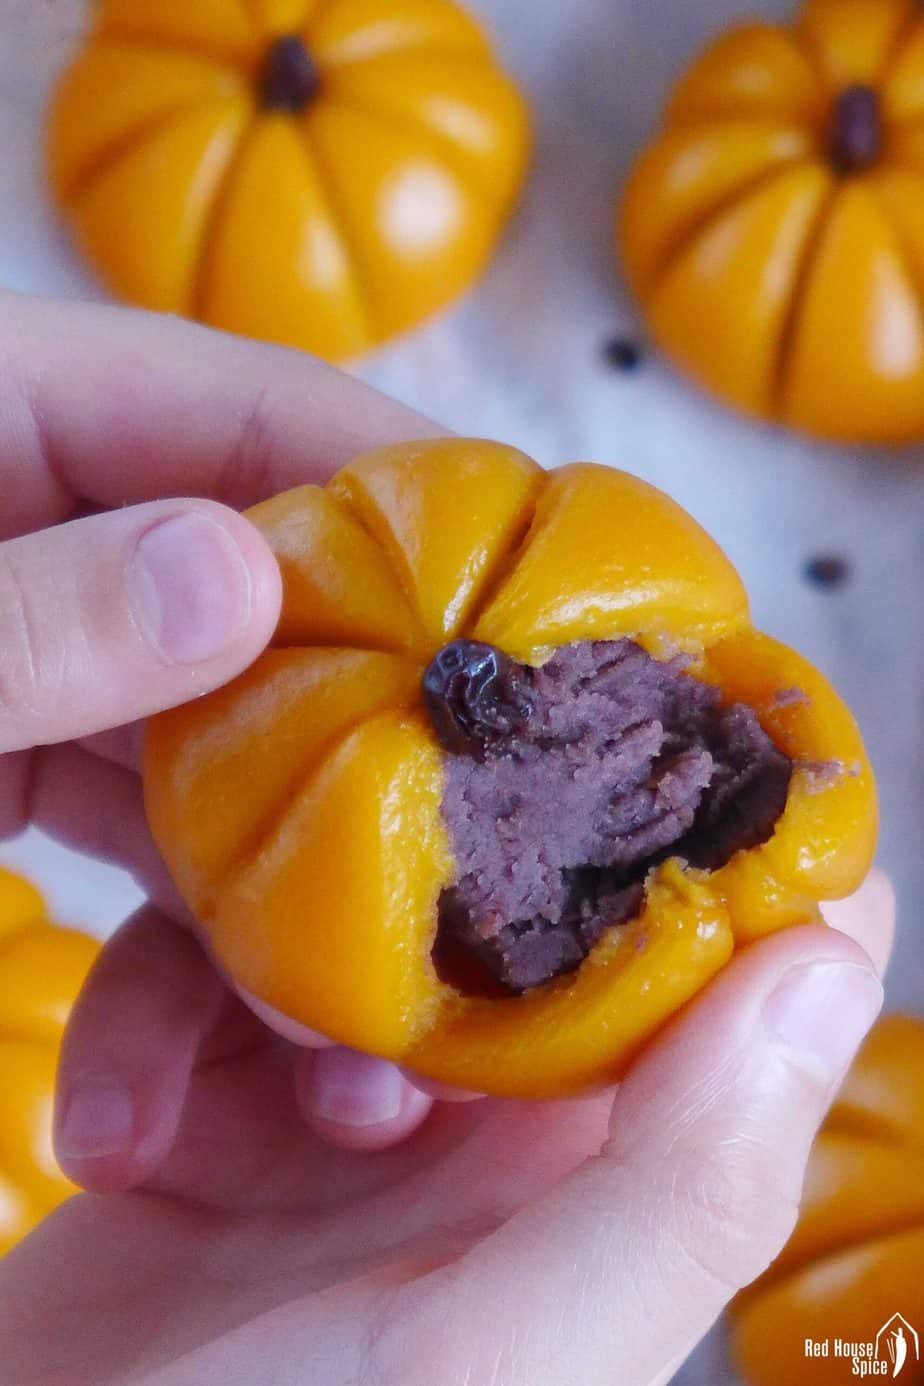
- Use your fingers to flatten one dough ball into a disc. Place a piece of filling on top. Gently push the edge of the dough upwards to cover the filling and seal completely. Try not to trap any air during this process. That is to say, make sure the dough is wrapped around the filling as tight as possible.
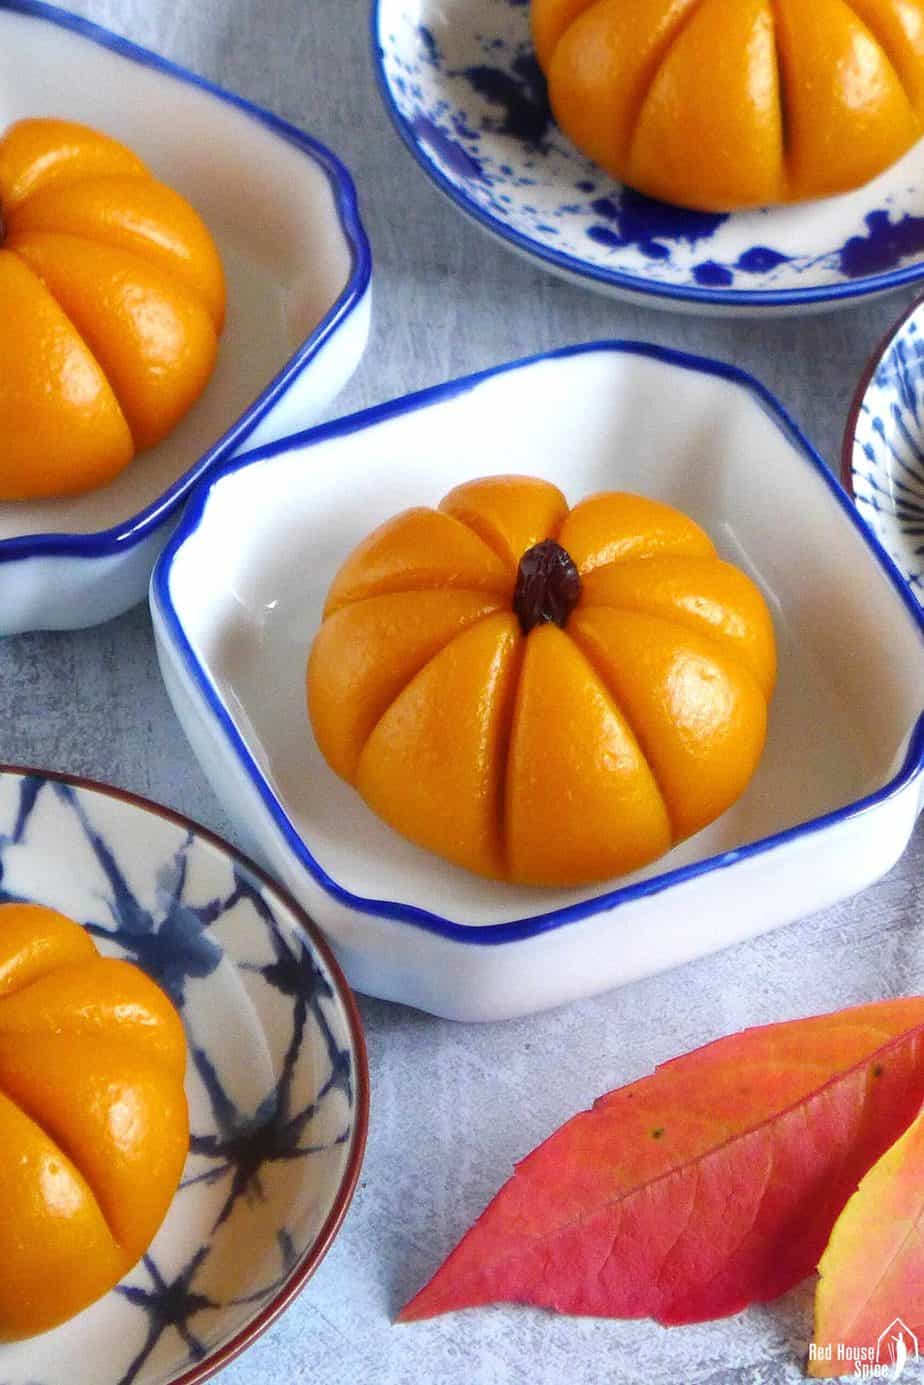
- Use the spine of a butter knife to create indentations all around to imitate a pumpkin.
- Finally, insert a piece of raisin on top as the “stem” of the pumpkin.
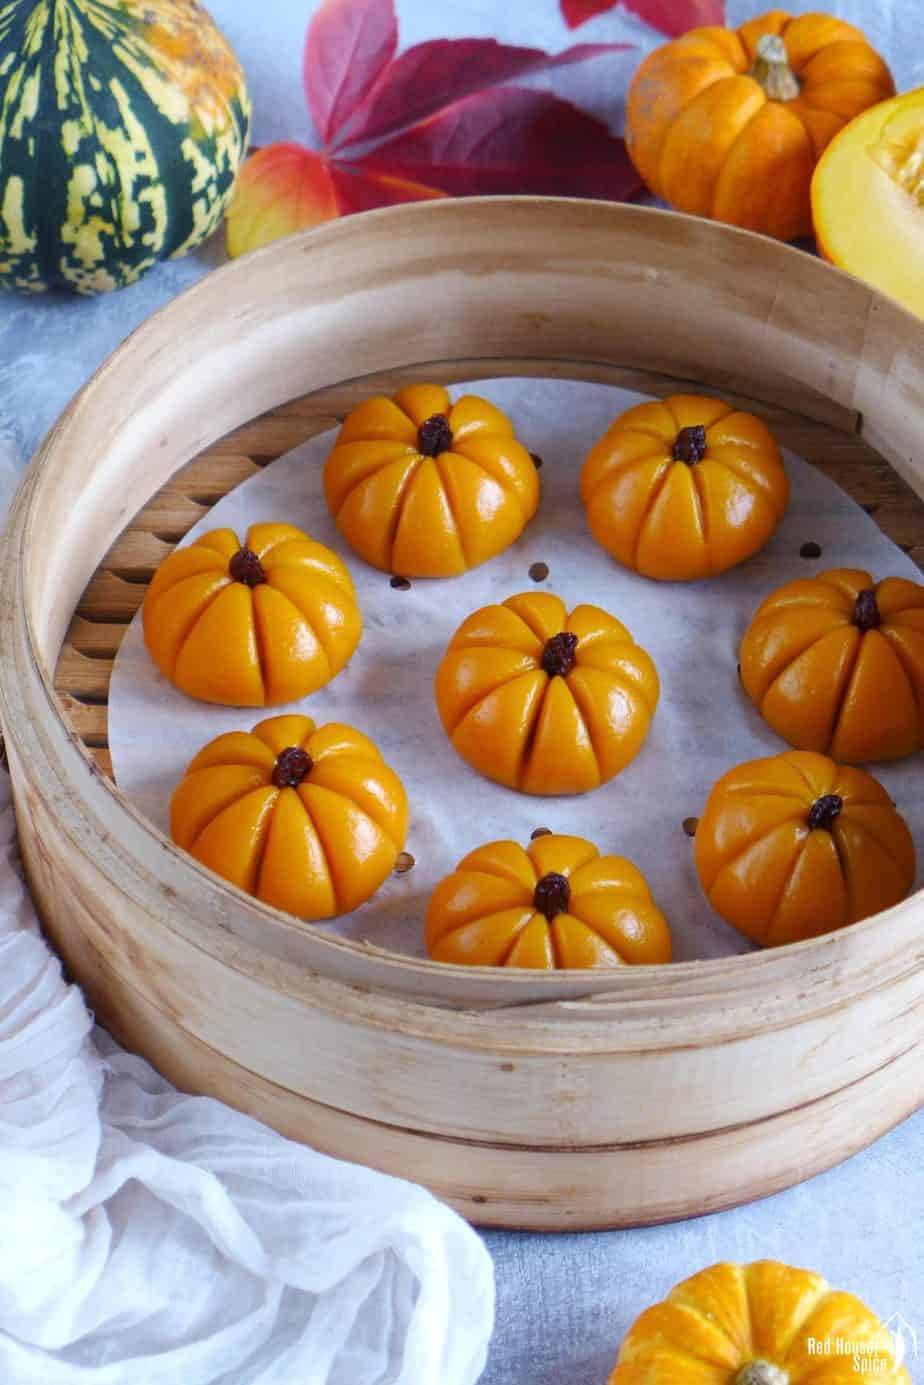
How to steam the cakes
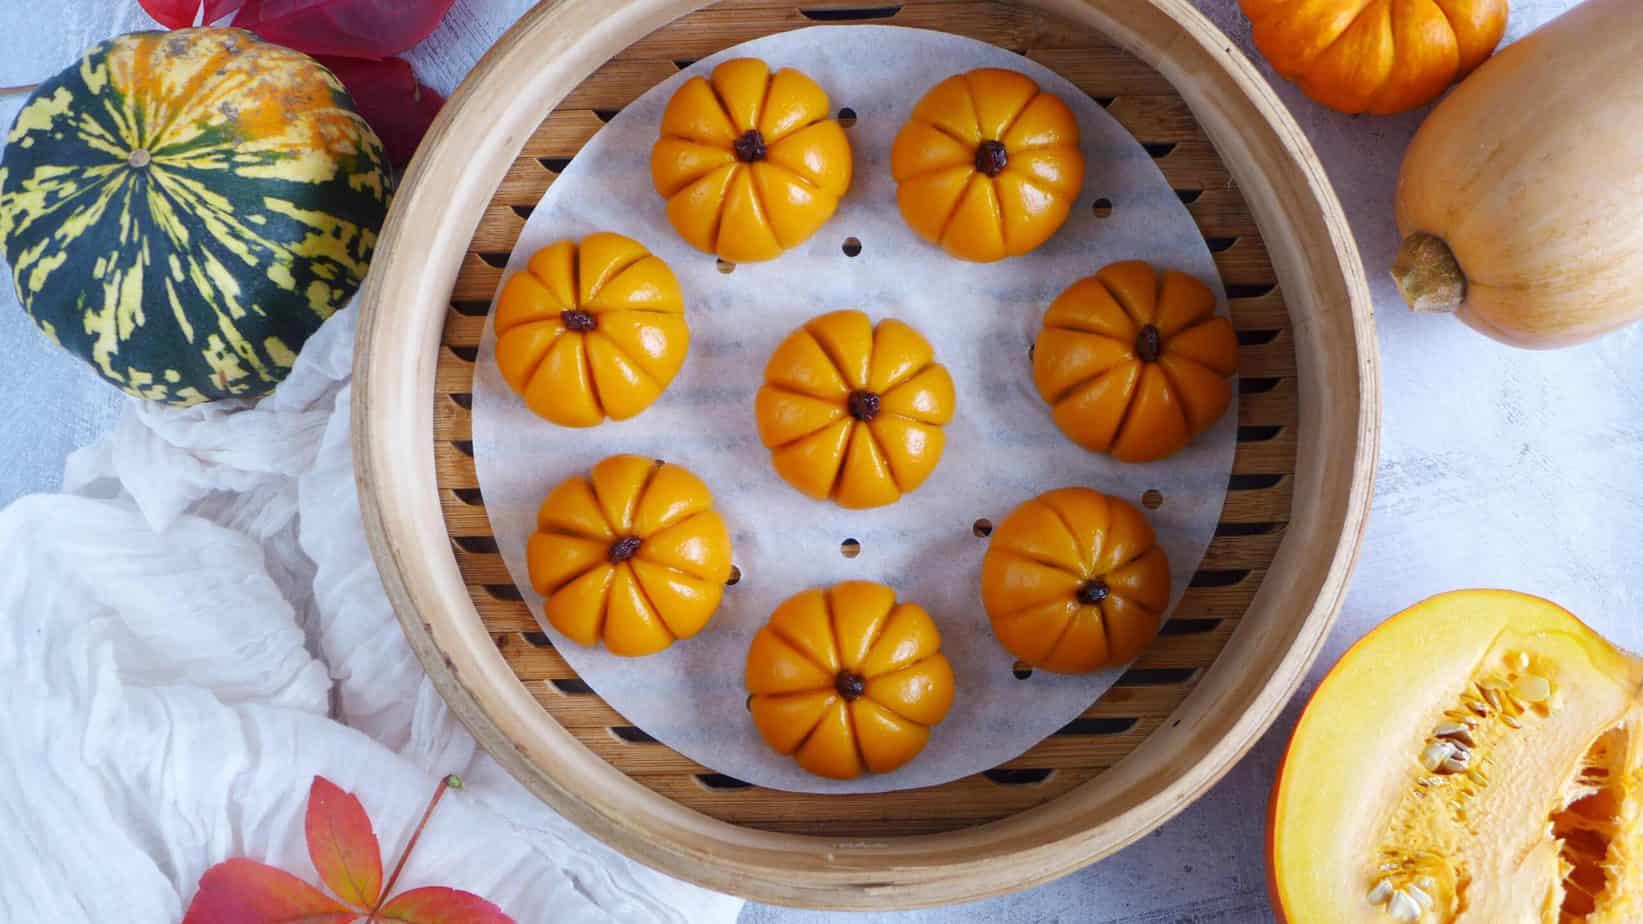
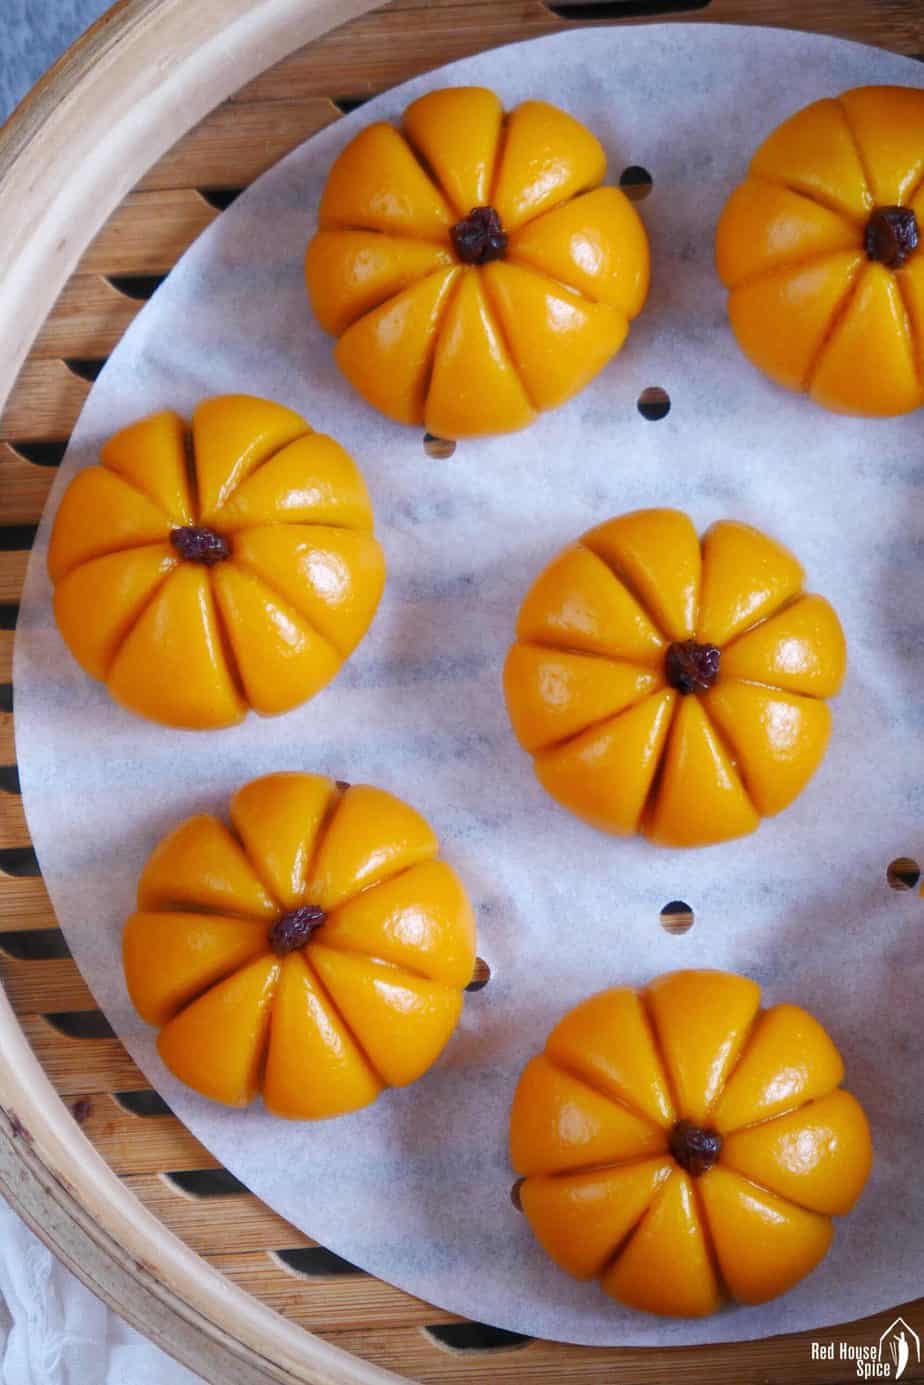
The last step, steaming, is very straight forward: Lay the pumpkin mochi cakes in the steamer baskets. Once the water starts boiling, place the baskets into the wok/pot. Set the timer to 10 mins and relax!
If you aren’t familiar with steaming, here are a few tips which you might find helpful:
- You may use a traditional bamboo steamer, a metal steamer or an electric steamer.
- If none of the above available, you can use a wok/pot (with a lid) to achieve the goal. Pour in water then place a small bowl in the middle. Put pumpkin cakes onto a flat plate which is smaller than the wok/pot. Place it onto the bowl when the water starts to boil. Cover and steam the usual way.
- No matter which type of steamer you use, don’t forget to place a lining underneath the cakes to avoid sticking. Parchment paper (with a few holes) works well. A thin layer of oil on metal/plastic baskets does the job too.
- Do not attempt to remove the pumpkin cakes right after steaming. Leave them to sit uncovered for a few minutes before serving. This way, they won’t be too sticky to handle.
Store, reheat and make ahead
I love pumpkin mochi cakes warm or at room temperature. If you have any leftover, store them in the fridge for up to 3 days. They will become quite firm after refrigeration. Three minutes of steaming will bring back their soft and gooey texture.
Want to make some in advance? Here is what you need to do: Lay assembled, uncooked pumpkin cakes on a tray lined with parchment paper. Put into the freezer. Once completely frozen, transfer them into an air-tight bag/container. Store in the freezer for up to 2 months. Steam them without defrosting for 15 mins.
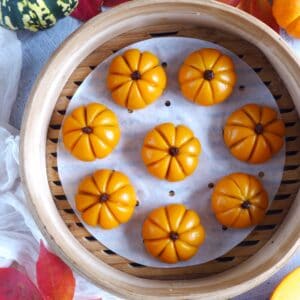
Pumpkin Mochi with Red Bean Filling (红豆南瓜饼)

Video
Ingredients
For the filling
- 150 g adzuki beans (aka red beans/红豆), or 350g canned ones
- 2 tablespoon white sugar
- 1 tablespoon dark brown sugar
- 80 g butter, See note 1 for vegan option
For the dough
- 350 g butternut squash , or canned pumpkin puree, see note 2
- 1 tablespoon white sugar
- 1 tablespoon neutral cooking oil
- 320 g glutinous rice flour (aka sweet rice flour/糯米粉), see note 3
You also need
- 16 pieces raisins
Instructions
Cook the beans (skip if using canned beans)
- Soak adzuki beans in water enough to cover overnight.
- Drain then put into a pot. Pour in 500ml of water. Bring it to a boil then leave to simmer for about 90 mins until cooked (You may use a pressure cooker/instant pot to reduce the cooking time).
Make the bean paste
- Put drained beans into a food processor. Add white sugar, dark brown sugar and butter (or lard, coconut oil). Blend on high speed into a fine paste. You may need to add a little water to make blending easier. However, only add as little as necessary.
- Transfer the soft paste into a non-stick pan. Cook over medium-high heat while stirring and flipping constantly to avoid burning. Once the paste becomes dark, dry and holds in shape, remove to cool (please refer to the video for the desired consistency).
Cook the squash (skip if using canned pumpkin puree)
- Cut the butternut squash into chunks (skin & seeds removed). Steam for 15 mins until fork tender.
Make the dough
- Put the cooked squash into a food processor. Add sugar and oil. Blend on high speed until it turns into a fine puree.
- Add glutinous rice flour in batches. Run the food processor on medium speed until a dough forms. It should be very soft but not sticky. Depending on the water content of the cooked squash, you may not need to use all the flour suggested in the recipe, or you may need to add a little more. Please feel free to adjust accordingly.
Assemble the cakes
- Divide the dough into 16 equal pieces. Then shape each into a ball. Repeat the same procedure to make 16 balls with the red bean paste.
- Flatten one dough ball into a disc. Place a piece of filling in the middle. Gently push the edge of the dough upwards to cover the filling and seal completely.
- Use the spine of a butter knife to create indentations all around to imitate a pumpkin. Then insert a piece of raisin on top as the “stem”(please refer to the video below).
Steam the cakes
- Lay the assembled cakes in steamer baskets lined with parchment paper (or brushed with a thin layer of oil if using metal/plastic steamer baskets).
- Bring water to a boil in a wok/pot, place in the baskets. Cover and steam for 10 mins over medium-high heat.
Serve, store & make ahead
- When cooked, leave the cakes to cool in the baskets for 5 mins then serve (Otherwise, they are very sticky to touch). These pumpkin cakes can be served warm or at room temperature.
- You may keep them in the fridge for 3 days or in the freezer for 2 months.
- Reheat refrigerated or frozen pumpkin cakes in the steamer until they become soft again.
- Make ahead: Lay assembled, uncooked pumpkin cakes on a tray lined with parchment paper. Put into the freezer. Once completely frozen, transfer them into an air-tight bag/container. Store in the freezer for 2 months. Steam them without defrosting for 15 mins.
Notes
Your Recipe Notes
Nutrition
Nutrition information is automatically calculated, so should only be used as an approximation.


This looks daunting! But I tried and it worked out so well, I served it during Chinese New Year dinner. The family loved it! I followed the sugar quantity and it turned out not too sweet. Thank you RHS.
Glad you gave it a try and so happy to hear you enjoyed the recipe!
My dough is coming out both sticky and crumbly. Adding more flour makes it more crumbly and unworkable. I am using Bob’s Red Mill sweet rice flour. Should I be using a different glutinous rice flour, or am I missing something?
Thanks for your comment! I’m a bit puzzled by the dough being both sticky and crumbly at the same time. Adding more glutinous rice flour will definitely make it drier and more crumbly, so that might be the issue. I don’t think the brand of flour is the cause of the problem. Have you had a chance to watch the tutorial video? It might help you get a better sense of the dough’s ideal consistency. Let me know if that helps!
This isn’t related to the recipe, but rather to the constant, intrusive and unstoppable voice-over ads from Stonyfield Organics. They even run over the top of your videos. There doesn’t seem to be any way to mute them without losing your video sound. During the course of reading through your recipe I had to listen to various versions of the ad 5 times, and then it kept playing over the top of your video.
I love your site, and have been a regular here for years, but these ads make me want to run away.
Sorry to hear your frustration, Kalia. I will report this to the ad management team and have it fixed. I also have a YouTube version of the video that might work better for you. Happy cooking!
Hi Wei, does using canned pumpkin puree affect the color of the finished product or will it still be lighter than using butternut squash?
I found the finished color to be very similar. But the color of shop-bought pumplkin puree might vary from brand to brand.
Hi Wei, I just made this and it looks and tastes really good. Thank you for the recipe, your creativity is very inspiring! Just a question though, my dough was soft and not sticky but it had cracks after wrapping the filling which fortunately disappeared after steaming. But does that mean it needs more water? I tried adding oil but that didn’t help much.
You can add a little water to make the dough more manageable. Or, if it cracks, simply use a wet finger to rub the crack to seal. Hope this helps!
such a tasty, easy, recipe with incredible results! thanks so much for sharing this with the world
My pleasure Amy! Very happy to know you’ve enjoyed it!
Do you think the texture would be affected if I use frozen butternut squash? (I froze it raw and would steam after defrosting.)
No, the texture won’t be affected. Remember that, as I’ve mentioned in the recipe, you might need to adjust the quantity of glutinous rice flour depending on the water content of the steamed squash.
Another amazing recipe, thank you so much!
My pleasure Daniela! It was great fun developing this recipe.
Wei,
Thanks so much for thinking about and offering those like me who do not own a food processor an alternative method allowing us to try your delicious food and technique.
In case we were considering purchasing a food processor, can you share your opinion as well as recommendations? I’m interested in purchasing something that will last, yet don’t wish to over purchase something loaded with bells and whistles that I am unlikely to use, particularly when I envision only occasional use. Thank you.
Hi David! What I’m using is a Kenwood all-in-one machine which includes a stand mixer, a food processor and a blender. It’s very sturdy and always does the job. Maybe you can have a look at their single-purpose food processor. But I’ve never used other brands so I’m not sure if it’s the best choice.